With Process Services it’s easy to create, publish, and use process models and apps.
This Getting Started tutorial shows you in 3 steps how to create and use a simple expense approval process app.
Prerequisites
Before you begin, make sure that you’ve following the instructions in Installing Process Services.
If you’ve registered for our cloud trial you don’t need to install anything and are ready to go.
Step 1: Create a process definition
This is the first of three simple steps in creating a process app.
In this step, you are going to design a simple expense approval process (definition) that includes three BPMN elements:
- A start event to trigger the process by submitting a new expense
- A user task to approve or reject the request
- An end event to end the process
This process also includes 2 web forms.
-
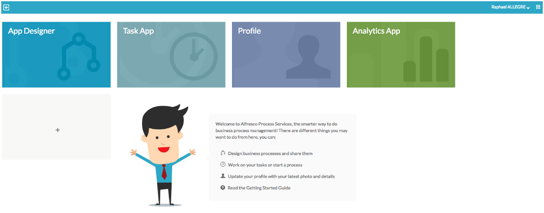
Open Process Services from one of the following options:
-
Local installation
- Address -
http://localhost:8080/activiti-app/#/ - Username -
admin@app.activiti.com/ -
Password -
admin - Cloud trial - APS App Cloud and use your online trial sign in details.
-
-
Select App Designer on your dashboard.
-
Select Create Process.
-
Give the process model a name (for example “Expense approval”) and a description, then select the BPMN Editor as the Editor type.
-
Select Create new model.
Note: If this is the first time you’ve used Process Services then some help tips may be displayed. You can click Next to watch them or press Esc. to close them.
-
The start event is displayed on the canvas as a circle. Double-click on it and type a name, for example “Submit expense”, then click on the canvas.
-
Click the circle again and drag and drop the
 User task icon to the right.
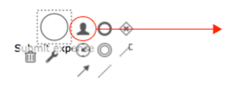
This adds a user task after the start event.
-
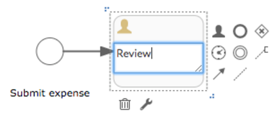
Double-click on the user task and type a name, for example “Review”, then click on the canvas.
-
Click the user task again and drag and drop the
 end event icon (circle) to the right.
 -
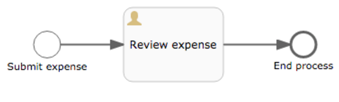
Double-click on the end event and type a name, for example “End process”, then click on the canvas.

The process model now has three stages:
-
Click
 Validate the model on the toolbar.
This checks models (processes, web forms, decision tables, data models, and stencils) for errors. If there are errors then a message shows you details on how to resolve them.
Once it’s validated, you can add forms to the process using the Forms editor. This example needs two forms to be added:
- One for the requester to submit the expense (start event)
- One for the manager to review the expense request (user task).
You can create forms:
- Directly from the Process editor (embedded in the BPMN model)
- Separately from the process model and then reference them in the design by adding a key
In this example they’ll be created directly from the Process editor.
-
Click the start event and then click Referenced form in the properties panel.

-
Click New form in the Form reference window.
-
Give the form a name (for example “Submit expense”) and a description, the click Create form.
This opens the Form editor.
-
Drag stencils onto the Design canvas in this order:
- Text
- Amount
- Date
- Attach File
-
Hover over the Text stencil and click the
 Edit icon, then type “Text” as the Label and click Close.
Repeat this step for the other stencils you added, and type the following labels:
- Amount
- Date
- Attachment

-
Click
 then Save and close editor.
 -
In the Process editor click the review expense user task and then click Referenced form in the properties panel.
-
Give the form a name (for example “Expense review”) and a description, the click Create form.
-
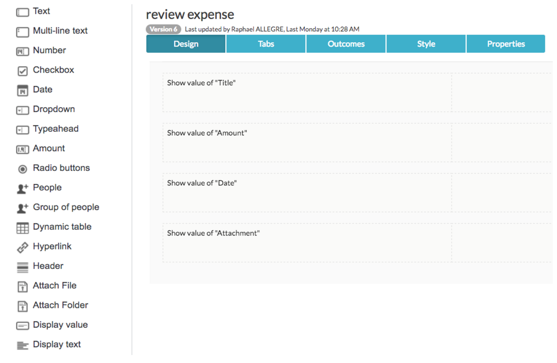
Drag stencils onto the Design canvas in this order:
- Text
- Amount
- Date
- Attach File
-
Hover over the Text stencil and click the Edit icon, then type “Text” as the Label and click Close.
Repeat this step for the other stencils you added, and type the following labels:
- Amount
- Date
- Attachment
-
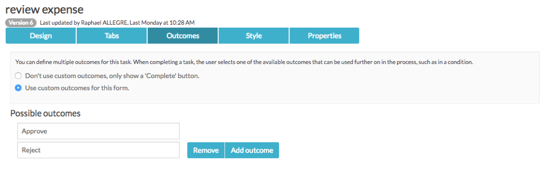
Click the Outcomes tab to add a custom outcome so that the reviewer can approve or reject the expense.
-
Select Use custom outcomes for this formand in the Possible outcomes add two outcomes:
- Approve
- Reject
-
Click
then Save and close editor. -
In the Process editor click
then Save.
Step 2: Create and publish the process application
Once you’ve created a process definition, you can create an app and add the process to it, then publish the app.
-
Click App Designer on your dashboard then click the Apps tab and select Create App.
-
Give the app a name (for example “Expense Approval”) and a description, then click Create new app definition.
-
Click Edit included models.
-
Select the Expense approval model. The
 icon shows that you’ve selected it. Then click Close.
 -
Click
then select the Publish? option and Save and close editor. -
Click
 to return to your dashboard.
 -
Click + to add a new app then select the Expense Approval app and click Deploy.
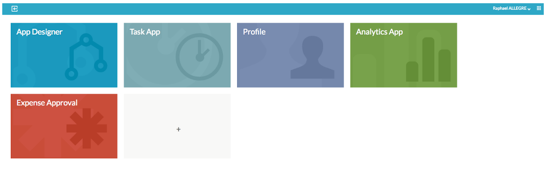
The Expense Approval app is added to your dashboard.
Step 3: Use the process application
When you’ve created and published a process app, it can be used to request a new expense for approval.
-
Click the Expense Approval app on your dashboard then click Start.
-
Complete the requested information and click Start Process to submit the new expense.
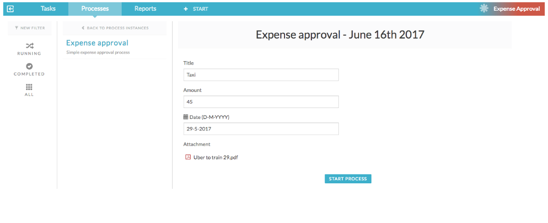
The Processes page now shows the new expense approval request. From here you can add comments or cancel the process.
If you click Show diagram you can see the current status of your expense claim. The active user task is highlighted in green to indicate it’s at review stage. Click Close to go back to the claim.

-
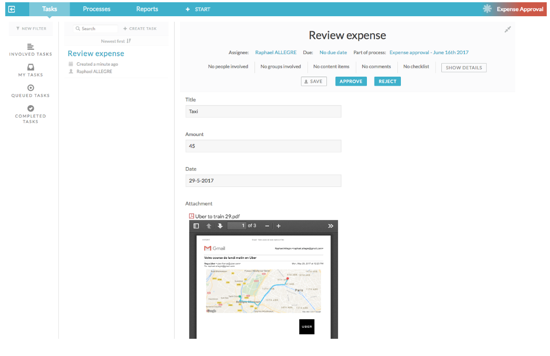
Click Review under Active Tasks to review the claim.
Note: This would usually be done by a user with the required approval level.
-
Click Approve to complete the task.
This completes the claim as it is now at the end of the process flow.
Note: To review completed tasks click the Processes tab, then click New Filter and select Completed as the Process State.

You can click Audit Log to download a PDF audit report. The template used for the Audit Log is part of the configuration settings and can be customized to your specific needs.
Now that you’ve set up and used your first process app, check the rest of the documentation to learn more advanced uses of Process Services.