The user guide contains general information about the Content Accelerator as well as information about the two domain specific implementations for policy and procedure and claims management.
Features
When you start using Content Accelerator, you’ll see a number of features that guide you through the application.
Dashboard
The Content Accelerator Dashboard provides an overview and links to relevant content, displayed in individually configurable dashlets. Results within many dashlets are pageable, with configurable results per page and text filtering functionality for finding the right document quickly and easily.
The Dashlets can be reordered on a single page or configured to appear under different tabs. A dashlet can be of a particular type that would be customized for a specific environment to display different information. Here are some of the typical dashlet types available:
- Saved Search : A saved search or query that is custom to load results into the dashlet.
- Inbox : A collection of workflow tasks (workflow on a doc) that are specific to the signed in user.
- Active Wizard Inbox : A collection of wizard workflow tasks (workflow involving forms) that are specific to the signed in user.
- Recent Objects : Configurable date range on objects the user has viewed or modified, which provides easy navigation back to the content.
- Reporting : A data visualization dashlet displaying graphs and pie charts for specific objects and specific attributes on those objects.
- Workflow Reporting : A data visualization dashlet displaying graphs and pie charts specifically for workflows. Would show “In Progress” workflows generated by the user, for monitoring their statuses.
- Incomplete Tag Dashlet: A dashlet to view if tags are incomplete and still remain on a particular object. Signifies outstanding items to the user.
- IFrame Dashlet : A dashlet that provides access to 3rd party tools via iFrames.
- Notifications: A dashlet that displays active notifications the user has yet to complete and archived notifications. See Navigation Bar explanation of Notifications.
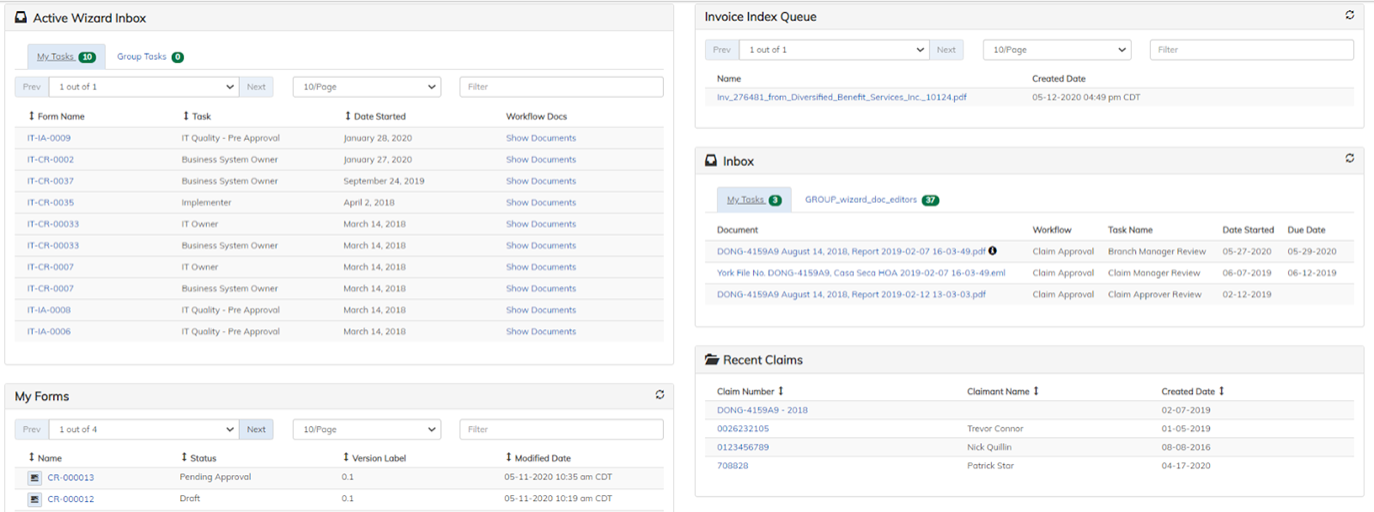
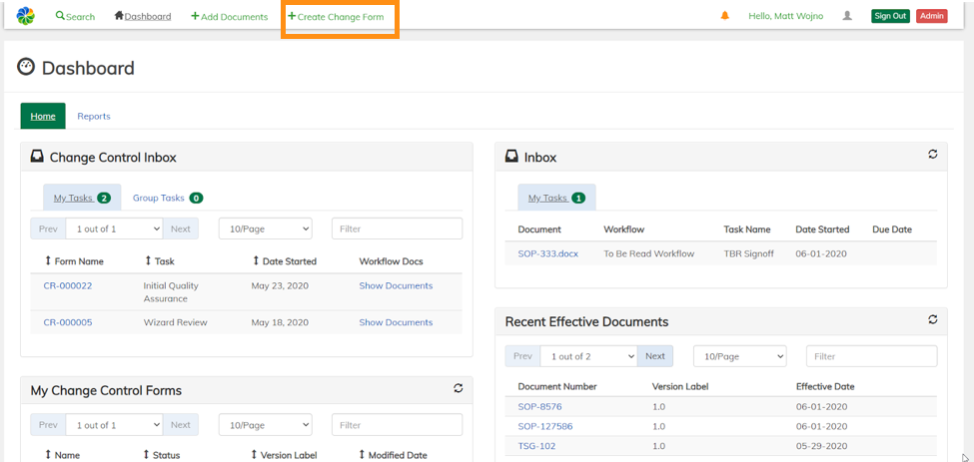
Here is an example dashboard in the screenshot below. This is not an actual environment. The following dashlets were put together to demonstrate the many combinations of dashlets a user can have in their application.
Search
The Content Accelerator Search gives users the tools to locate, filter, and review document and folder information. Content can be searched on using a number of metadata fields, such as document name, creator name, version number, and last modified date. Commonly executed combinations of search parameters can be stored as a “Saved Search”, allowing for quick execution of a specific search in the future without needing to re-enter parameters.
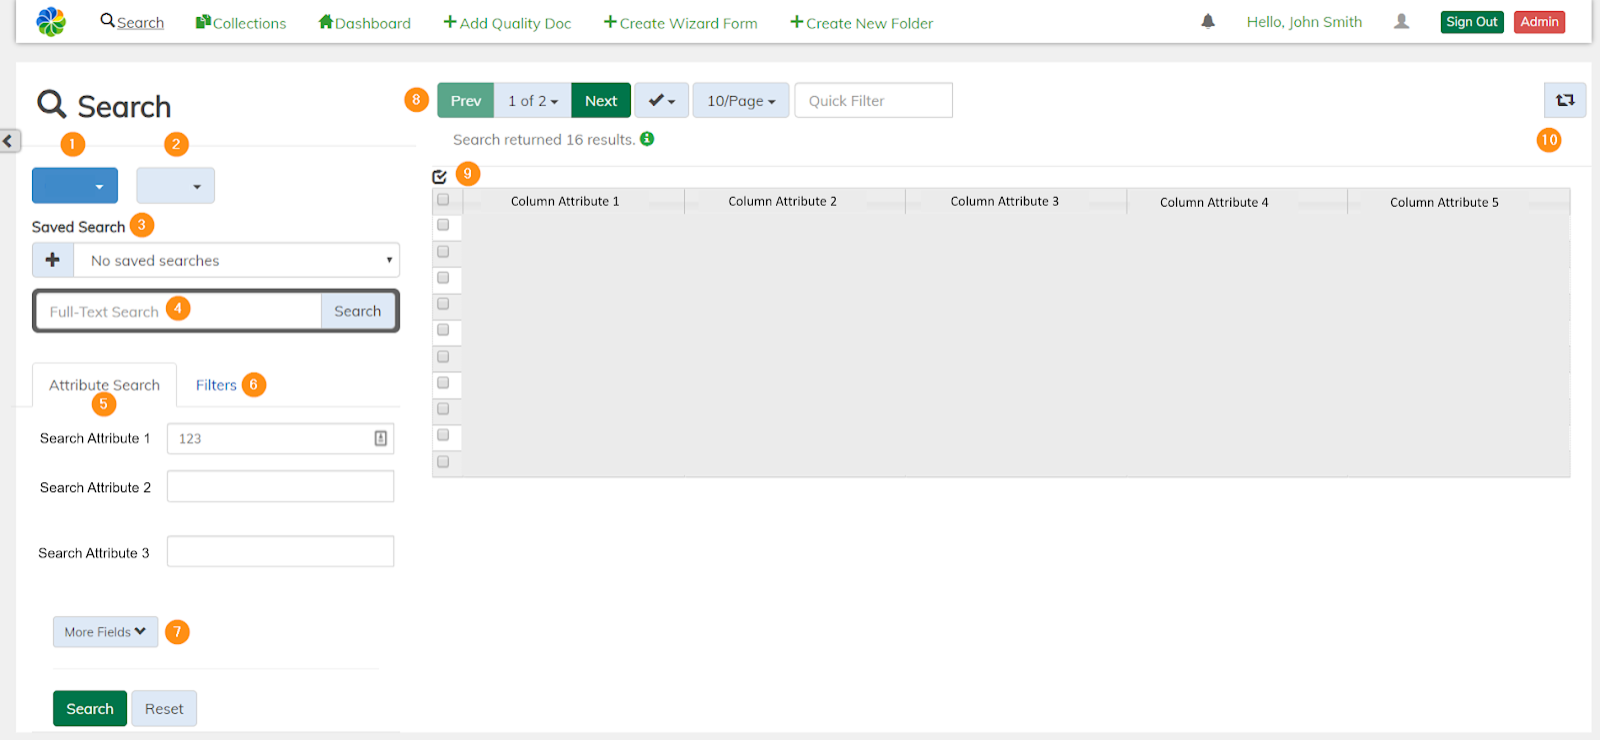
The above screenshot shows what Search’s main components look like and environment specific information will be greyed out as we walk through the general descriptions of its components.
- Trac (object type) selection.
- Document type selection.
- Execute previous saved searches, or click “+” to save current search criteria as a saved search.
- Provide search criteria here to perform a full text search.
- Provide search criteria for specific configured metadata fields.
- The filter tab allows users to filter search results based on property values.
- Click More Fields to search on other configured metadata fields.
- Search result controls such as pagination, select results, items per page, and text filtering of results.
- Table displays results returned by the search, along with configured metadata fields.
- Reset table settings to its defaults.
Note: this could be on in some environments and not in others depending on if the administrator turned it on.
Search results can be paginated and filtered all from a single screen without needing to re-execute a search. Many document and folder actions can be performed from Search. There are two easy ways to execute those actions:
- Check a document or documents and select an available action from the dropdown labeled Actions that will appear.
- Right-click on one or more documents and select an action from the modal that will appear.
To learn more about executing actions within Search, reference the Document Actions in Search. These sections will talk more specifically about what actions are available.
Stage
The Content Accelerator Stage provides tools to review the information and content of documents and folders. Stage gives the user a results view (similar to that of the Content Accelerator Search tool), information about the folder itself, and actions that can be performed at the folder level.
The above screenshot shows what Stage’s main components look like and environment specific information will be greyed out as we walk through the general descriptions of its components.
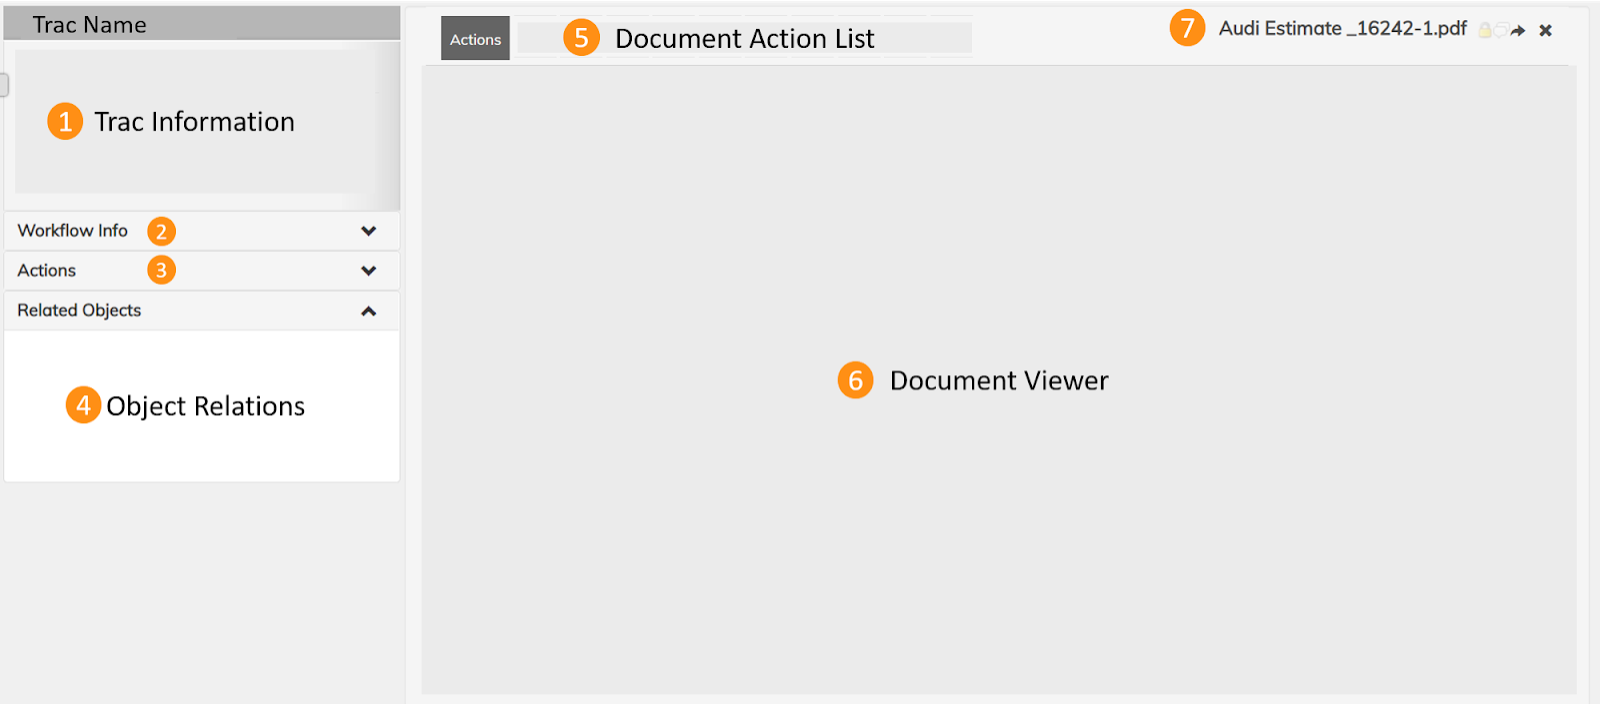
- Trac Information: Various attributes and information appears here about the current Trac’s Stage that is loaded. A Trac is an object type.
- Workflow Info: Workflow information is displayed within this section. It will detail information such as the workflow name that is associated with this document, when it started, the tasks, and the processes attached to the workflow.
Note: this section will only appear when the document is in a workflow and it is turned on by the administrator for the user to see it.
- Folder Action List: Actions that can be executed with the context of the entire folder. Reference the Folder Actions section to see what type of actions can be available in this section.
Note : this section could potentially be turned off and not seen if no folder actions are applicable.
- Object Relations: Documents typically have relationships to other objects that help with organization. These related objects are displayed in this section with links to that object.
- Document Action List: Actions that can be executed with the context of the document loaded into the document viewer. Reference the Document Actions section to see what type of actions can be available in this section.
- Document Viewer: For viewing document contents, Content Accelerator leverages the Alfresco Enterprise Viewer for previewing and interacting with documents within Stage, giving users access to tools such as annotation and redaction.
- Document Title & Additional Document Icons: The document title will be shown in this section. Also, three icons that will provide the user with more information about the document:
- Lock Icon : The lock icon will display if the document is locked by the current user logged in or another user. See Checkout/Checkin for more information about why the document would be locked.
- Conversation Bubble: The conversation bubble glows to signify if the document has been annotated or not. To annotate a document, Content Accelerator leverages the Alfresco Enterprise Viewer.
- Right Arrow: The right arrow icon will open the document in a new tab to edit the document in a full screen mode.
Forms
A “Form” in the Content Accelerator provides an interface for completing and submitting electronic forms, such as benefits enrolment, vacation requests, Change Requests, and more. Content Accelerator Forms utilizes a questionnaire approach for gathering information, simplifying the process of filling out forms electronically. Content Accelerator Forms validates the information provided to it, ensuring all necessary data has been provided and notify the user if any required data has not been provided before finishing the creation of the form.
An example of a business scenario that utilizes the Content Accelerator Forms is the Policy and Procedure (PnP) scenario. Check out the PnP’s action to Create a Change Form and or the Typical Use Case Scenarios for more information about a real world example using this Content Accelerator feature.
Form Fields
This area will help you understand the various form controls that you’ll encounter when filling out forms in Content Accelerator.
Auto Complete
Auto Complete is a text field that will give you completed text after you type a certain amount of characters. Below is an example of a participants list being filled in after typing 3 characters.

Proximity Date Range
The Proximity Date Range control allows you to select a date range that is relative to the current day. You can choose to search for items within a certain time frame, past the time frame, or in the next time frame. To use it, select the desired option from the dropdown list. Next, enter a number for the desired unit of measurement, such as days, weeks, or months. Finally, select the appropriate unit of measure from the list. This will define the range of dates you’re searching for. Here’s an example:

Form Field Attributes
This section outlines the various attributes that can be assigned to form fields within the Content Accelerator platform.
Repeating Field
A Repeating Field is a field that allows you to provide multiple values. This type of field has an “Add” button next to the input to allow you to enter additional values. To remove a previously entered entry, click on the X next to it. Here’s an example:

Required Field
A Required Field is a field that must be completed before the form can be submitted. These fields are marked with a red asterisk next to the field label. If you attempt to submit a form without completing all required fields, an error message will appear indicating which fields need to be completed. Here’s an example of a Required Field:

A submit button will not be able to be clicked until a required field is satisfied see below:
Once a required field has been filled the button to submit the form will be available to be clicked again. See below:
Uneditable Field
An Uneditable Field is a field that cannot be edited by the user. These fields are displayed in a grayed-out or disabled state to indicate that they are read-only. Additionally, you may notice a cancel icon over the field when highlighted, indicating that it cannot be edited. Here’s an example:

Validation Error
A Validation Error may appear when a field has been filled out with an incorrect value. This is indicated by red text above the field, warning you of the issue. To correct the error, update the value in the field to satisfy the validation criteria. Here’s an example:

Navigation Bar
The Content Accelerator Navigation Bar provides a user with links to important areas of the application, ability to execute commonly used actions quickly, notifications to allow for communication, and user preferences to customize the user experience. The Content Accelerator Navigation Bar comes with the following default areas detailed below, but can be customized by the administrator for the application.

Header Links
The header links are shortcuts to rapidly access important Content Accelerator features.
- The Search header is a link to the Content Accelerator Search feature. Follow the link to learn more about this section and its capabilities.
- The Dashboard header is a link to the Content Accelerator Dashboard feature. Follow the link to learn more about this section and its capabilities.
Header Actions
The header actions are a fast and efficient way to execute popular actions that are used frequently.
- Create Form - Content Accelerator Forms are great resources for completing and submitting electronic forms. To easily build a form the Create Form header action becomes crucial. The user can simply click on this header action and immediately begin filling out the specific form they choose from a dropdown list. A specific use case to create a form would be in the Policy and Procedure scenario where users Create a Change Form.
- Create Folder - Folders are a helpful resource to provide additional organization of documents or files that are used within Content Accelerator for a particular business’s use case. To perform this task of creating a folder with ease, the user can select this header action. A specific use case to create a folder would be in the Claims scenario where users Create a Claim.
- Add Document(s) - Adding a document or multiple documents is something a typical user could perform often. An easy way to swiftly accomplish this task can be accessed in the navigation bar. Clicking on the header action will provide a modal to upload a document or multiple documents. To learn more about uploading a document, see Add Documents.
Notifications
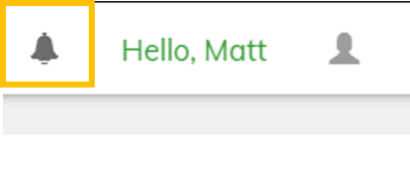
Notifications within the application are a fantastic way to send out reminders or messages to selected recipients for any relevant use case. The notification section is designated by the bell icon in the right corner of the navigation bar. The bell will glow if the user has a notification or notifications they have not completed. There is also the ability to filter and reference archived (completed) messages. See the action Send Notifications to learn more about how these are sent and received.

User Preferences
The following section covers user preferences.
Search Preferences
The following options are available for the user to control that are related to their Search Preferences:
- Saved Searches : A saved search is a way to save a search query that the user runs frequently. This saves the user time and the hassle of remembering exactly what parameters were entered to achieve the desired result.
- Public Saved Searches : A public saved search is identical to the regular saved search, however, it is open to all users within the application to use.
- Table View Columns : The ability to reset the table view columns configuration. The table view has the ability for various properties to be shown with the tables. This option will reset those to their default values within the application.
- Search Side Bar : This functionality is exactly what the description says. It will hide the search form (where you entered all the search parameters) when the search is executed.
Dashlet Preferences
The user has the following choices on how they can view or not view different dashlets in the application:
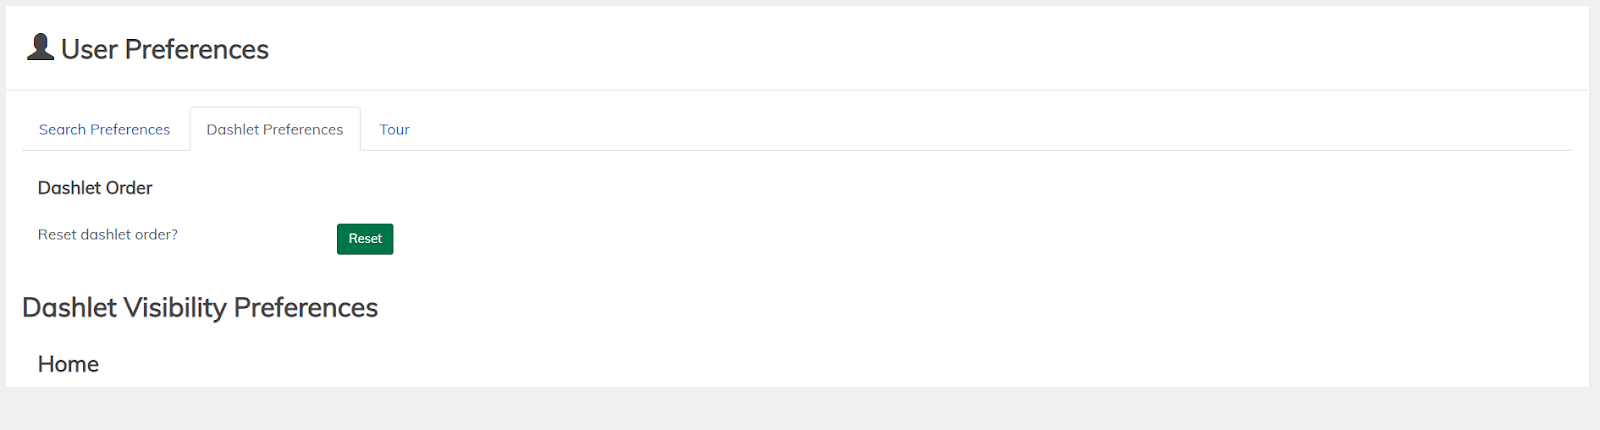
- Dashlet Order: The user can drag to change the order of any or all the dashlets that are seen in their particular dashboard. To reset them to the default settings the user can select the reset button.
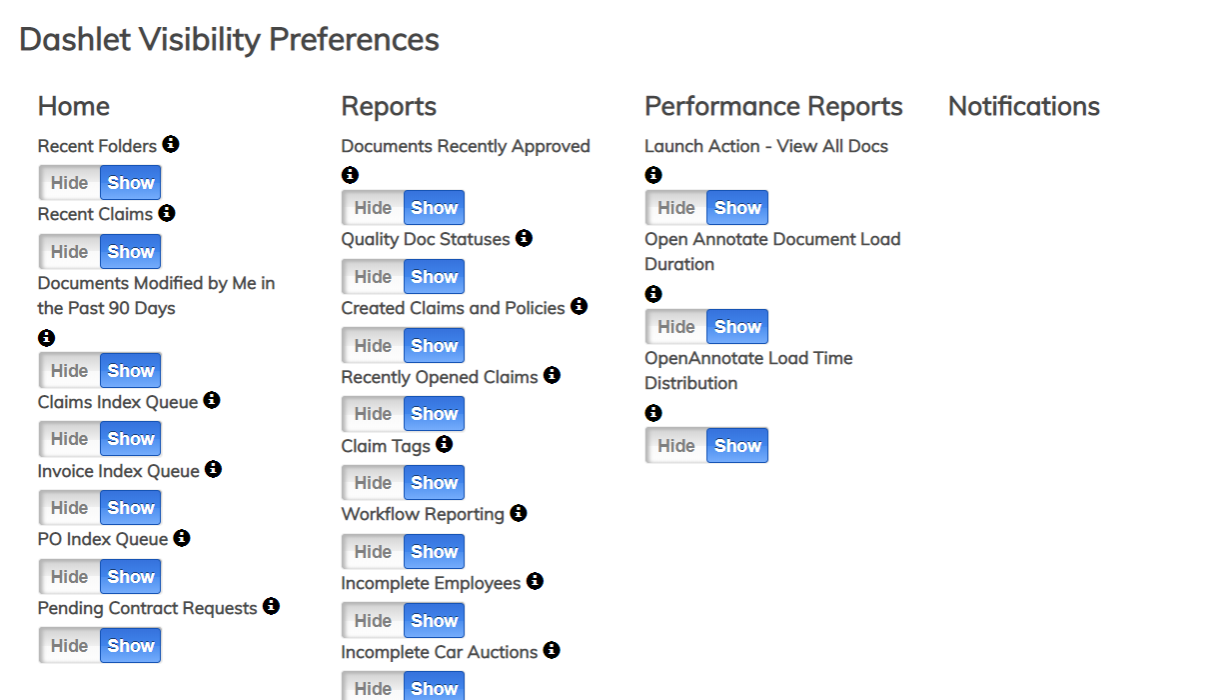
- Dashlet Visibility Preferences: The dashlet visibility preferences is a section where the user can turn on or off certain dashlets if they choose to do so. Sometimes, however, the administrator for the application may not give the user that option to not view a dashlet because of its importance. Therefore, sometimes a blank screen might be seen. Like the screenshot below.
An example of if the administrator of the system would turn that ability on would look something like what the screenshot below shows.
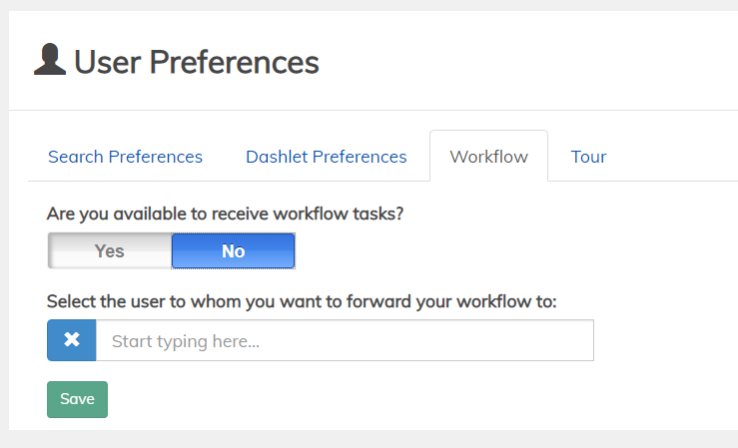
Workflow (if applicable)
This is a user preference that may not be visible to every user depending on what type of business case/scenario they are using. For example, the Policy and Procedure scenario user would see this while the Claims scenario user would not.
The user has the ability to designate if they are available to receive workflow tasks. The typical use case for this would be when a user goes on vacation. The employee does not want their vacation time to hold up a particular workflow, so they can designate who should complete tasks on their behalf.
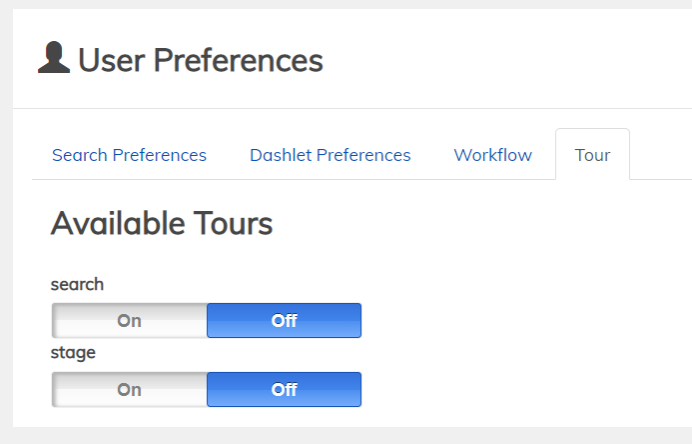
Tour
The tour section is initiated when it is the first time the user is visiting the Content Accelerator feature sections of Search and Stage. This can be switched on or off depending on if the user wants to see the tour again because they forgot all the cool things they can do in each of the Search and Stage areas.
Actions
Actions in the Content Accelerator are buttons that allow for an activity to be performed on a folder, document, or documents as a group action.
Folder Actions in Stage
The following actions are folder related.
Add Documents
Allows for the upload of documents into the repository. Documents can be uploaded via a number of sources, including drag-and-drop, file explorer, Box integration, Gmail integration, or from a scanner. Metadata can then be added to the document for indexing.
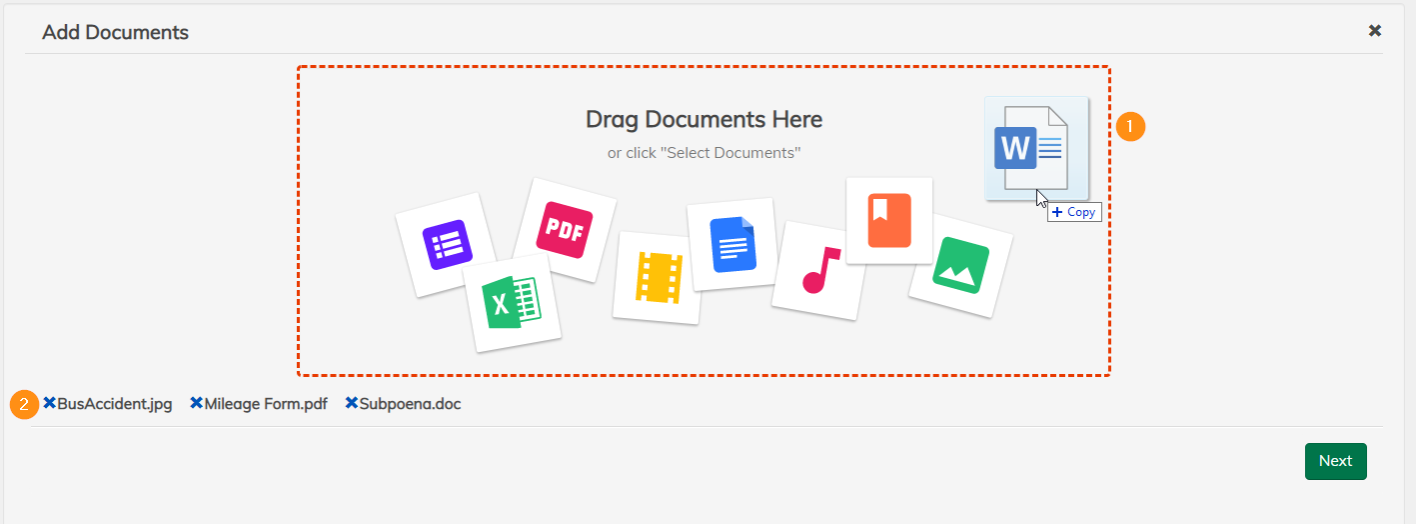
Add Documents - Initial Page:
- Drag and Drop area to easily select documents to upload
- The current documents selected for upload
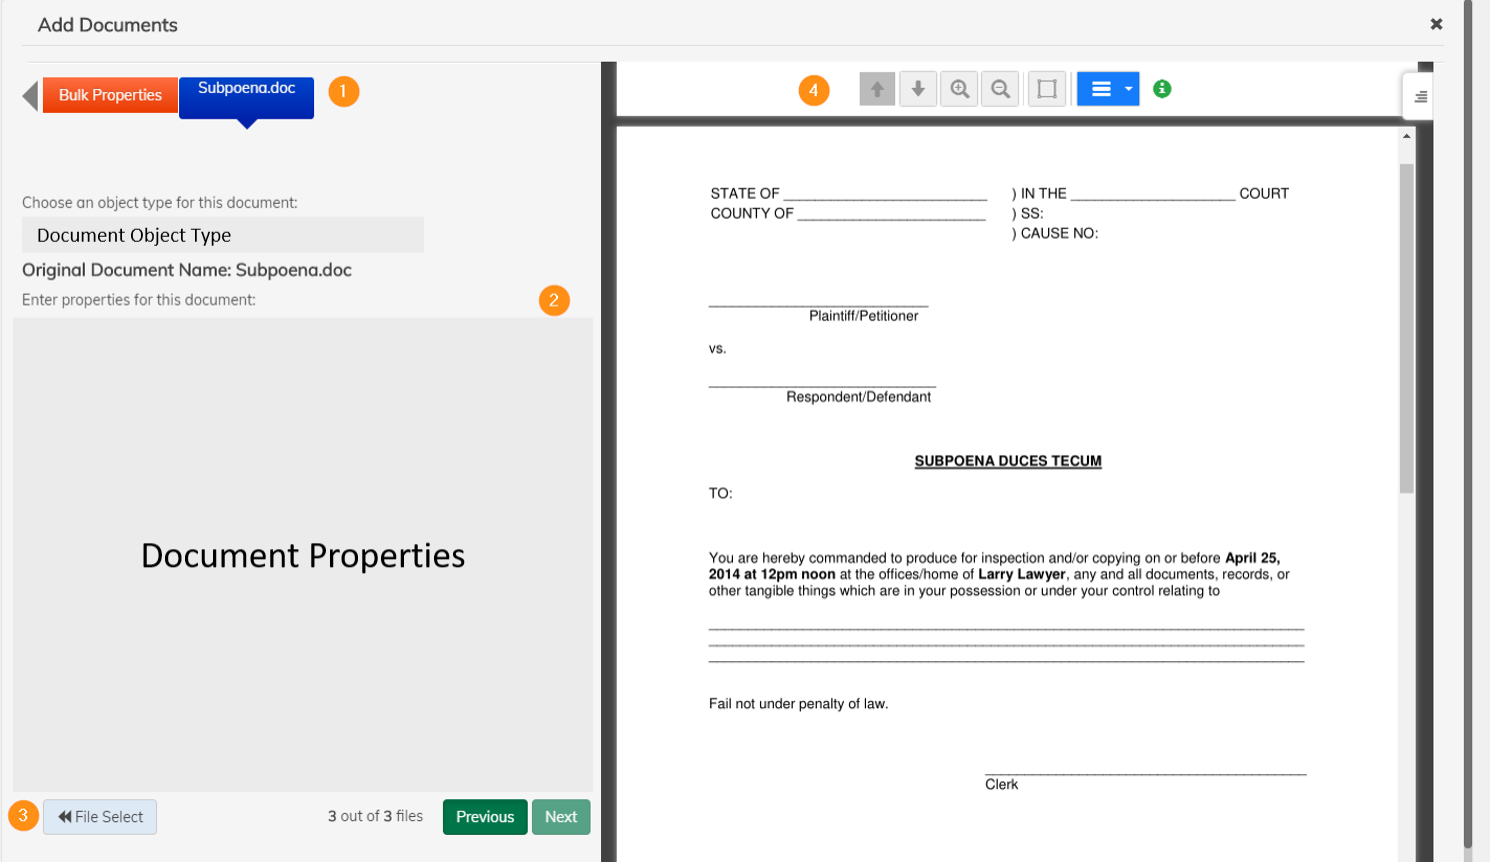
Add Documents - Upload View:
- The list of documents that you are uploading and which one you are currently on.
- Properties for the document displayed here for the user to edit, some could be required while other properties would be optional.
- This button will take you back to the initial selection page.
Note: This will not save the properties filled out for documents.
- A preview display of the document.
View/Edit Properties
Allows for viewing and/or modification of document or folder properties.

- Note that some fields could be greyed out. These are properties that were configured to be uneditable.
- The non-greyed out sections’ values can be changed. Once the property change is made then click Submit. Open back up the View Properties action and the new properties should now be seen.
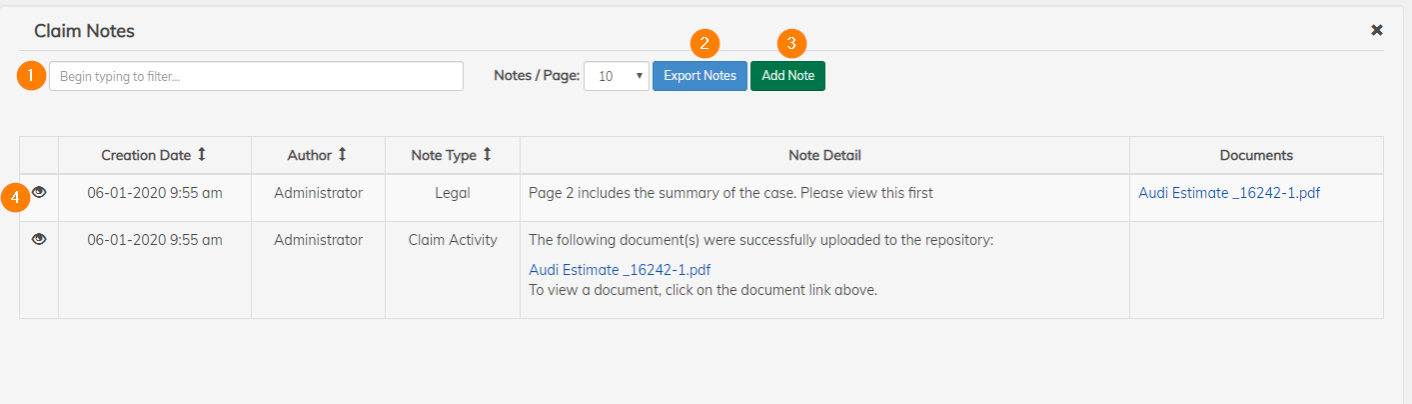
View/Create Folder/Document Notes
Allows for the creation and viewing of a note on a particular folder or document in Content Accelerator.
Creating a new note for a document:

Listing document notes:
Document Actions in Stage
The following actions are document related.
View Versions
Allows for viewing of information and content of previous versions of a document:

- Indicates the different versions of the document. If a version number is clicked, then the document at that version will be displayed.
- Displays version comments.
- Users have the ability to revert a document to one of its versions. This will create a new version of the document with that version’s content and properties.
- Choose two versions to compare. Note, this option requires the enabling of a 3rd party integration with Workshare Compare.
Note: 3 and 4 may not show up in every environment.
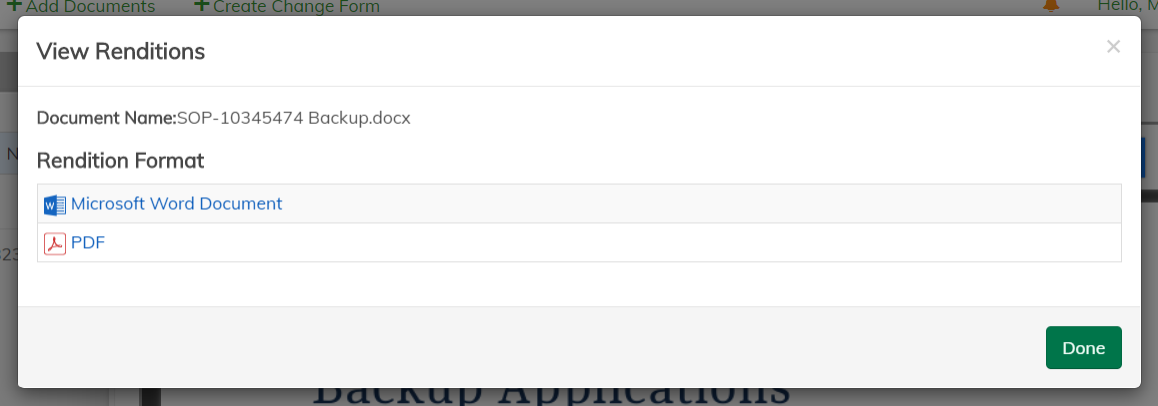
View Renditions
Allows users to view the different renditions (file types) for a particular document:
Checkout / Checkin
Allows for a document to be downloaded, modified, and uploaded to Alfresco as a new major or minor version of the document:
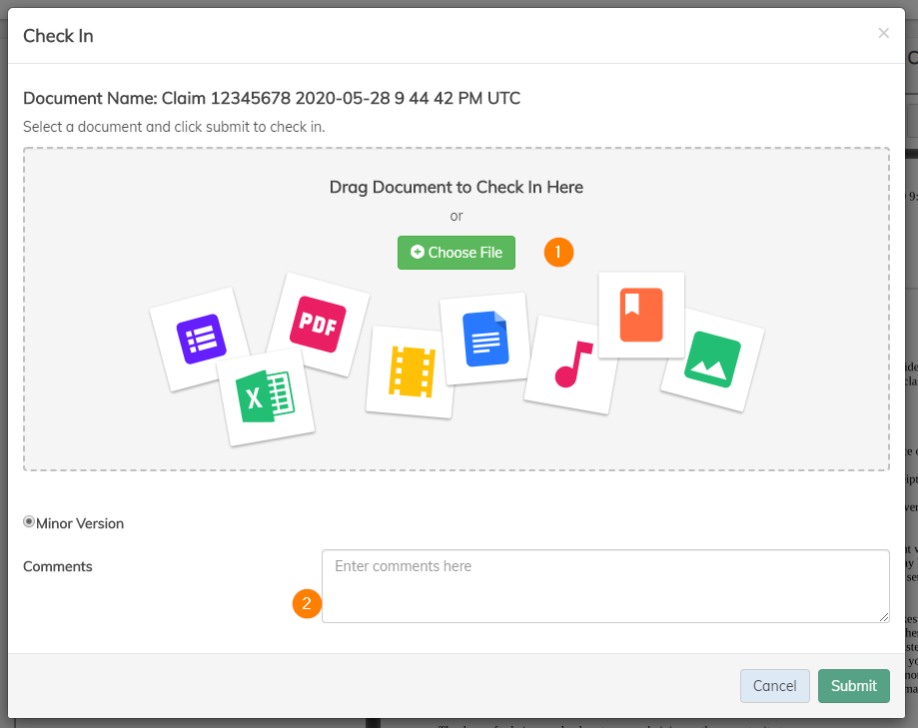
- Drag and Drop area to easily select a file to upload as the documents new content
- A text box to describe the changes that occurred with the new checked-in document
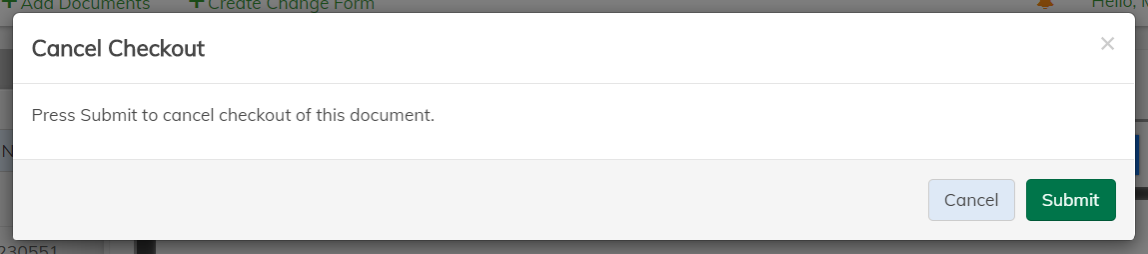
Cancel Checkout
Allows a user to cancel their checkout of an object in the repository. This will remove the user’s lock on the object:
Send Notification
The ability to send out a message to a particular user/users or group/groups with adding a comment.
- Users : select the user(s) that will receive the notification. The dropdown is populated by a configurable list (picklist) that a query is sent out to populate.
- Groups : select the group(s) that will receive the notification. Like stated above, the dropdown is populated by a configurable query.
- Notification Type : the notification category type for to tell the recipient a little more information about the notification. Like stated above, the dropdown is populated by a configurable query.
- Workflow Due Date : the workflow due date that will tell the user more information about why this notification was sent out.
- Comment : the comment field is to provide more information about the notification that is sent out.

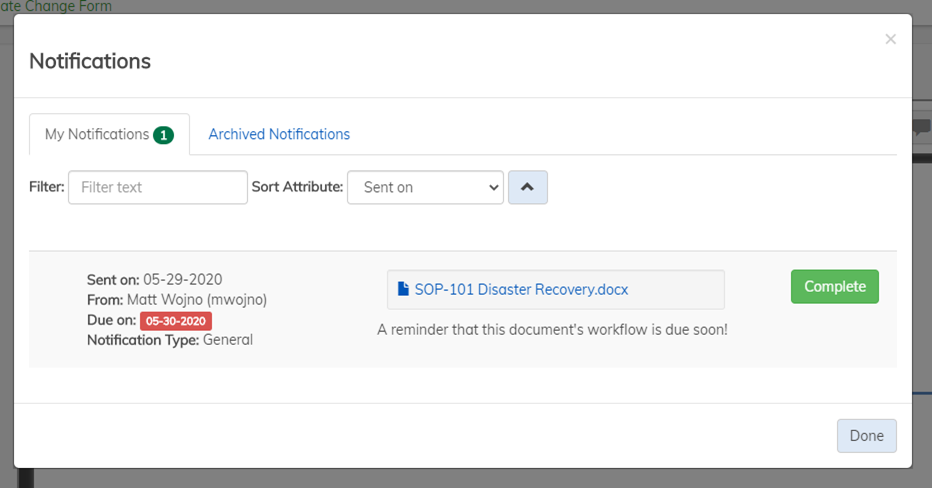
Once a user receives a notification, the bell in the top right corner will glow. This notifies the user they can click on the bell icon to view their notifications.

When the user clicks on the bell icon. The following screenshot displays what the user will see on their screen. The user can click the complete button to acknowledge they have received and understood the notification.
Note: An email will be sent out to the recipient in addition to this notification within the web application.
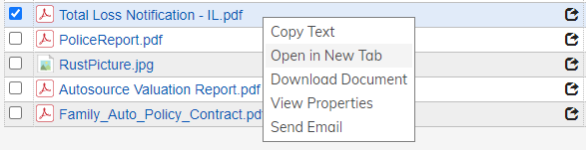
Document Actions in Search
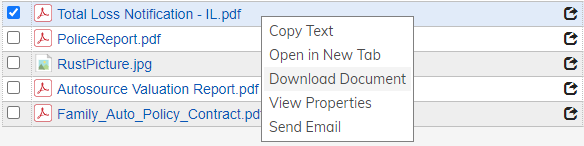
To access actions in this section, navigate to Search and execute a search to bring back documents (See Search). Select a single document (either right-click the document or use the little checkboxes on the left side). Then right-click. The drop-down menu will show all the available document actions that can be performed at this time.
Open in New Tab
Allows a user to open the selected document in a new tab of his or her browser.
To perform this action, select the checkbox next to a document and then right-click on the document. Alternatively, you can access this action from the Action dropdown menu once a document has been selected. Click the Open in New Tab action, and the document will open in a new browser tab:
Download Document
Allows a user to download the selected document to his or her file system.
To perform this action, select the checkbox next to a document and then right-click on the document. Alternatively, you can access this action from the Action dropdown menu once a document has been selected. Click the Download action, and the document will be downloaded to your file system:
View Properties
This is another way to execute the View Properties on an object, just within the Content Accelerator Search. Please check out the View/Edit Properties for the explanation of this action.
Document Notes
Notes specifically placed at the document level. See the Document Notes section where this action was already explained.
Send Email
The send email action is the ability to send an email with the document that this is executed from as an email attachment. Reference the Send Email action within the Claims Scenario to get a better understanding of how it is used within a business use case.
Group Actions in Search
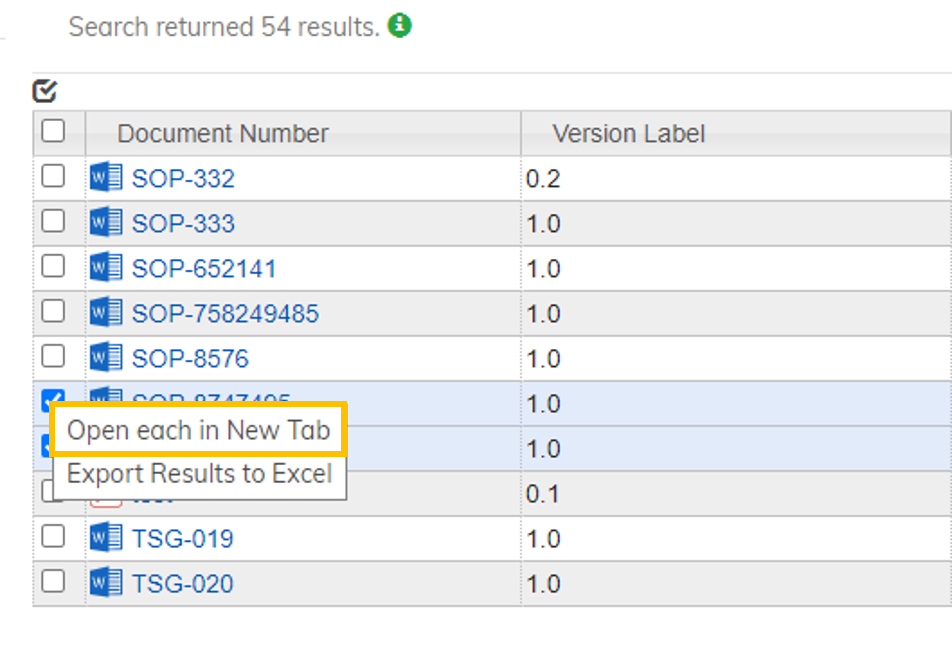
To access actions in this section, navigate to Search and execute a search to bring back documents (See Search). Select multiple documents (either right-click selecting multiple or use the little checkboxes on the left side). Then right-click. The drop-down menu will show all the available group actions that can be performed at this time.
Open Each in New Tab
It may be beneficial to open multiple documents in a new tab for better viewing and editing. To perform this action, select multiple documents from the search results and right-click. Alternatively, you can access this action from the Action dropdown when multiple documents are selected. Press the Open Each in New Tab action and each document will open in its own individual tab. (Similar to Open in New Tab).
For some internet browsers, the tabs may not open due to a popup blocker, so ensure that popup blocker is disabled for the application to ensure all tabs are able to be opened.
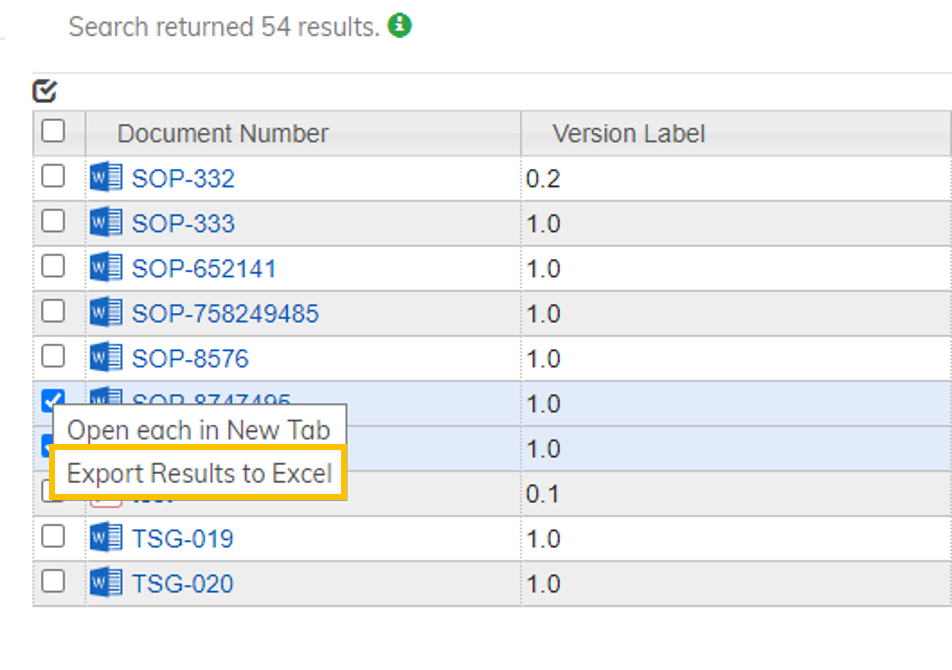
Export Results to Excel
A quick way to provide information in another format using a different product is the integration to export the search results to an Excel spreadsheet. Select multiple documents from the search results and right-click. Then click on the Export Results to Excel action. Alternatively, you can access this action from the Action dropdown when multiple documents are selected. An Excel spreadsheet will be downloaded to your browser that will have organized the search results into the spreadsheet.
Policy and Procedure Solution
The Content Accelerator for Policy and Procedure Management supports efficient and well documented change management of policies, procedures and other quality documents across a variety of industries including life sciences, manufacturing, utility/energy.
The accelerator will allow users to easily change, approve and release both simple business procedures (for example Expense Policy, Hiring Policy, Disciplinary Policy, etc.) as well as more complex and controlled manufacturing and operations documents such as Specifications, Standard Operating Procedures, Batch Records, and Formulation documents.
The Content Accelerator provides repeatable change control for initiating and processing of a change request package with both collaborative review as well as formal and dynamic workflow approval, ensuring that changes to policies and procedures are correctly documented and demonstrate compliance with legal, quality, and regulatory requirements including electronic signatures in compliance.
This section describes actions related to the policy and procedure use case.
Power Promote
Advance a document to the next lifecycle status by inputting the current logged in user’s credentials. For example: Doc’s lifecycle status of Draft -> would advance to Approved:

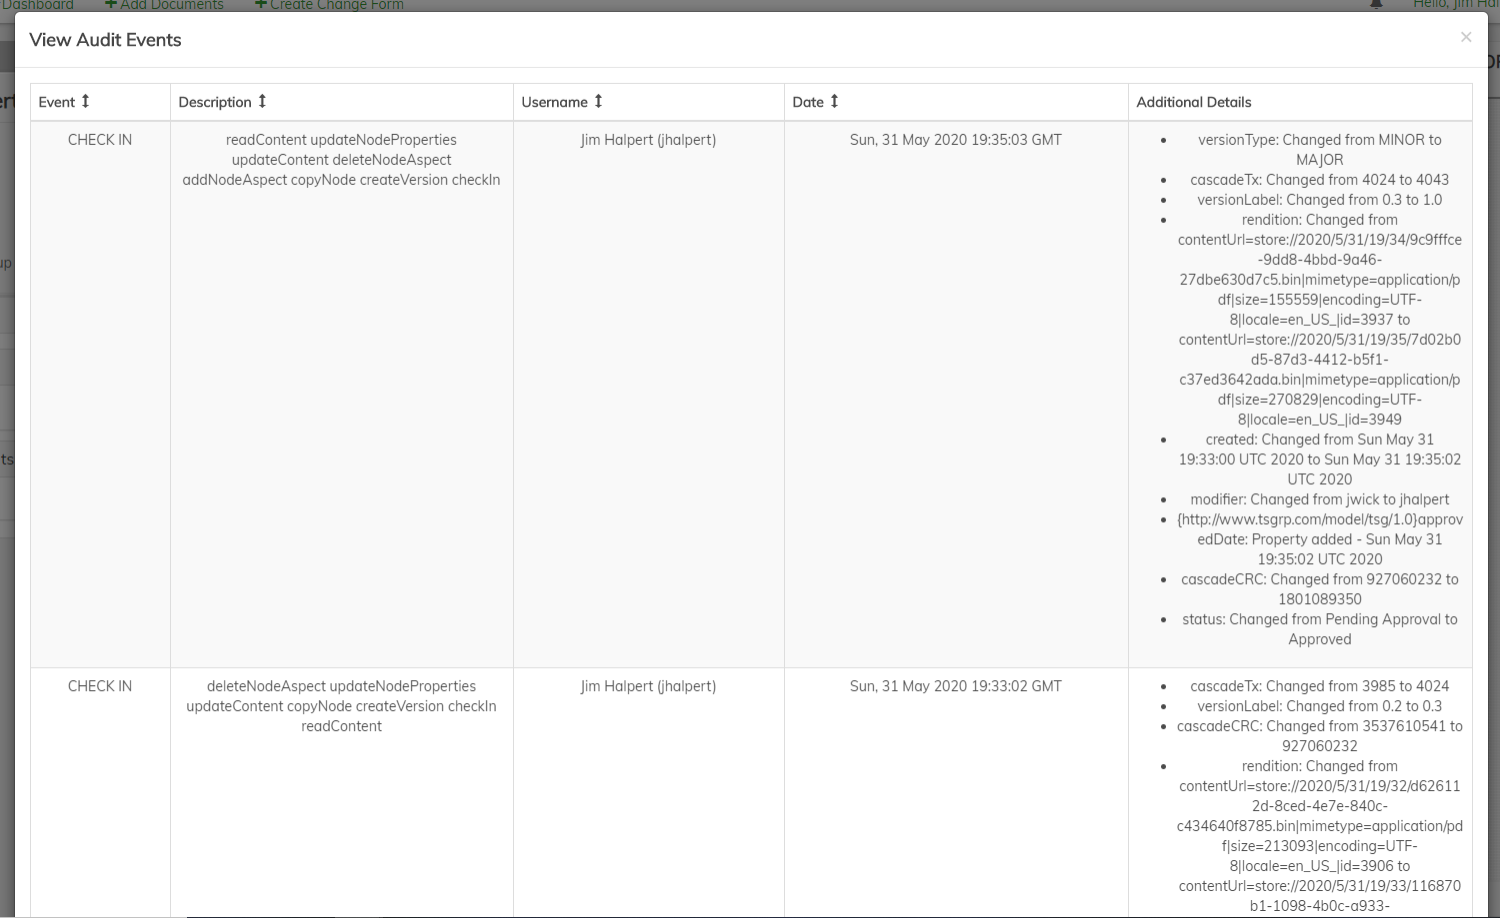
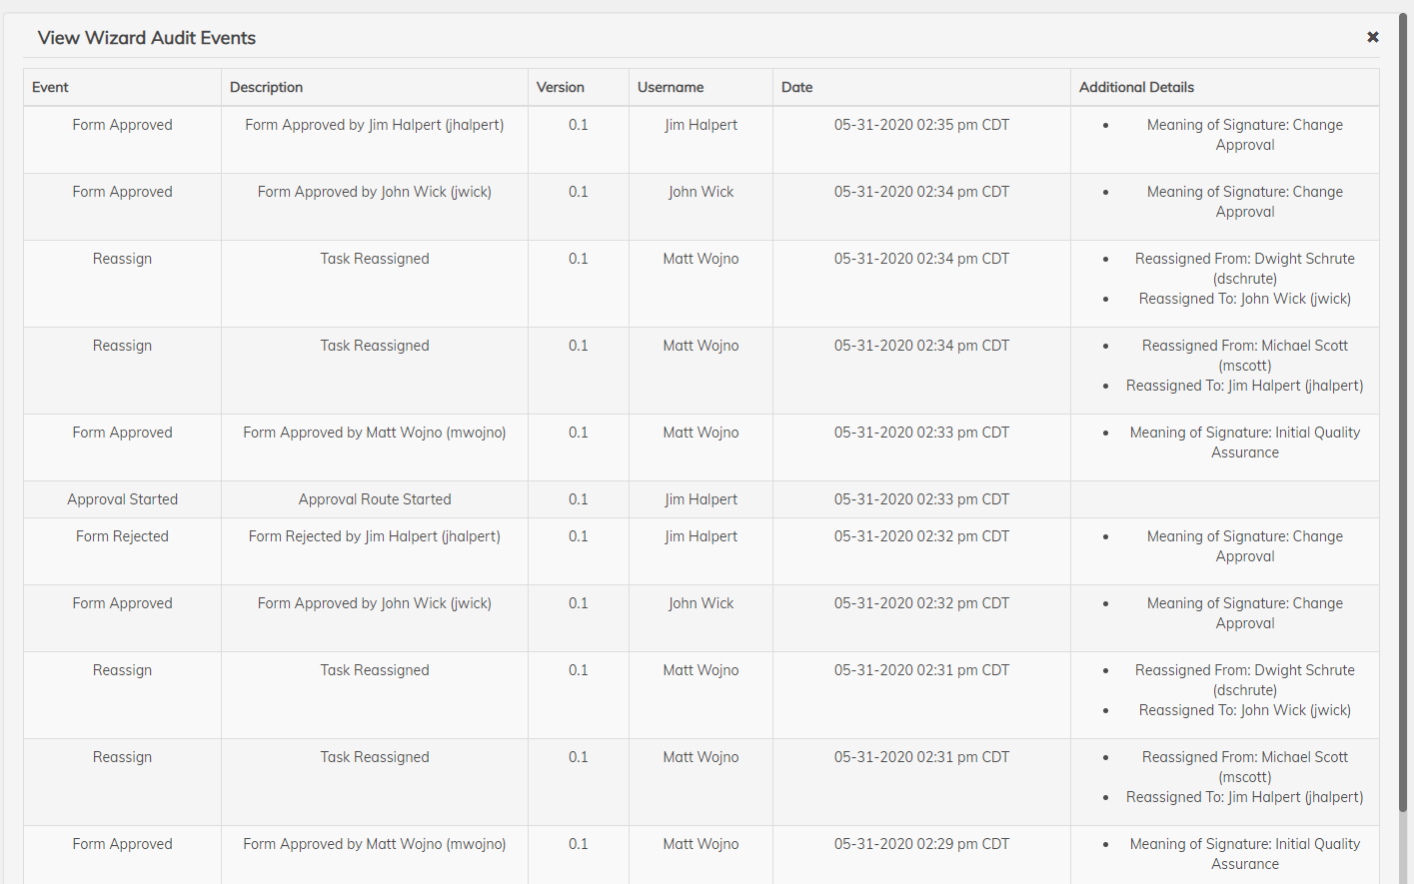
View Audit Events (Documents and Forms)
An audit trail is kept to keep track of all auditable actions/events that happen with the particular document that is present.
Example of audit events for a document:
Example of audit events for a form:
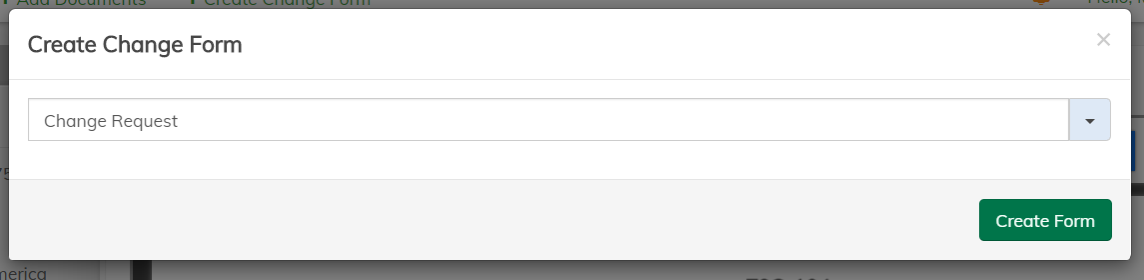
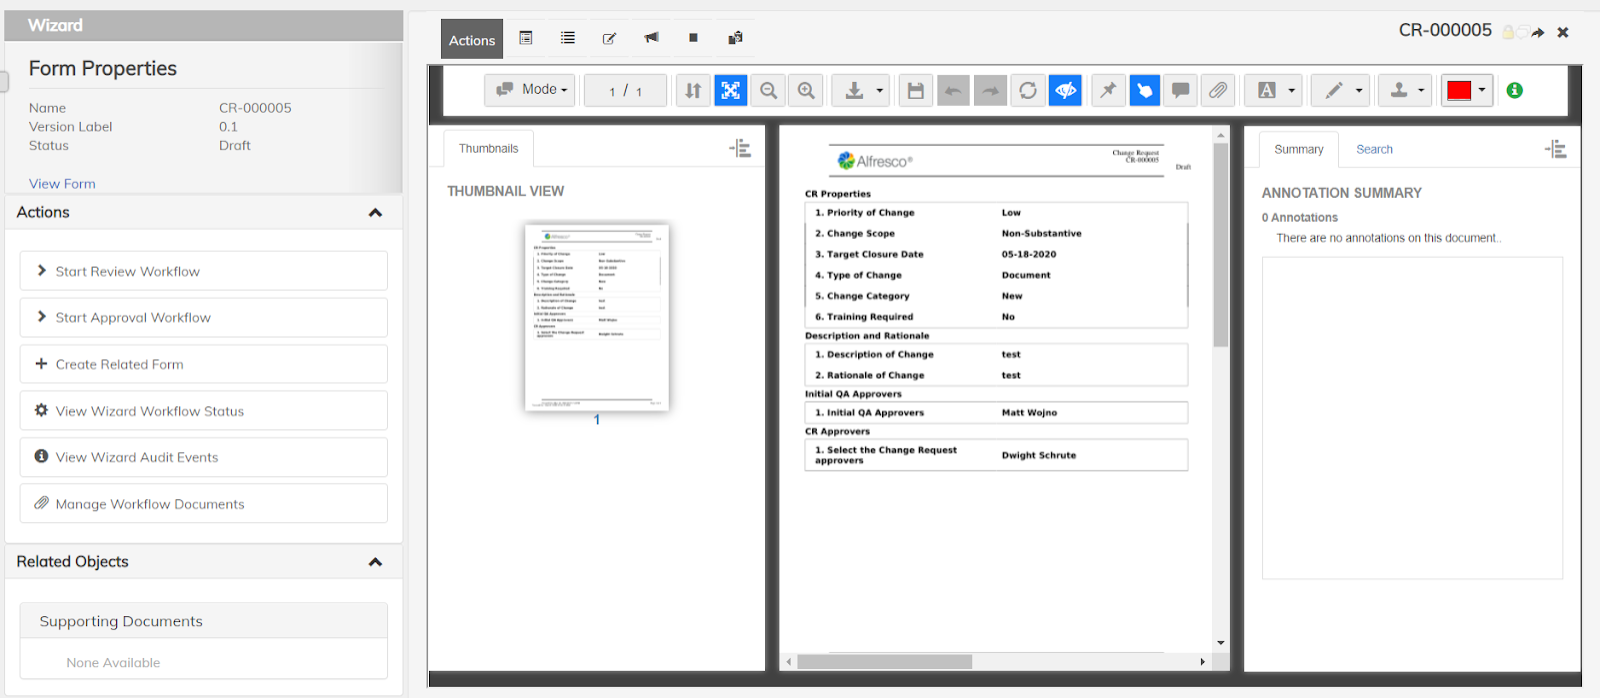
Create Change Form
The ability to create a Change Form with the document this action is executed from attached to the form to route through the form’s workflow. If there are any other available forms, they will be populated in the dropdown that the user can select.
Note: The Change Form supplied in the PnP environment is a test form created to demonstrate the capabilities of Active Wizard forms.
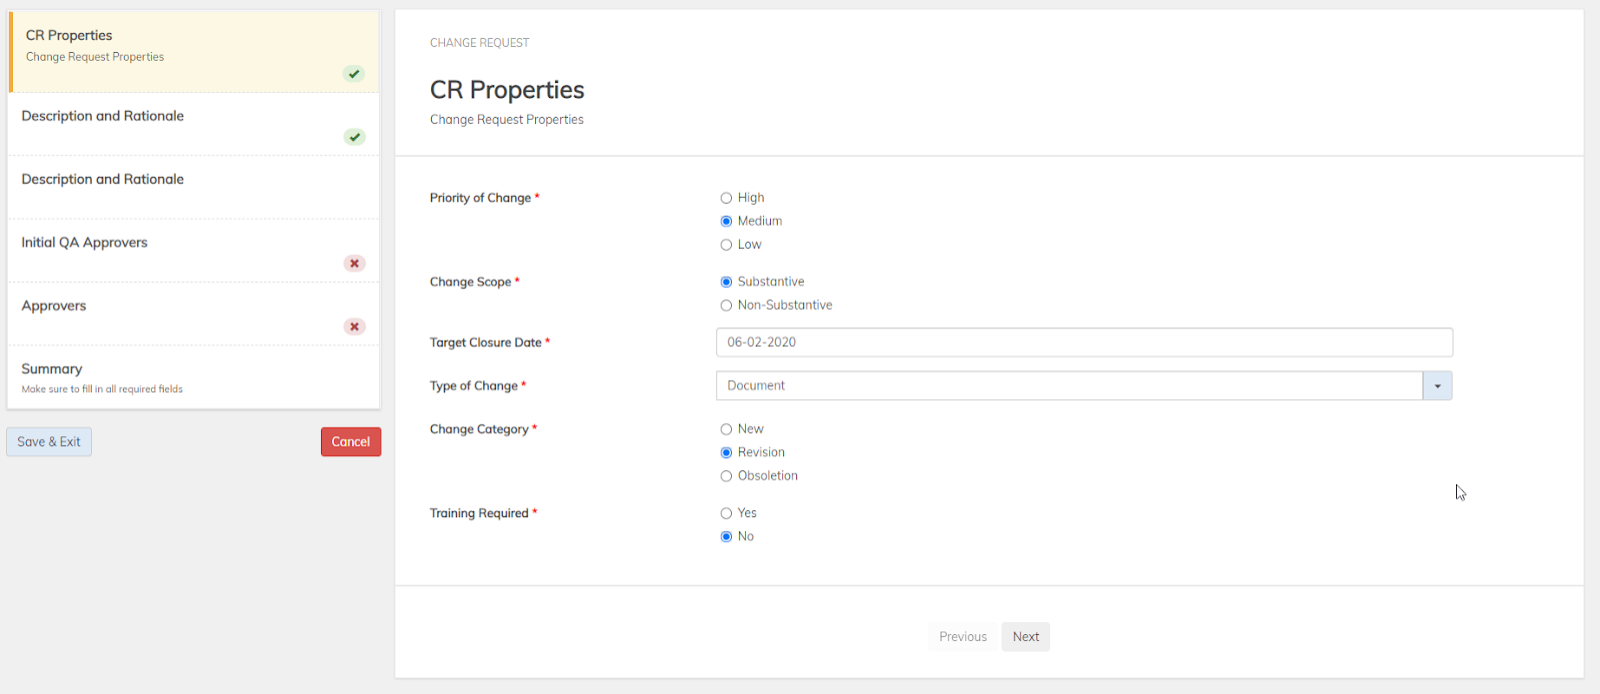
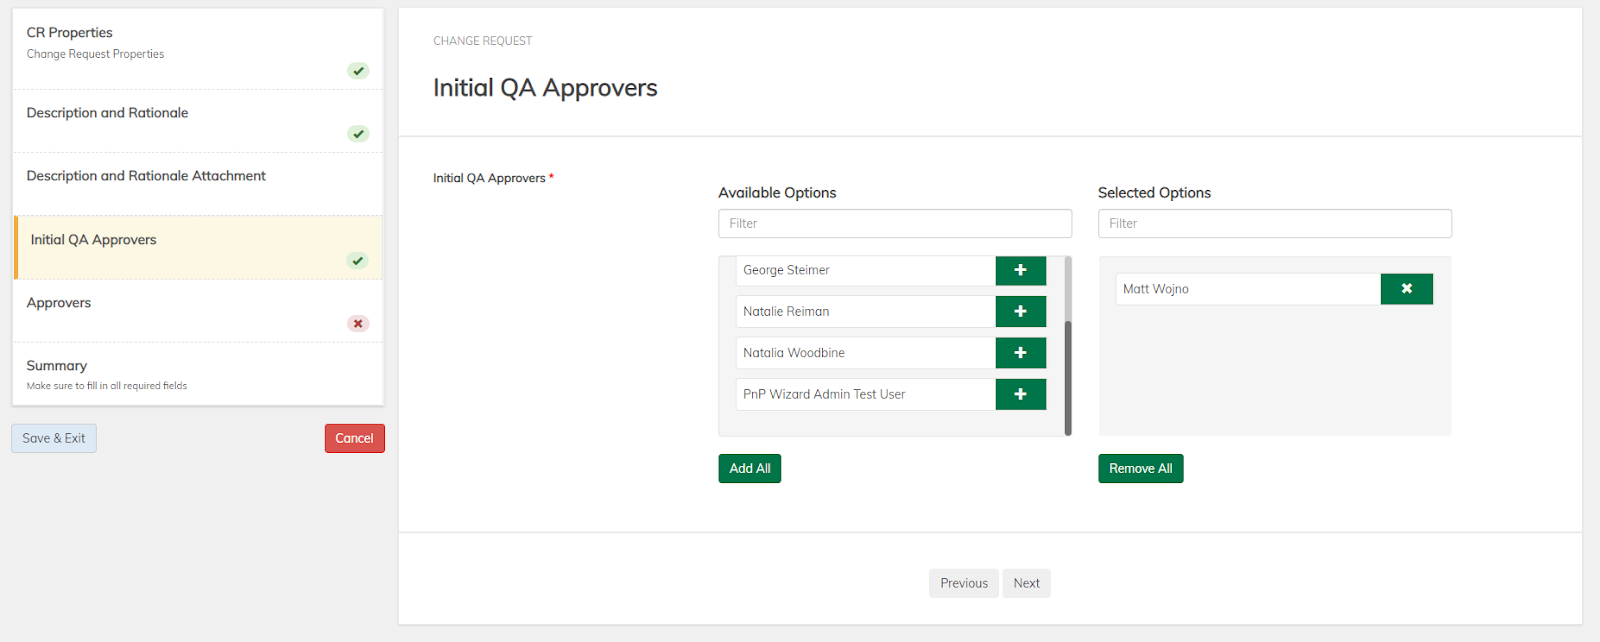
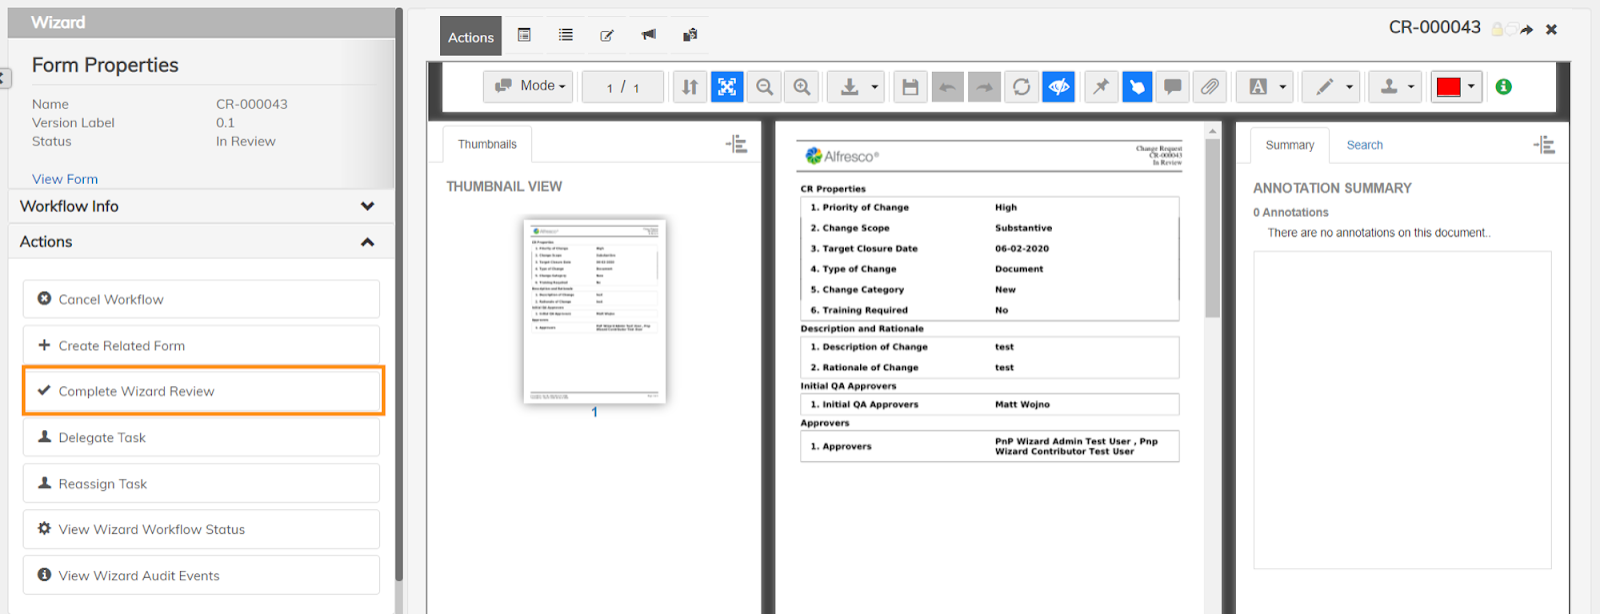
Once Create Form is selected, the form template appears and there are ![]() icons signifying to the user that these areas are required. Below will talk more specifically about each section of the Change Request Form.
icons signifying to the user that these areas are required. Below will talk more specifically about each section of the Change Request Form.
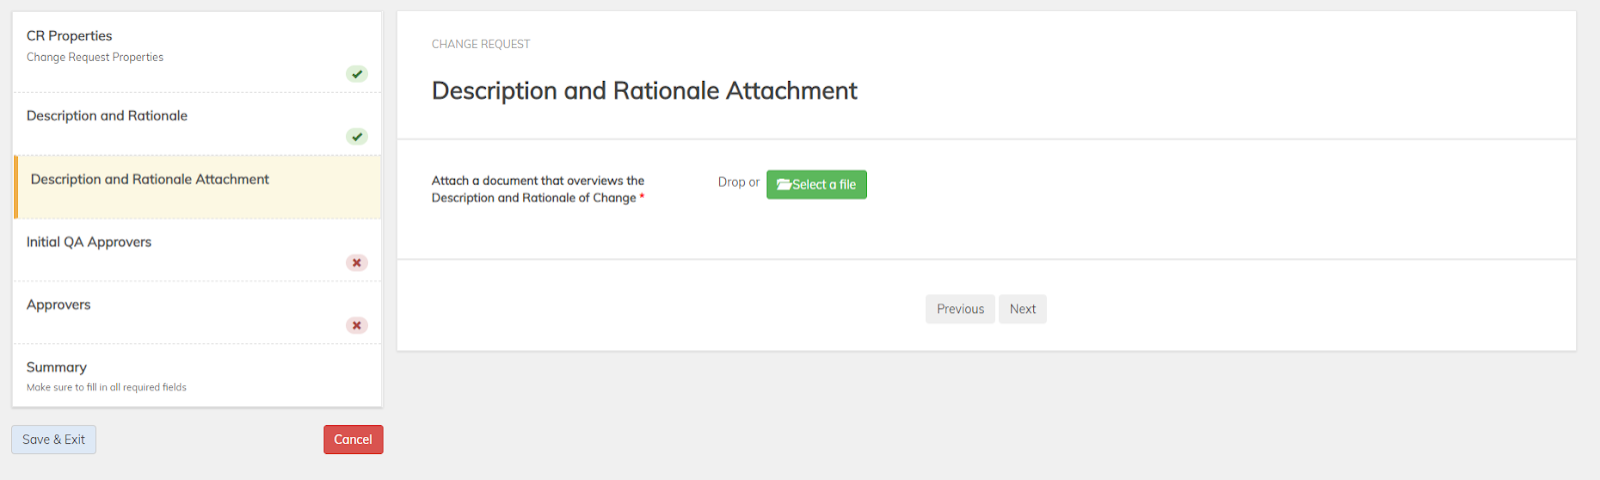
The one section worth noting is the Description and Rationale. This section depending on what answer is giving will control what page is displayed next to the user. For example, if Enter test into this form is selected, like in the screenshot below. Text boxes are shown for the user to input a text rationale.

If the Attach separate document is selected instead, a user will have to attach a supporting document.
Another noteworthy section is the approvers section (both Initial QA Approvers and Approvers). This section the user has the ability to select what users will receive workflow tasks to approve or reject.
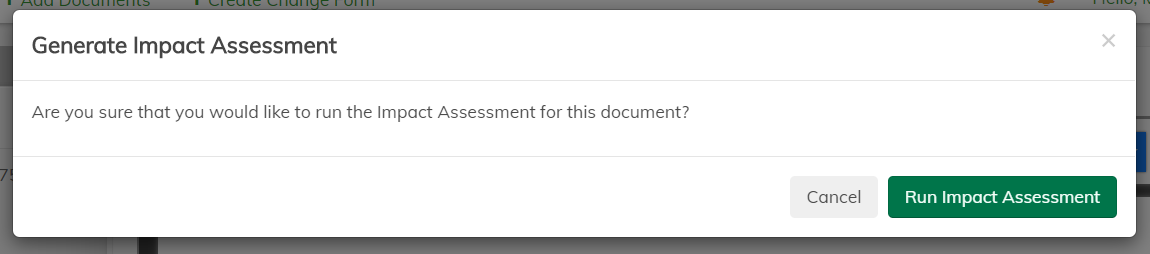
Generate Impact Assessment
Uses a search attribute provided to search all documents for text and output queries specified. Once the action is executed it will download an Excel spreadsheet. In this environment, the Target Query Document Type is Quality Document and Target Property is Document Number
Running import assessment:
Waiting for result:

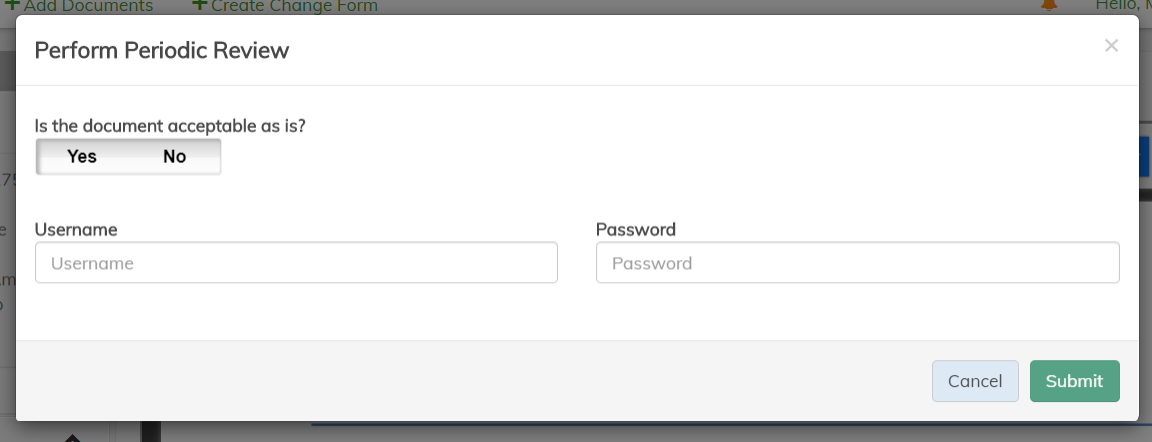
Perform Periodic Review
Allows the user to either accept or reject a periodic review. A periodic review is an analysis of a document after a certain period of time (e.g. 2 years) to make sure that the document is still valid.
Submit periodic review:
Result:

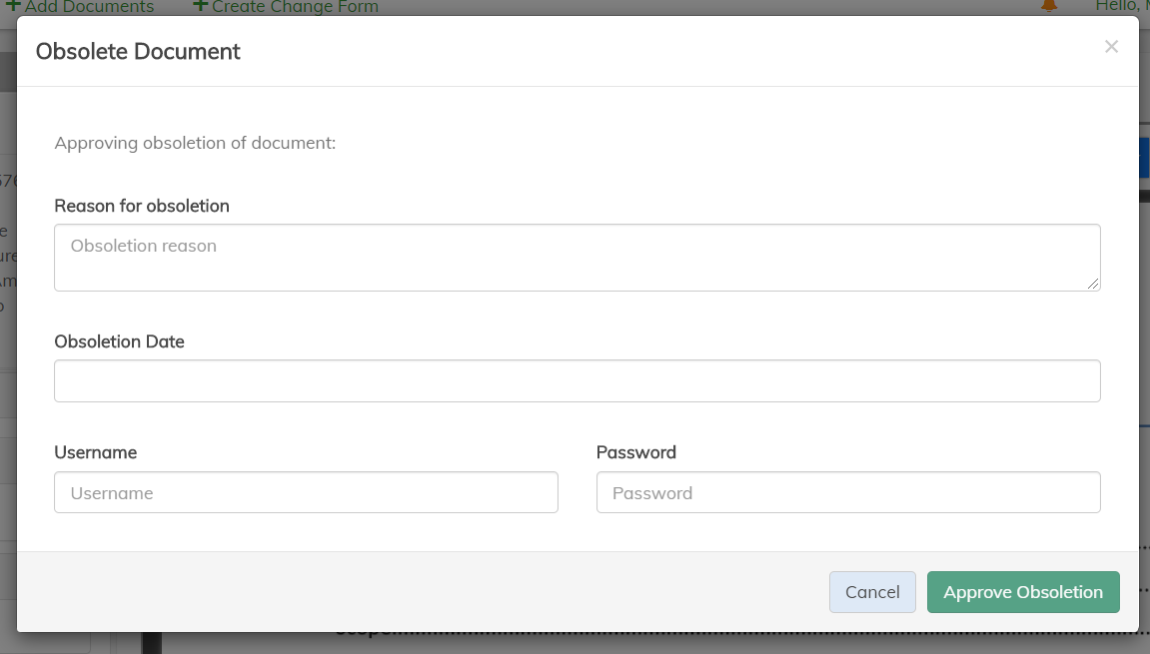
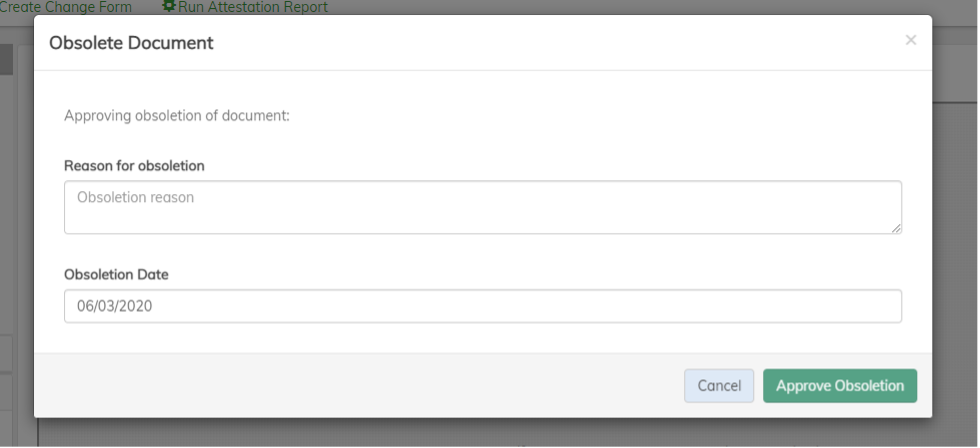
Obsolete Document
The ability to set an obsolete date for a scheduled job to be run to transition the workflow status to obsolete. An obsolete workflow status means that the document is no longer in use or active.
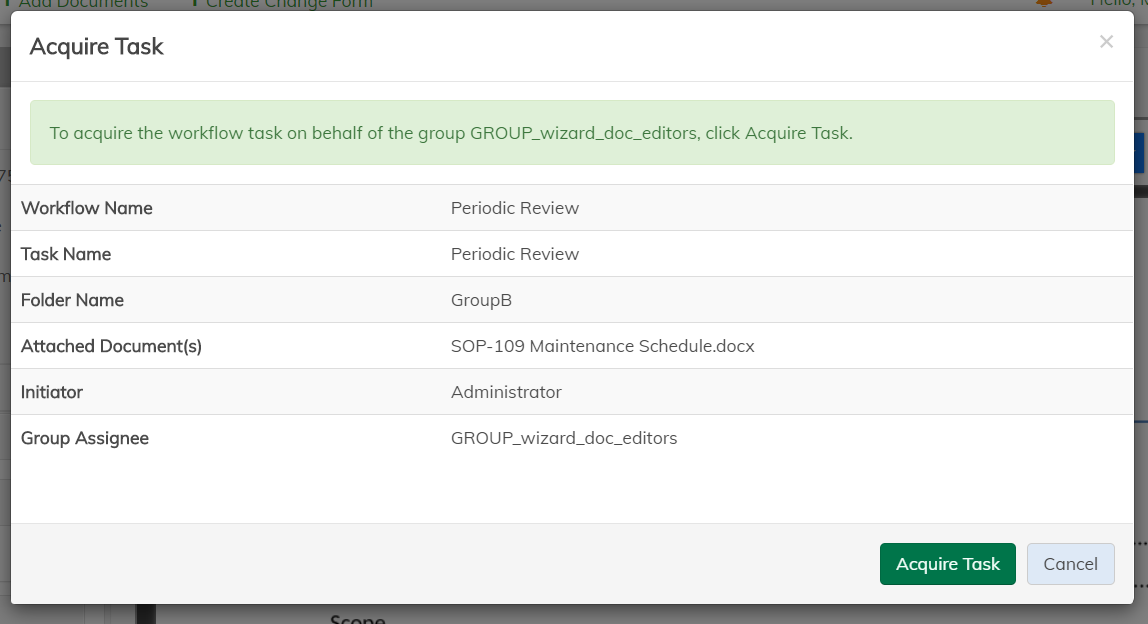
Acquire Workflow Task
Allows a user to claim a workflow task that is assigned to a group, which the user is in. After performing this action, the user will own the workflow task. In this environment, this is used to acquire the Periodic Review group task for the group GROUP_wizard_doc_editors.
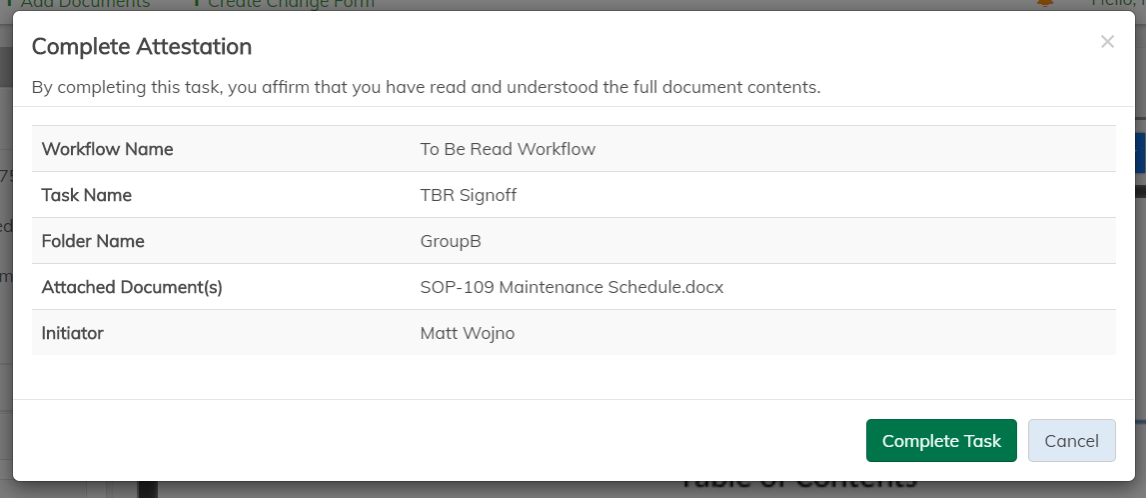
Complete Attestation
Users can complete the “To Be Read” (TBR) workflow task, which is a workflow that is sent out to the specified group. The specified group is a property on the document that should be set before the document makes it to an Approved workflow status. When a user attests to the document, they are accepting the document and all changes (if any) made to it.
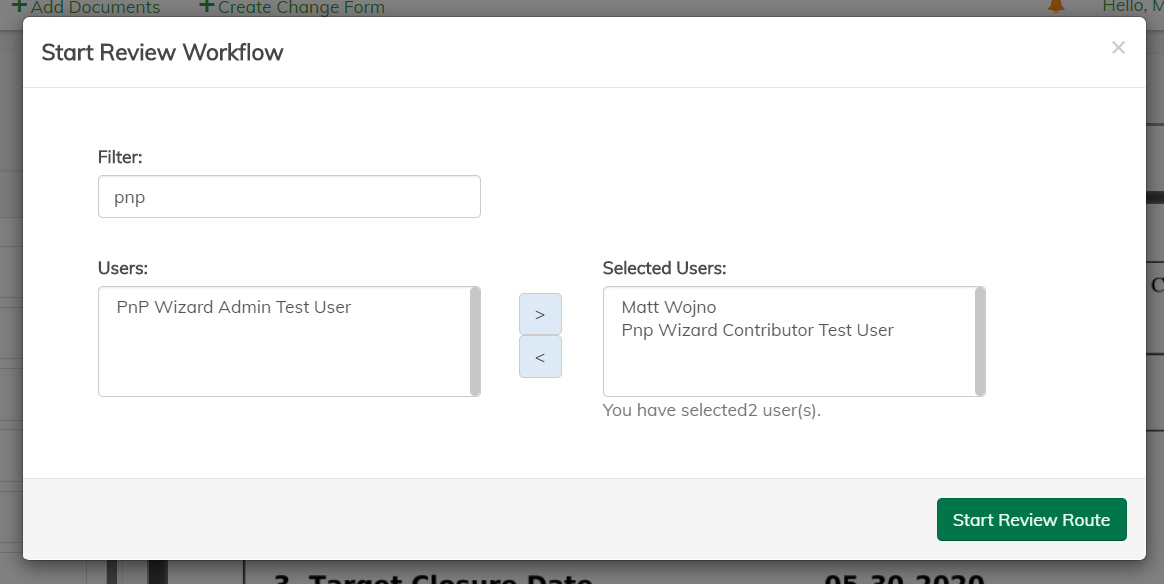
Start Review Workflow
Start a review workflow on a form in the Draft lifecycle state. A review workflow lets the initiator to select the user(s) to review the form and any documents attached. The users can either reject or accept the state of the form and documents attached, if any (See Complete Wizard Review)
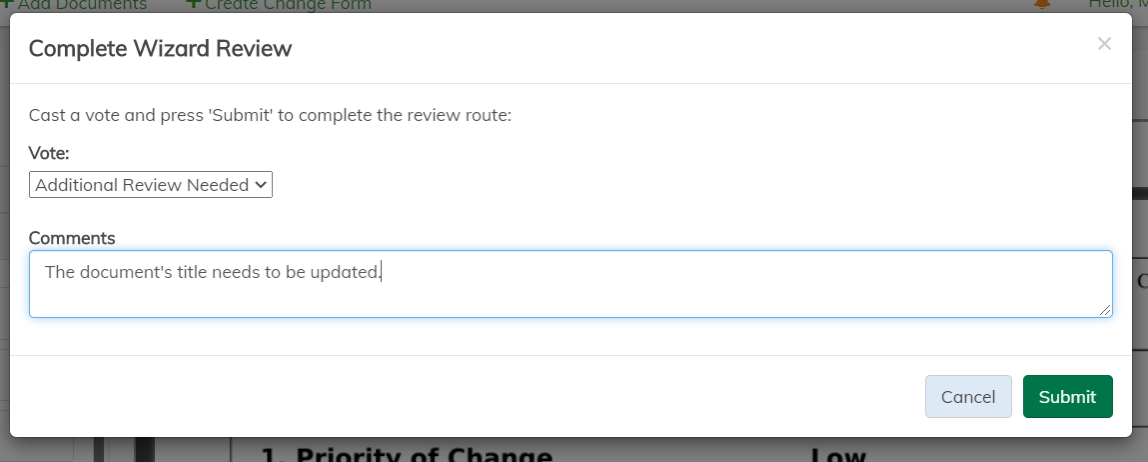
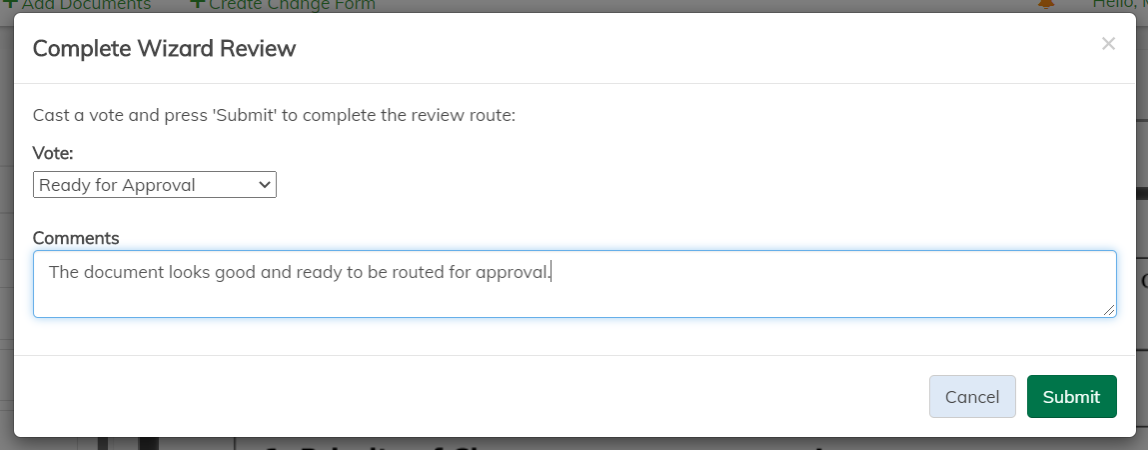
Complete Wizard Review
Allows a user to complete a review task for a form.
Addional review needed:
Ready for approval:
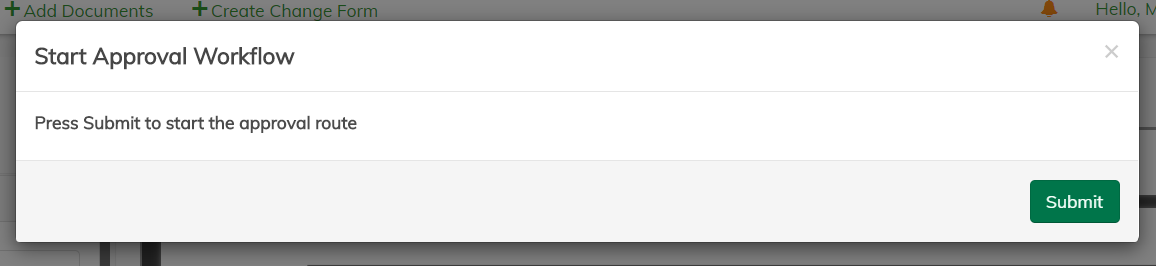
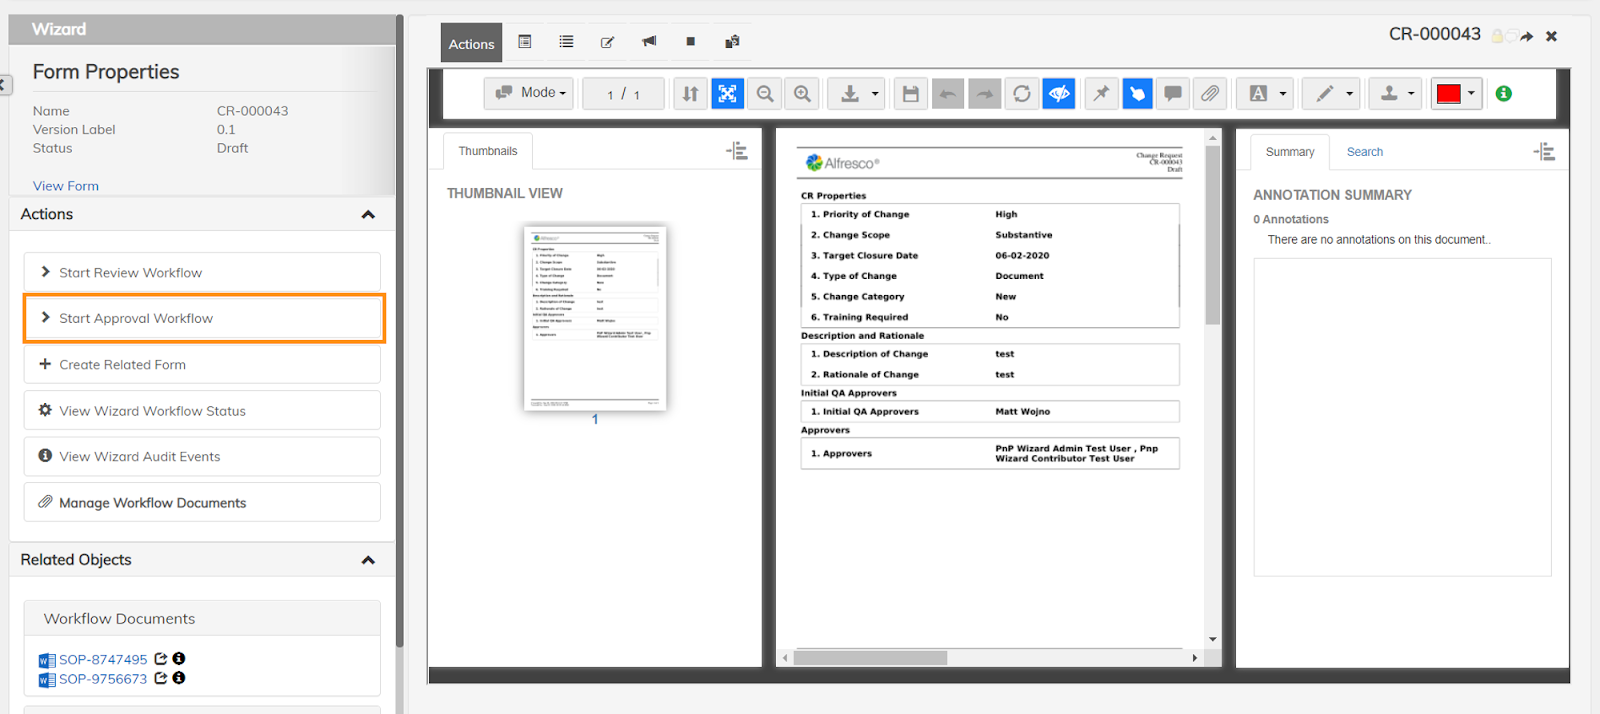
Start Approval Workflow
Allows a user to initiate an approval workflow on a form in the Draft lifecycle state. The form must have assigned approvers.
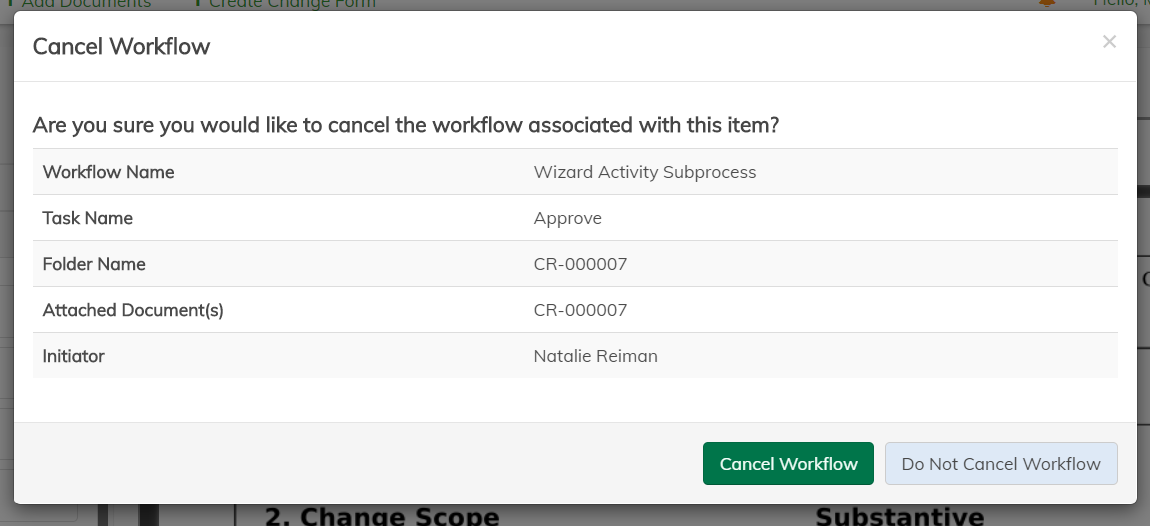
Cancel Workflow
Allows either the form owner or an administrator to cancel an ongoing workflow.
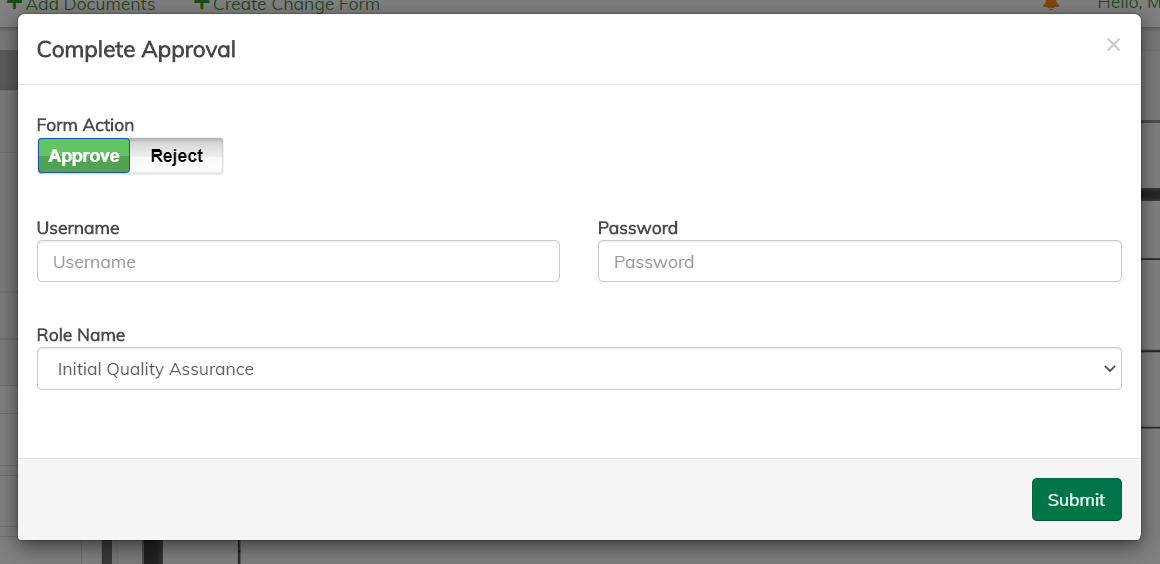
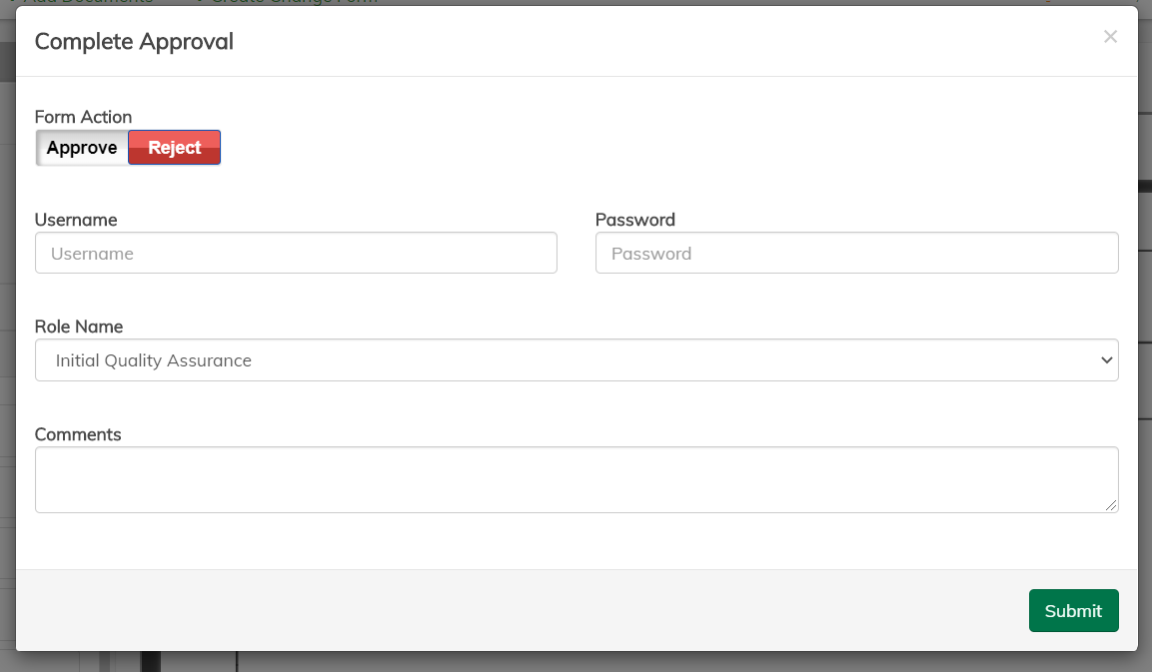
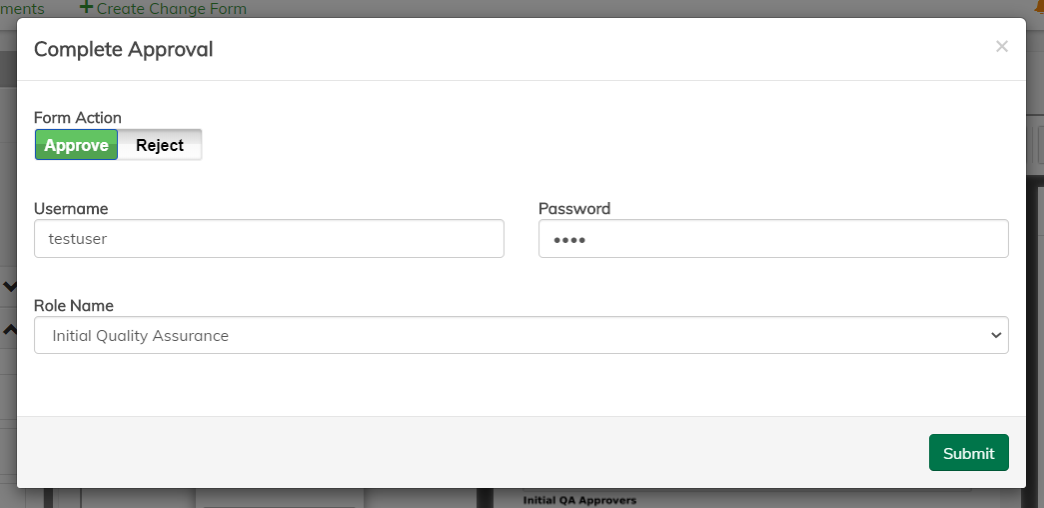
Complete Approval
Allows a user to complete their task by accepting or rejecting the form by entering their credentials. Depending on configuration, a rejection may or may not cancel the workflow.
Completing and approving:
Completing and rejecting:
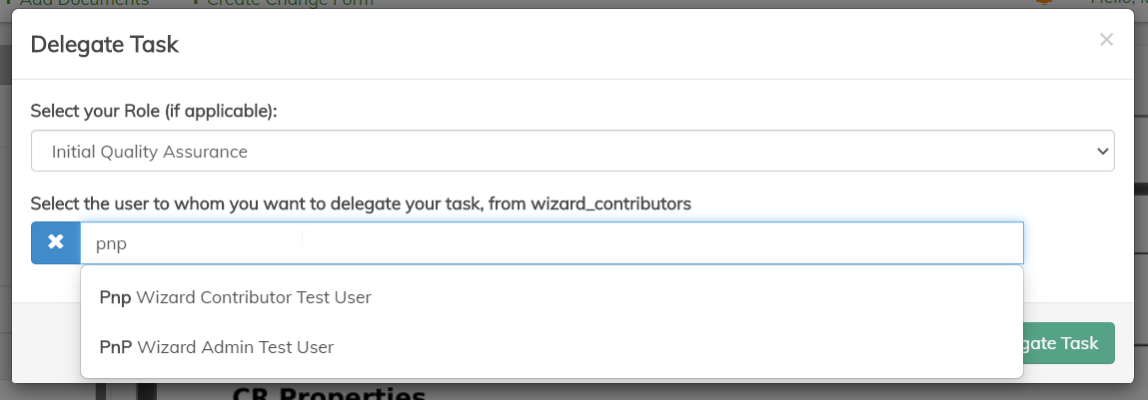
Delegate Task
Allows a user to give away (delegate) their workflow task to another user that is within their Role (e.g. Change Approval). The form must currently be in a workflow and have active tasks for this action to be available.
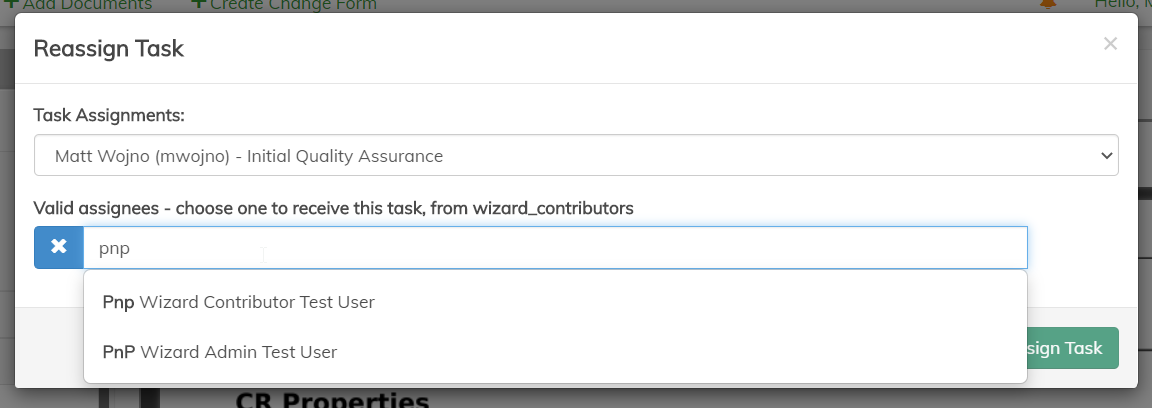
Reassign Task
Allows a user within the wizard administrator group to change ownership (reassign) of a workflow task from one user to another. The form must currently be in a workflow and have active tasks for this action to be available.
Delegate task:
Select task to reassign:

Selecting user to reassign task to:
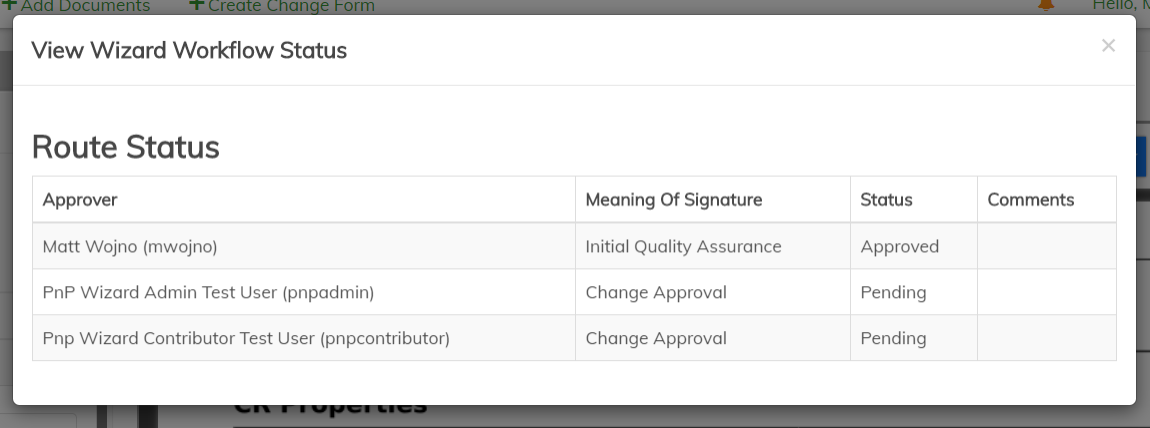
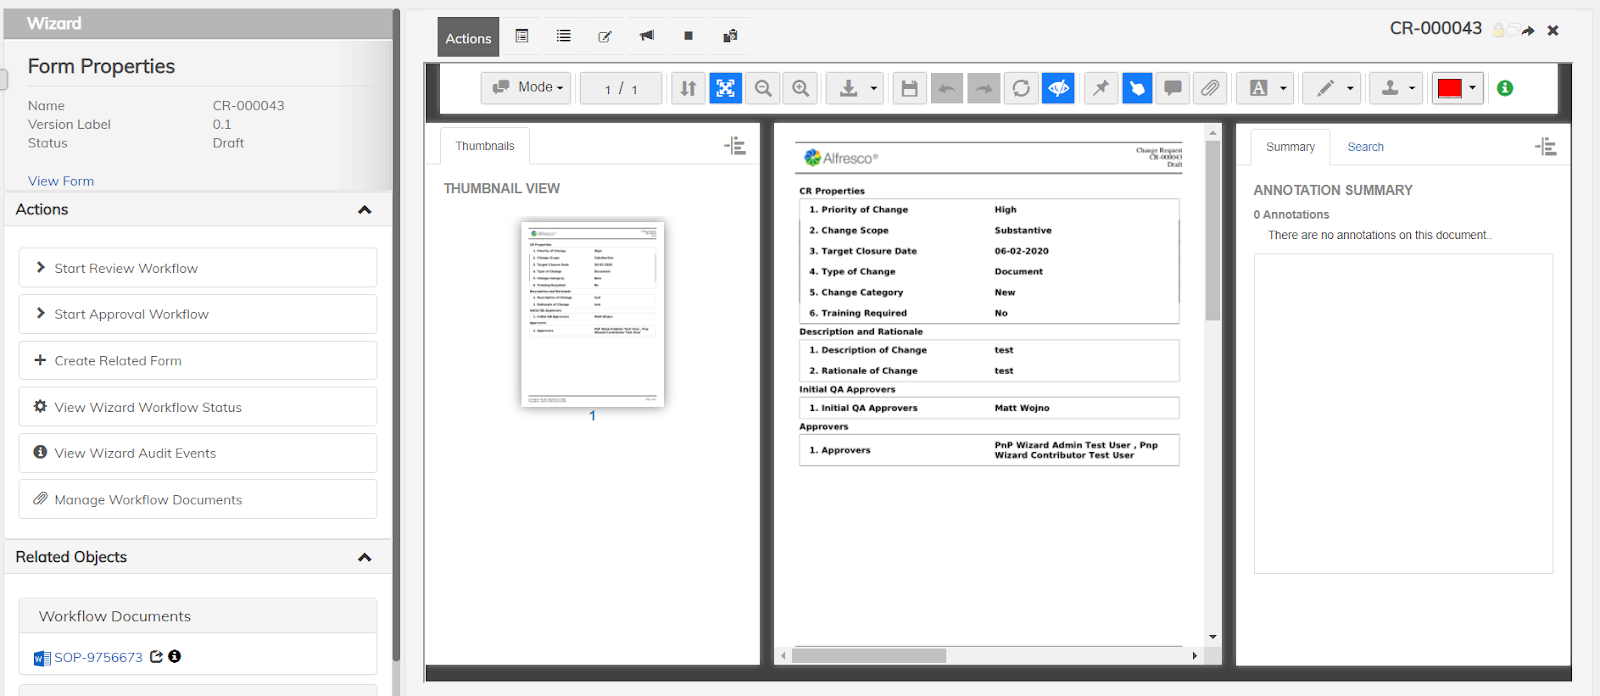
View Wizard Workflow Status
Allows a user to view the status of an Active Wizard form in its current workflow. If the form is in the Draft lifecycle state, this action shows the assigned form approvers with a Pending status.
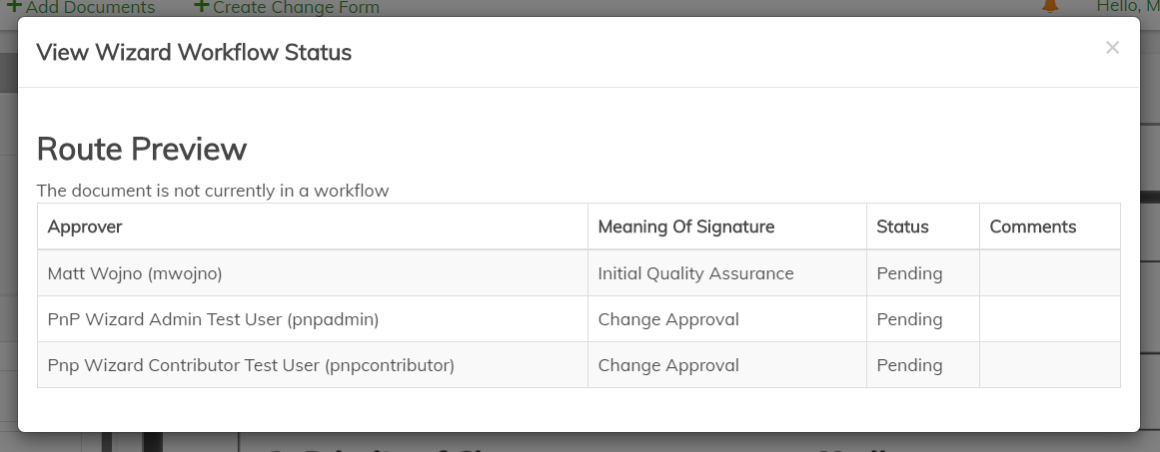
As the form proceeds through the workflow, this action will be updated based on the various status changes such as when a user Approves their task.
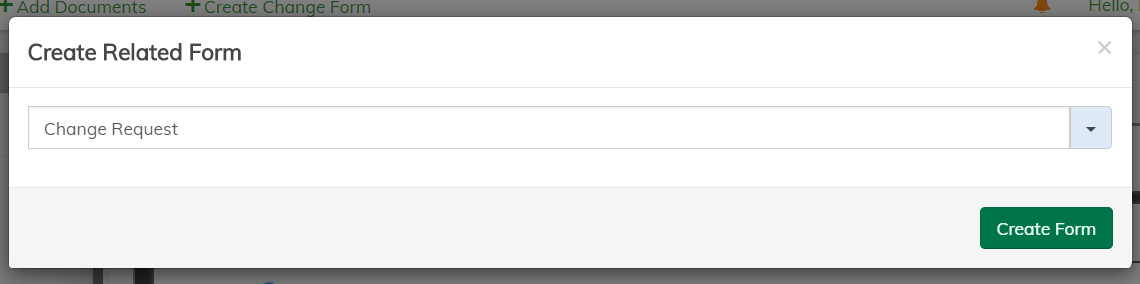
Create Related Form
Allows a user to create a new Change Form that will have a related association to the current form where the action is executed.
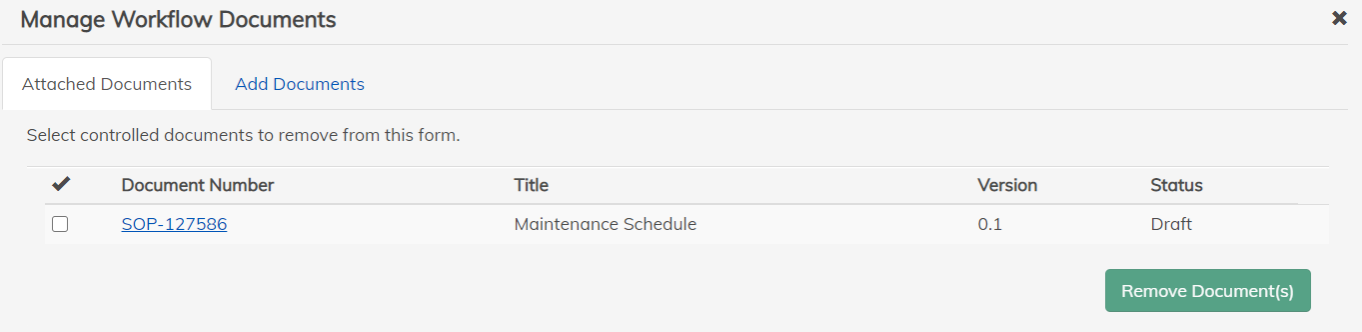
Manage Workflow Documents
View, remove, and add workflow document relationships to the current form.
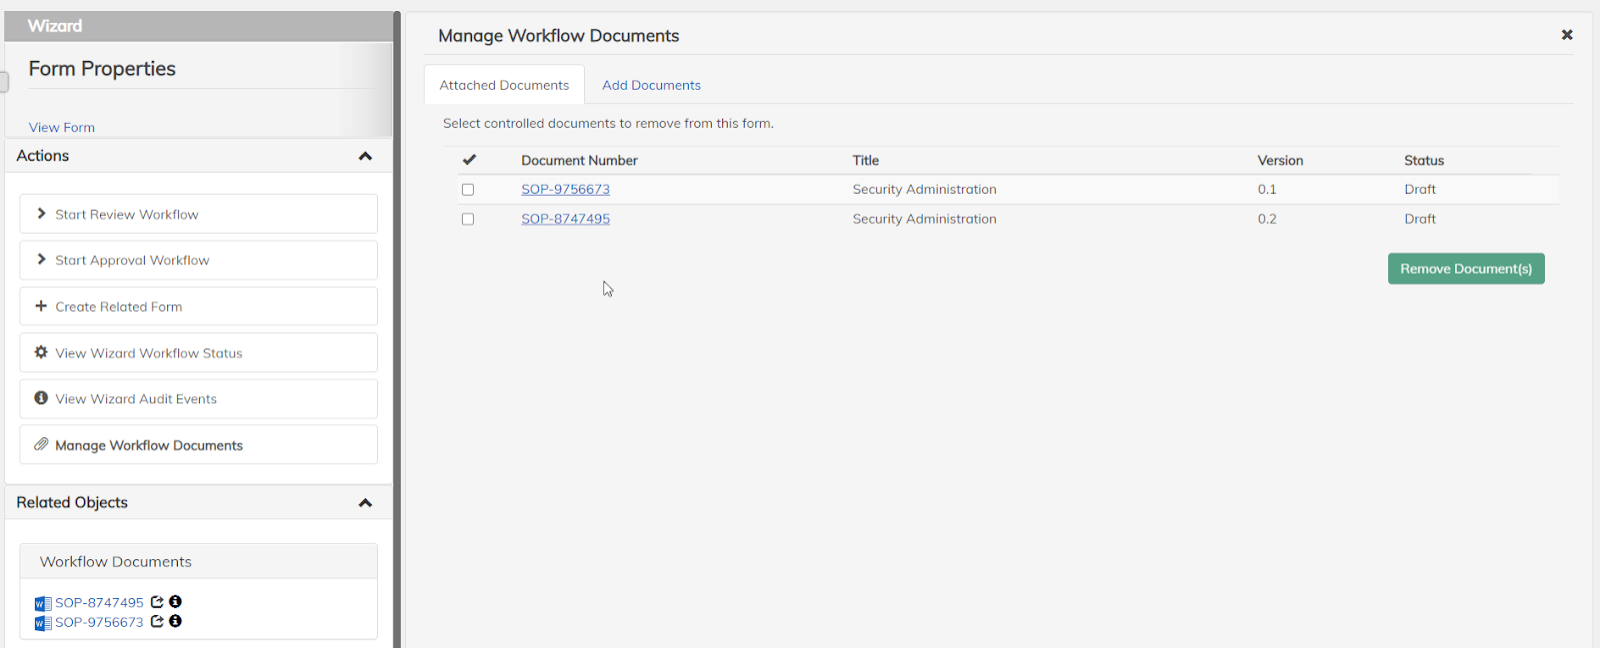
Attached documents:
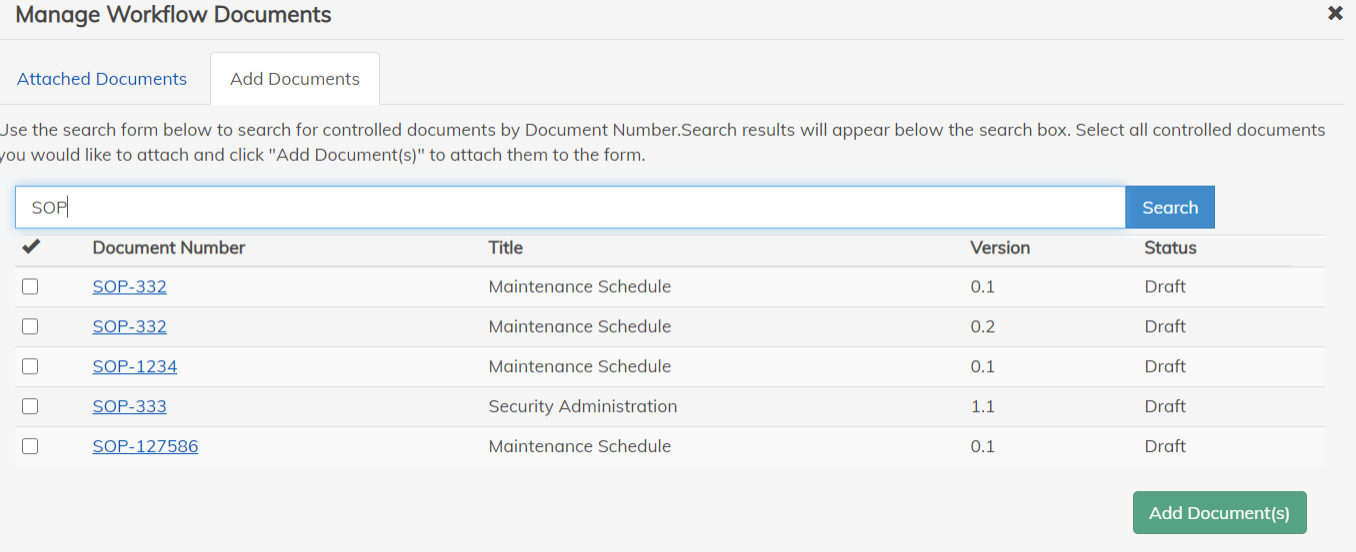
Add documents:
Set Effective Date
This action can exist on either a form or document. If attached to a form, it presents the ability to set the effective date of each workflow document attached to the form. Conversely, it only sets the effective date for that specific document.
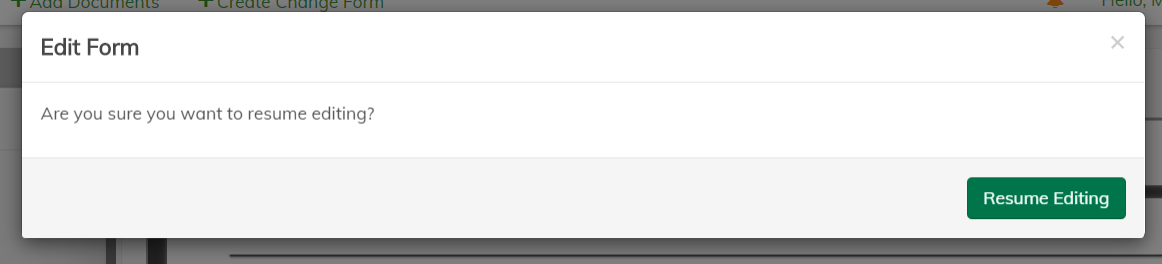
Edit Form
Allows a user to edit the wizard form. Note: this will version the form (0.1 -> 0.2 after editing)
Cancel Form
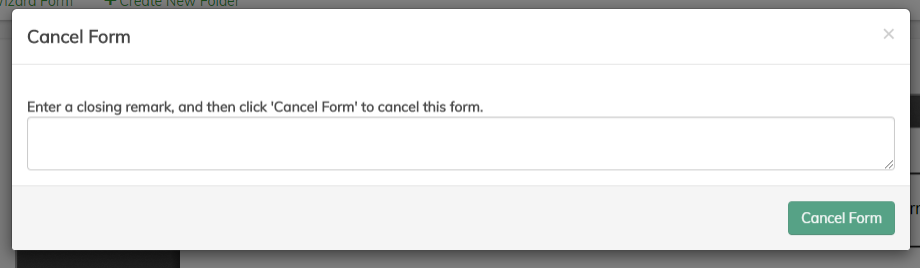
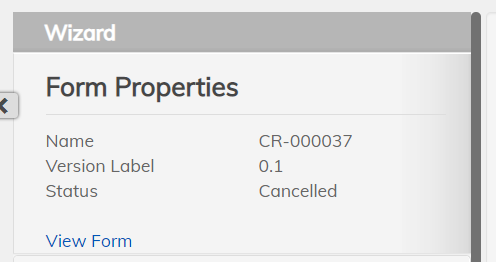
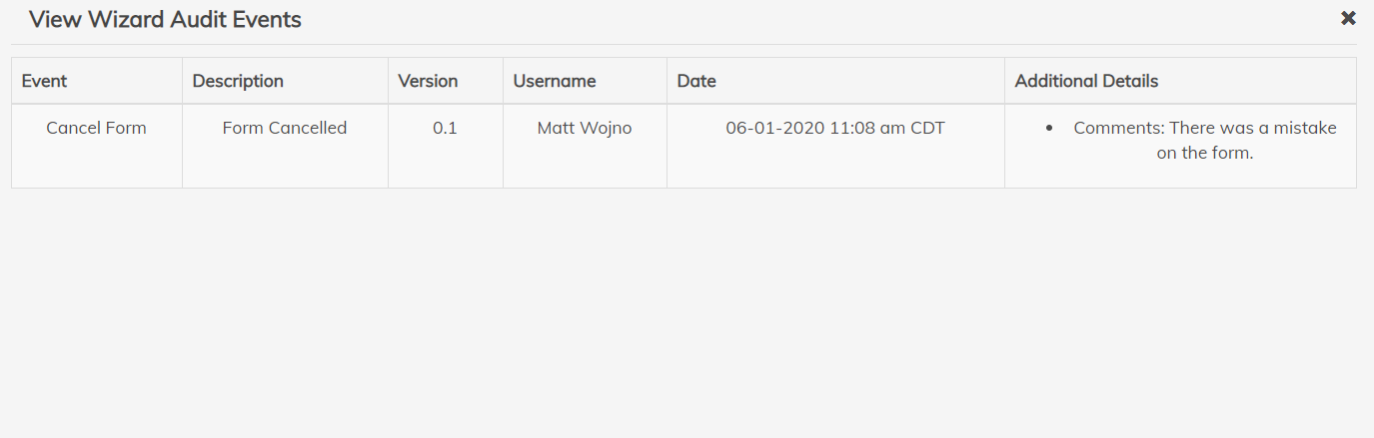
Allows a user who is either the owner of the current form or in the wizard administrator group to cancel the wizard form. The form status will be transitioned to Cancelled, and an audit of this event will be created.
Cancel form with closing remark:
Form properties:
View wizard audit events:
Close Form
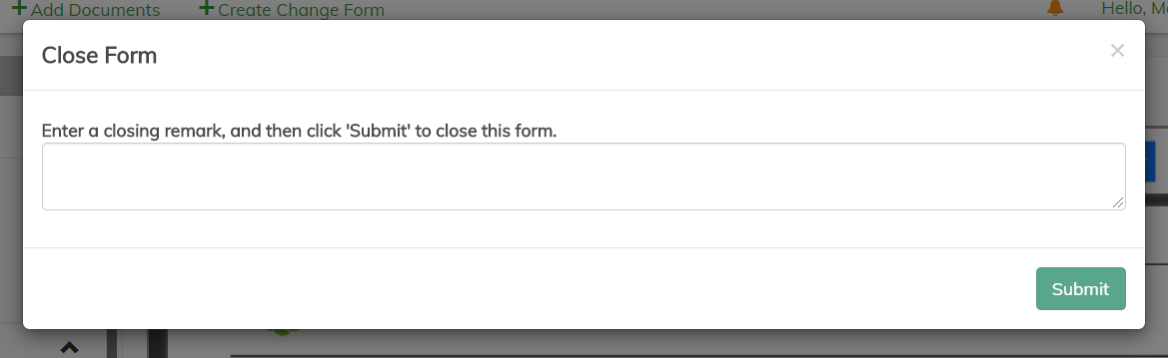
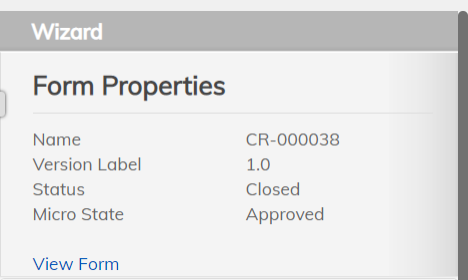
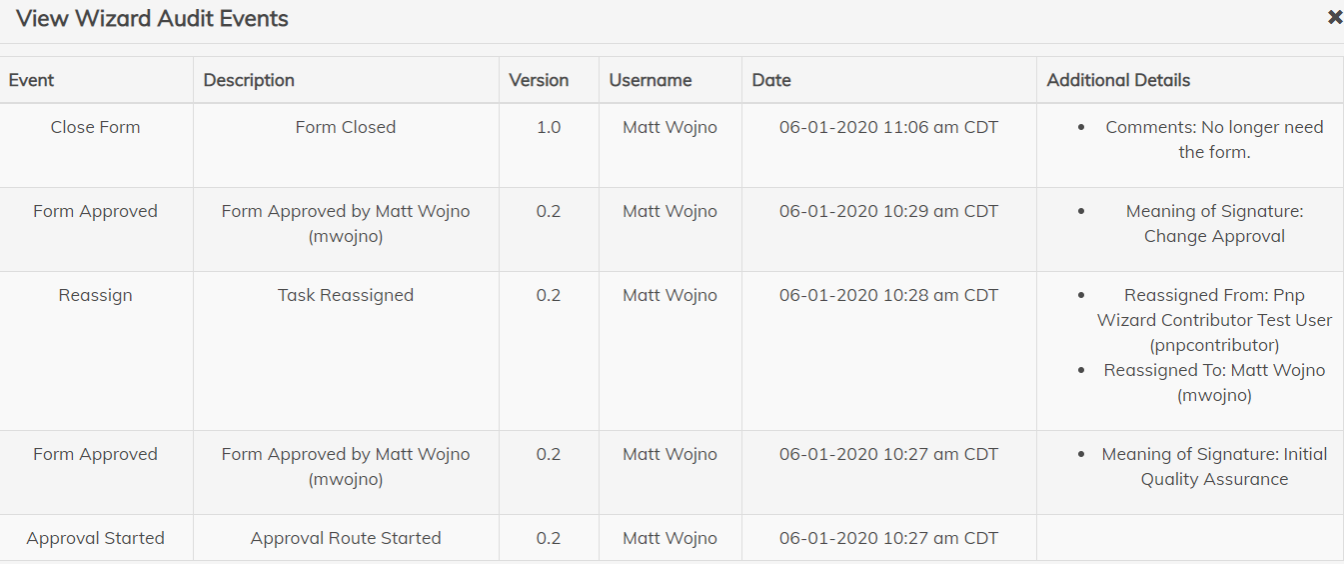
Allows a user who is in the wizard administrator group to close the wizard form this is in the Approved lifecycle state. User needs to provide a closing remark, which will be added to the audit trail.
Close form with closing remark:
Form properties:
View wizard audit events:
Copy Wizard Form
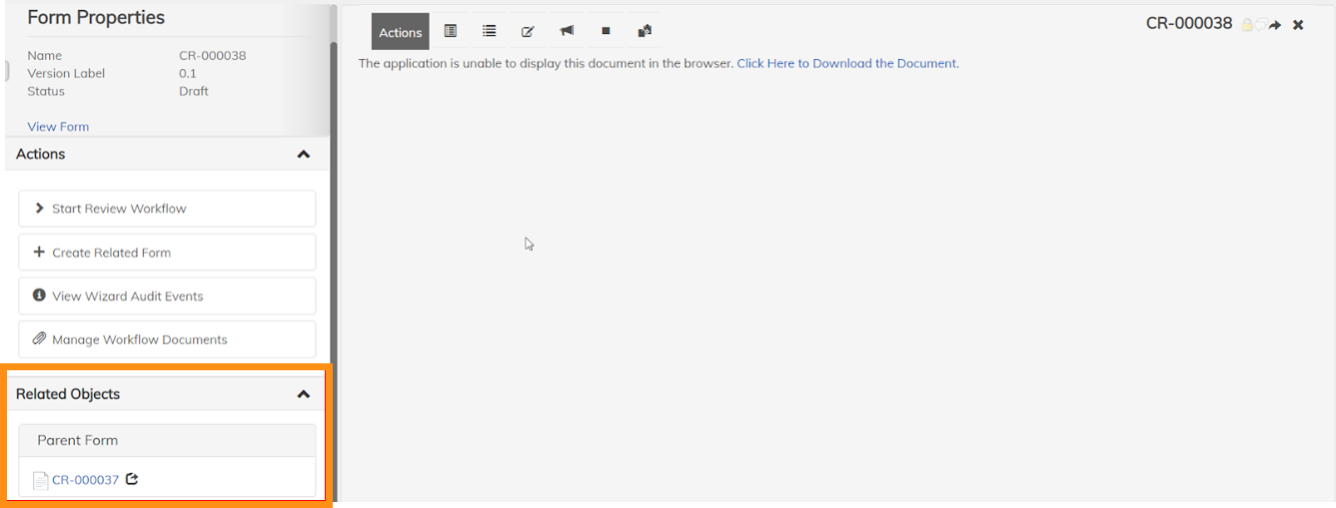
Allows a user to copy the metadata (form input/information) from the current form into a new form. The new form will copy the most current version of the form’s template.
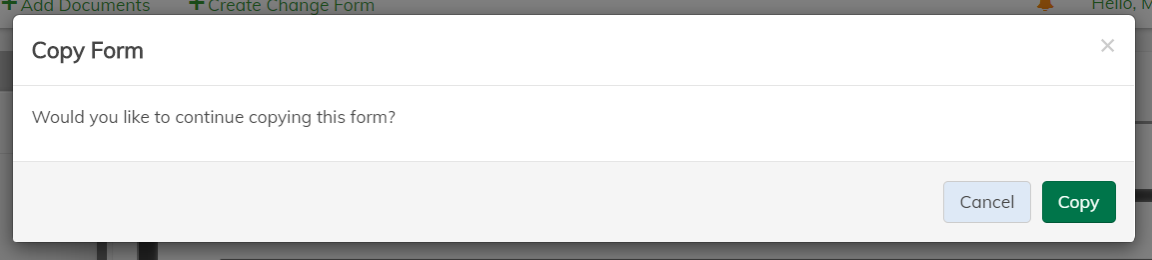

You may be thinking there has been an error because the form isn’t displayed. The form’s content is copied over but the approvers need to be re-inputted so the user can validate that the new form should still have those certain approvers. Therefore, click the Edit Form action to proceed. Also note that a parent-child relationship is created between the current form and the new copied form.
Policy and Procedure Use Case Scenarios
In this section, daily use cases will be detailed that an individual for the PnP scenario will frequently carry out.
Upload New Document
To upload a document in the PnP environment, the user will select the header action called Add Documents. Once clicking that action the following modal should be seen on the screen.

This is the Add Documents action modal that is detailed in the commonly used actions section, see Add Documents. A document or multiple documents can be dragged or uploaded into the upload screen then the Next button would be clicked showing the screenshot below.

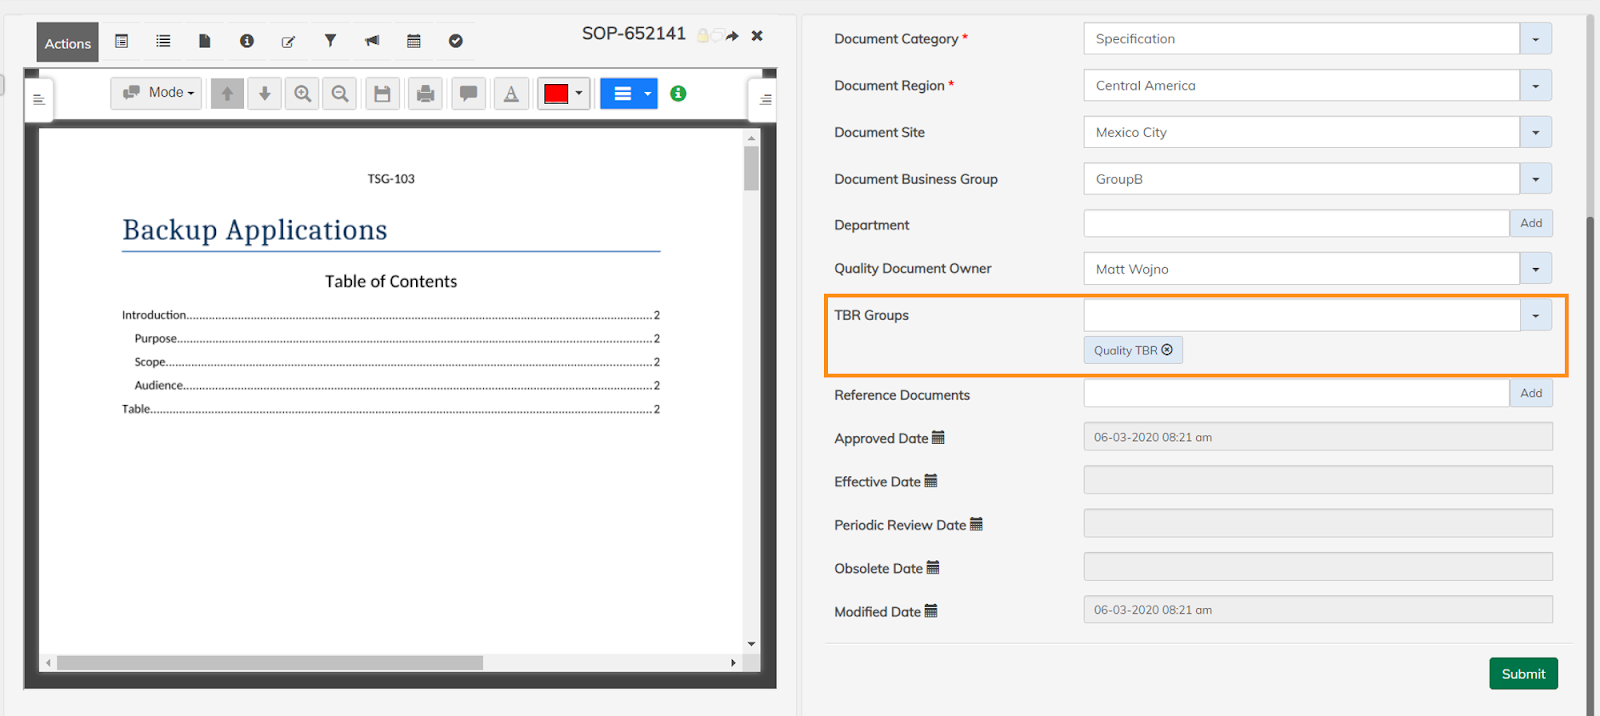
A form that consists of the incoming document’s properties are filled out at this point with certain fields, such as Document Number, are required to upload. Also, notice the Iframe to the right that shows a preview of the incoming document.
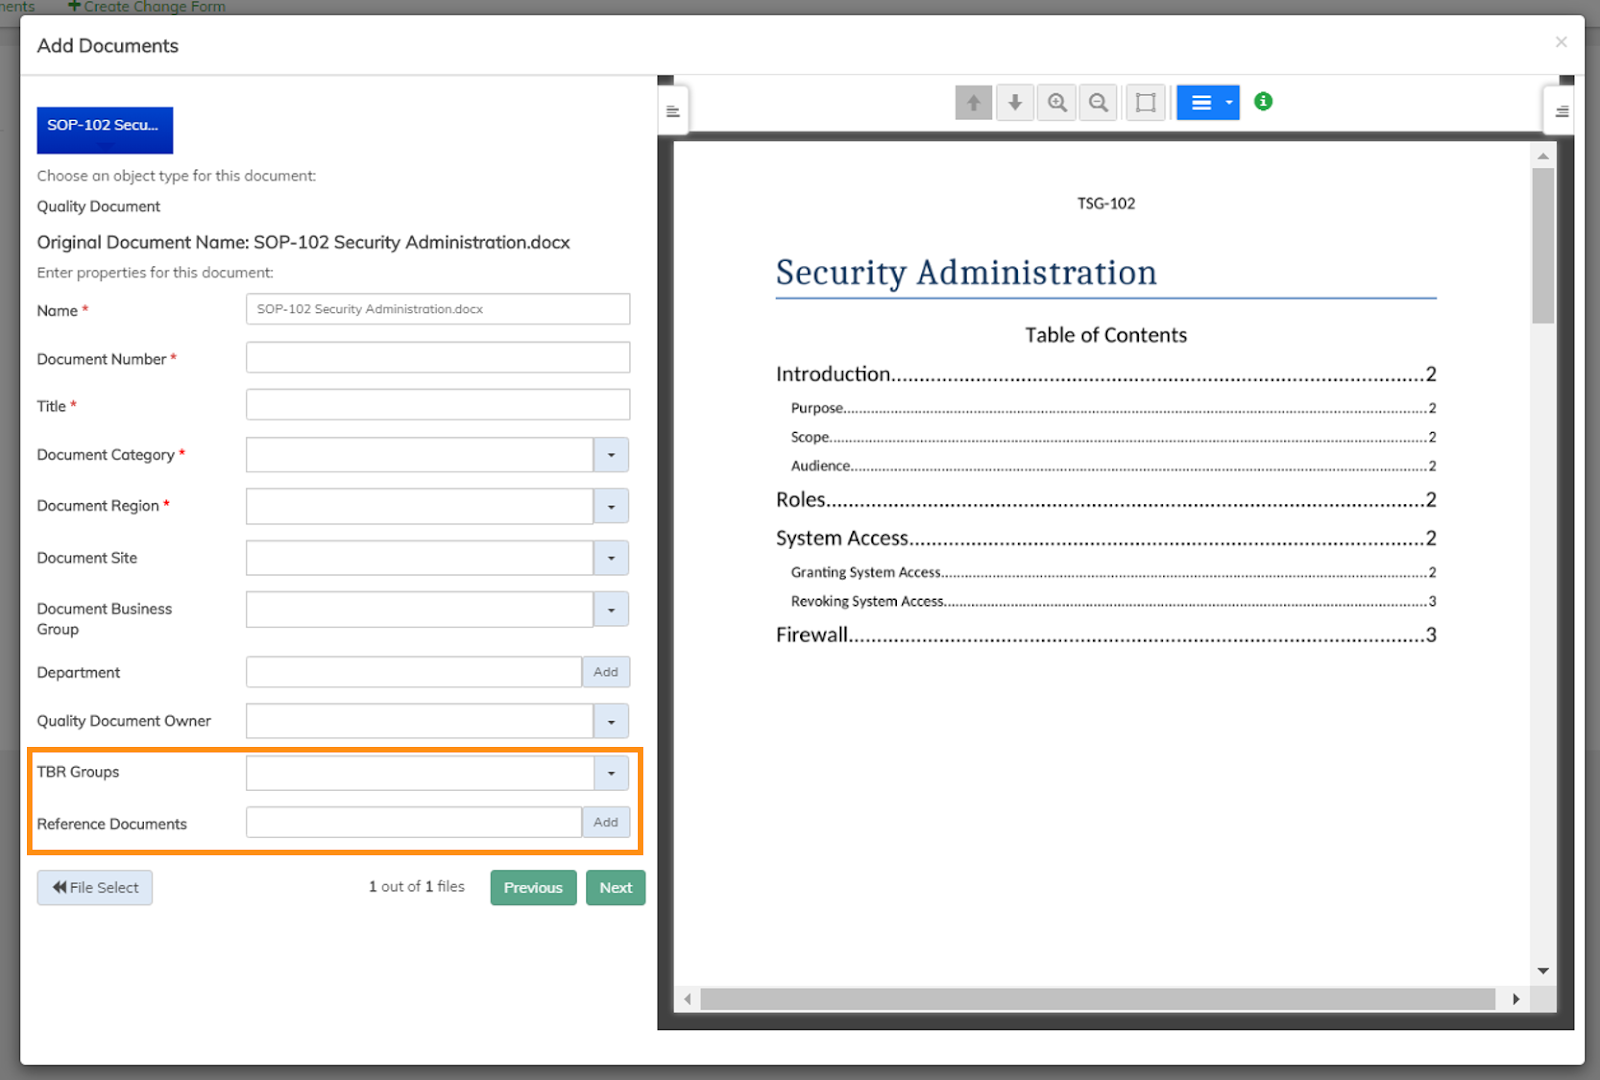
Two sections on the form worth noting are the TBR Groups and the Reference Documents.
- The TBR Groups is a field that determines what group(s) the TBR Attestation workflow tasks are sent out to attest to the changes of the document(s) once it reaches approval (See Complete Attestation Action and TBR Attestation)
- The Reference Documents are documents related to the uploaded document. A relationship will be created and the relation could be seen under the Related Objects section.
Editing Document (Content & Properties)
Once a document is uploaded, the document can be viewed in the application. Many times a document’s content and properties change. Below will talk about how to achieve both.
Editing Content
To modify a document’s content the document will have to be versioned.
- Click on the icon
 to Check Out the document and press Checkout (See Check Out).
 - The document should have been downloaded. Now is the opportunity to make the necessary changes. Before checking the document back in, notice the lock glowing in the top right corner of the viewer. This icon is telling everyone that this particular document is locked by you as you are making changes.
- If it turns out no changes actually needed to be made. The
 could be clicked to Cancel Checkout (See Cancel Checkout).

- When it is time to check the document back in, press the
 that says Check In. The item can be dragged or chosen from the computer to upload back into the application. Then hit submit to check the document back in.
 - A couple things to note when a document is checked in.
- The lock on the document is released.
- The version label has now updated to become the next minor version (e.g. 0.1 -> 0.2).
- To view all the versions thus far, see View Versions.
Editing Properties
To update a document’s properties click the View Properties ![]() icon.
A dual pane should be seen with the document’s properties displayed. (See View/Edit Properties).
icon.
A dual pane should be seen with the document’s properties displayed. (See View/Edit Properties).
Annotations
Annotations are a very powerful collaboration tool that is integrated within this application thanks to the product called Alfresco Enterprise Viewer (AEV).
The annotation tool can be used whenever a form or document is viewed (this viewer is configured by default).
The advantage of using AEV is that it provides additional opportunities to provide feedback on a document. In addition, there are an abundance of use cases that AEV can tackle. During this section, only the particular use cases associated with the Pnp scenario will be highlighted.
To understand more of the use cases of AEV please refer to AEV’s user guide or relevant documentation.
Why use annotations in the PnP Scenario?
The typical use case for annotating a document in the PnP scenario will be during review or the pending approval of a document or form.
As talked about in the Route for Review and Route for Approval sections, the user has the ability to reject the document or form. Annotations can be a great way to show the owner/author of the form what needs to change to seek the user’s approval.
Route for Review Annotation Use Case
Let’s imagine a document is within a Review route and has the status In Review. Let’s assume the role of a user who has been selected to receive a task to review the document and form. This user goes to complete their task.
Click on the document to bring it up in the AEV document viewer. The user notices a mistake worth noting on the document. They want to leave a sticky note comment for the owner of the document.
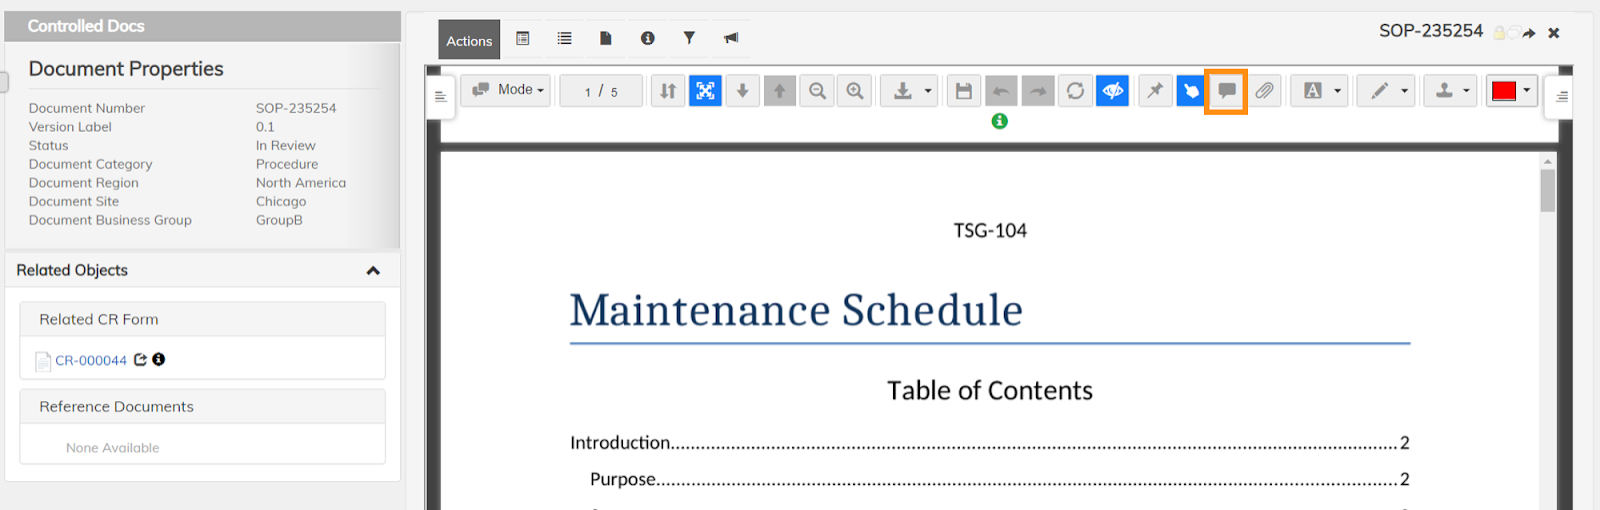
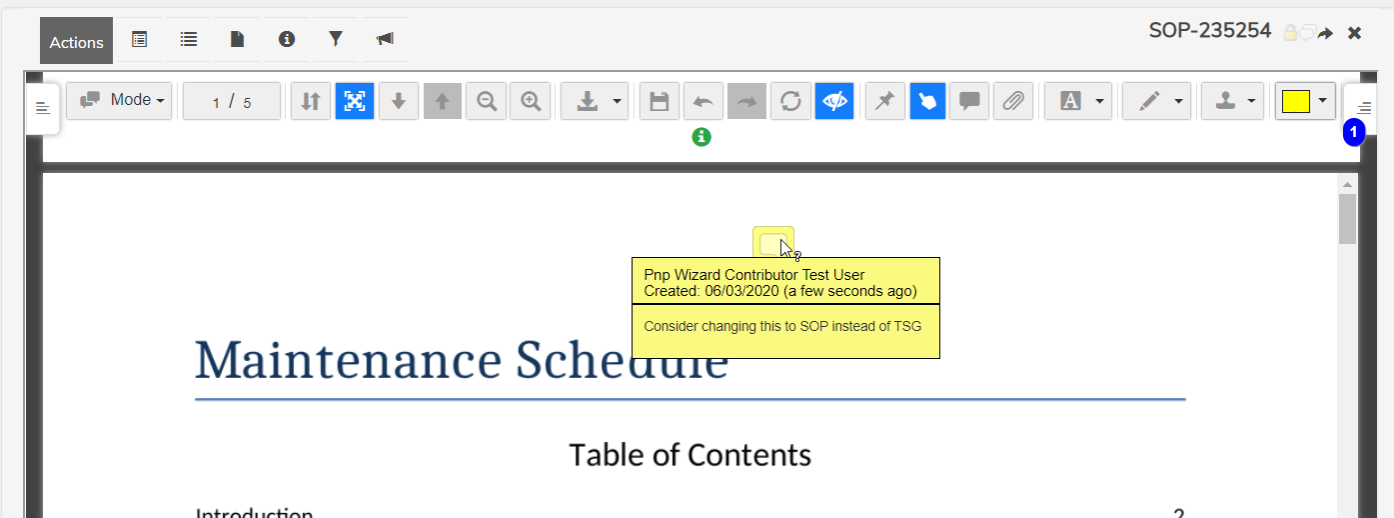
Select the sticky note annotation icon highlighted in the above screenshot. The ability to write a comment within the sticky note annotation is available at this moment. Leave a comment by the “TSG-104” saying something like, “Consider changing this to SOP instead of TSG”

Press the OK button. The annotation can be seen hovering over the sticky note icon in the document, like below:
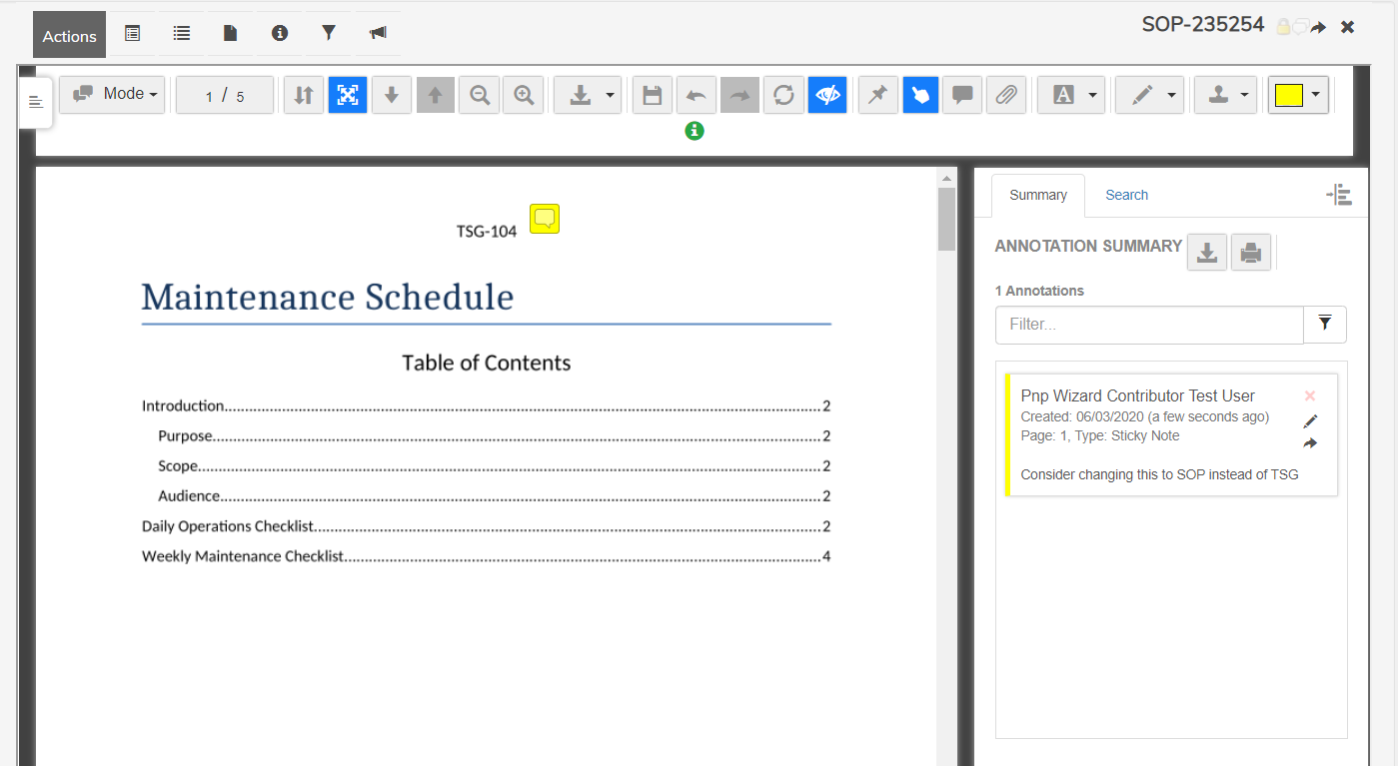
Another way to view annotation a little cleaner is by expanding the right sidebar where the “1” icon is in the above screenshot:
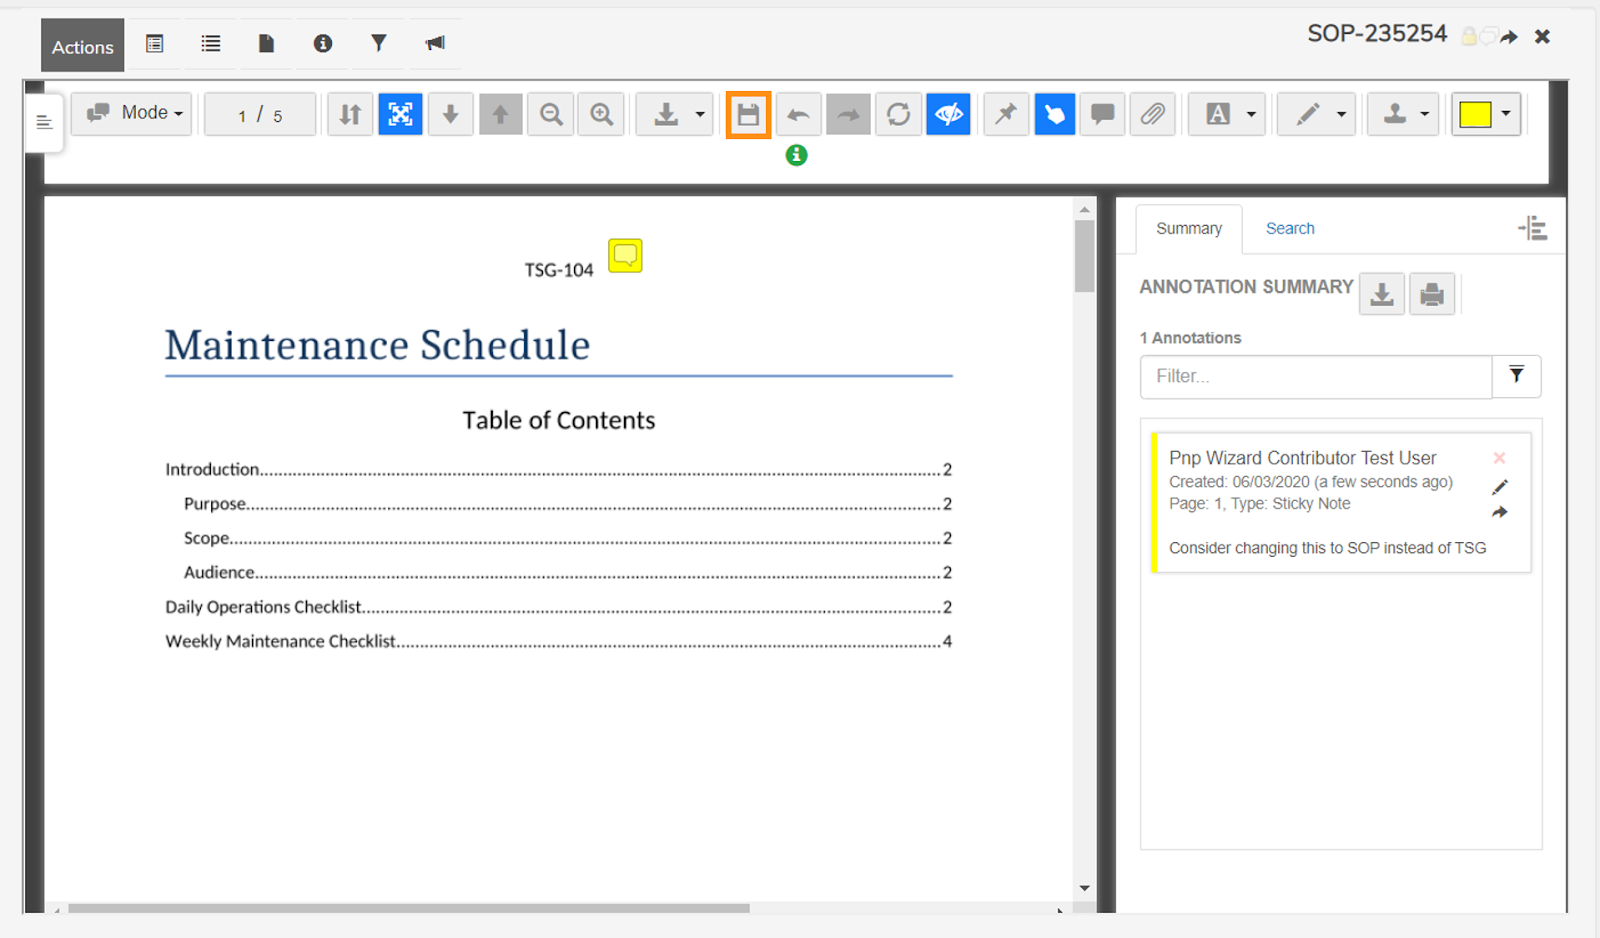
The annotations should be auto-saved but in case they aren’t select the Save icon highlighted in the following screenshot:
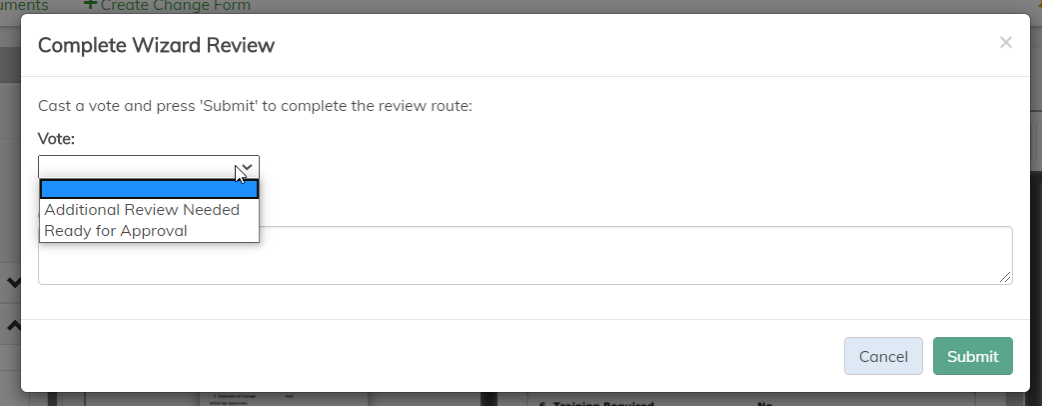
Now navigate back to the form. Select the Complete Wizard Review. Choose the Additional Review Needed under the Vote dropdown. Leave a meaningful comment about the annotation and proposed change. Click Submit.
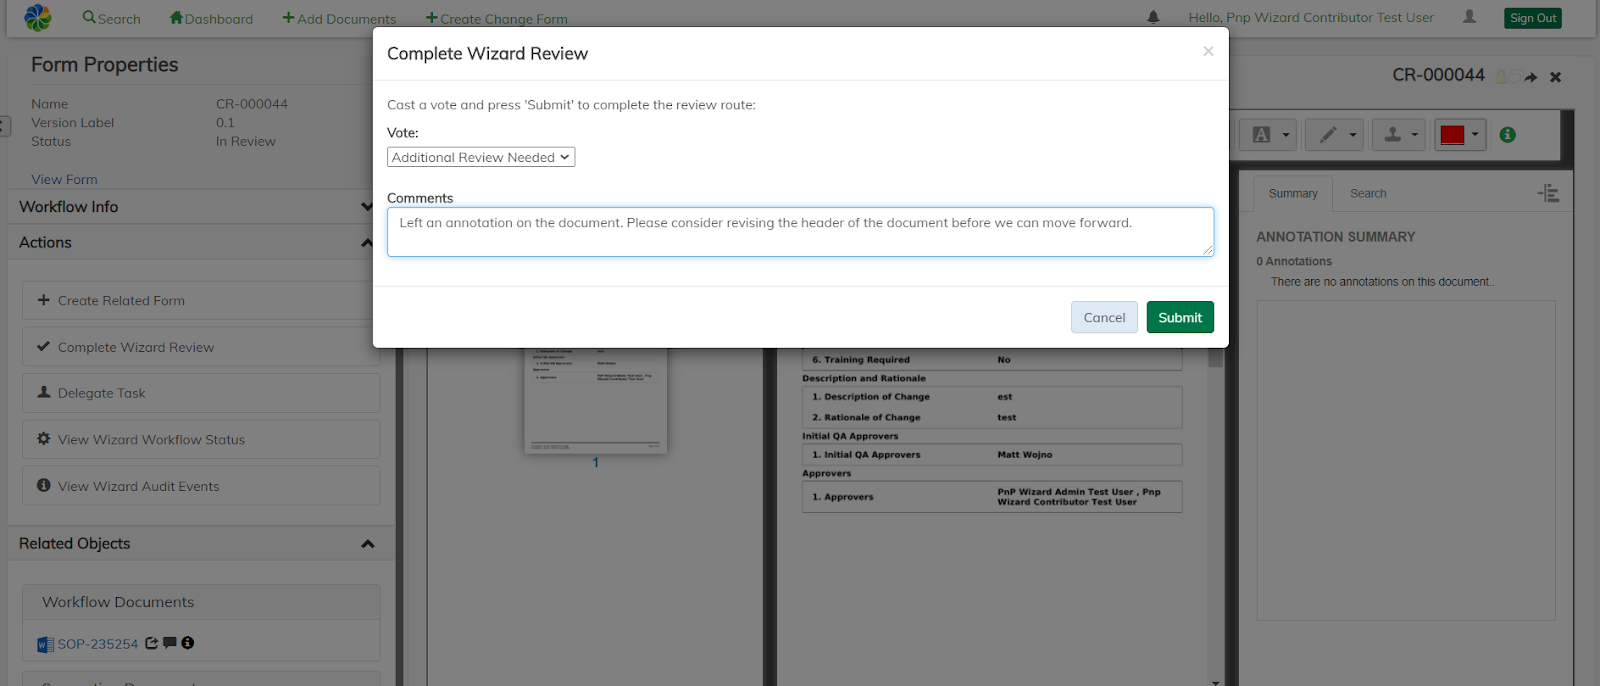
There are two important things to point out in the above screenshot:
- Notice in the bottom left corner the annotation icon next to the workflow document. This is a convenient icon notifying to the user across this application that the document has annotations attached.
- The user action of Additional Review Needed will be audited and sent in an email. The owner of the document can navigate to the document and address the concern that was mentioned.
Important Notes
Even though the above use case was for the Route for Review. The same applies for the Route for Approval. The only differences are the status would be Pending Approval, the task would be Complete Approval where the user would Reject. All other actions would be very similar.
The overall goal is to provide the document/form owner a better way to receive feedback and increase the efficiency of collaboration on a document/form.
Like stated in the intro to this section, AEV has an abundance of use cases it can handle. Please refer to AEV’s specific documentation walking through those use cases. This section was to provide a couple use cases that AEV can help in the PnP scenario.
Create Form and Attach Document
The task of creating a form and attaching documents will be a crucial action for a user to carry out within the PnP scenario. Currently, there are a couple different combinations and ways to Create a Form and or attach a document or multiple documents to a form. These are described below. See “Create Change Form” action description for more details.
Create a Form Without Document Attached
Sometimes a form is needed without any document attached. To achieve this scenario, the user can select the header action Create Change Form:
When the form has been created notice under the “Related Objects” section that there are no workflow documents attached (ignore Supporting Documents that is something different):
Create a Form With Document Attached
A typical use case within the PnP scenario could be when a form needs to be created with one document attached to it.
To start, navigate to a document and click Create Change Form button pictured below.
Note: the document should not be attached to another form. If it is, there is the ability to version the document then attach to a form (only if that use case makes sense if your instance should you do that)
After the form is filled out and created, the workflow document should be seen under the Related Objects section. Once the form is taken through the various workflow routes the document will act accordingly (See “Route for Review” or “Route for Approval”)
Create a Form With Multiple Documents Attached
There could be a time when multiple documents are required to be attached and routed in a form. To achieve this first follow the steps in the “Create a Form Without Document Attached” section.
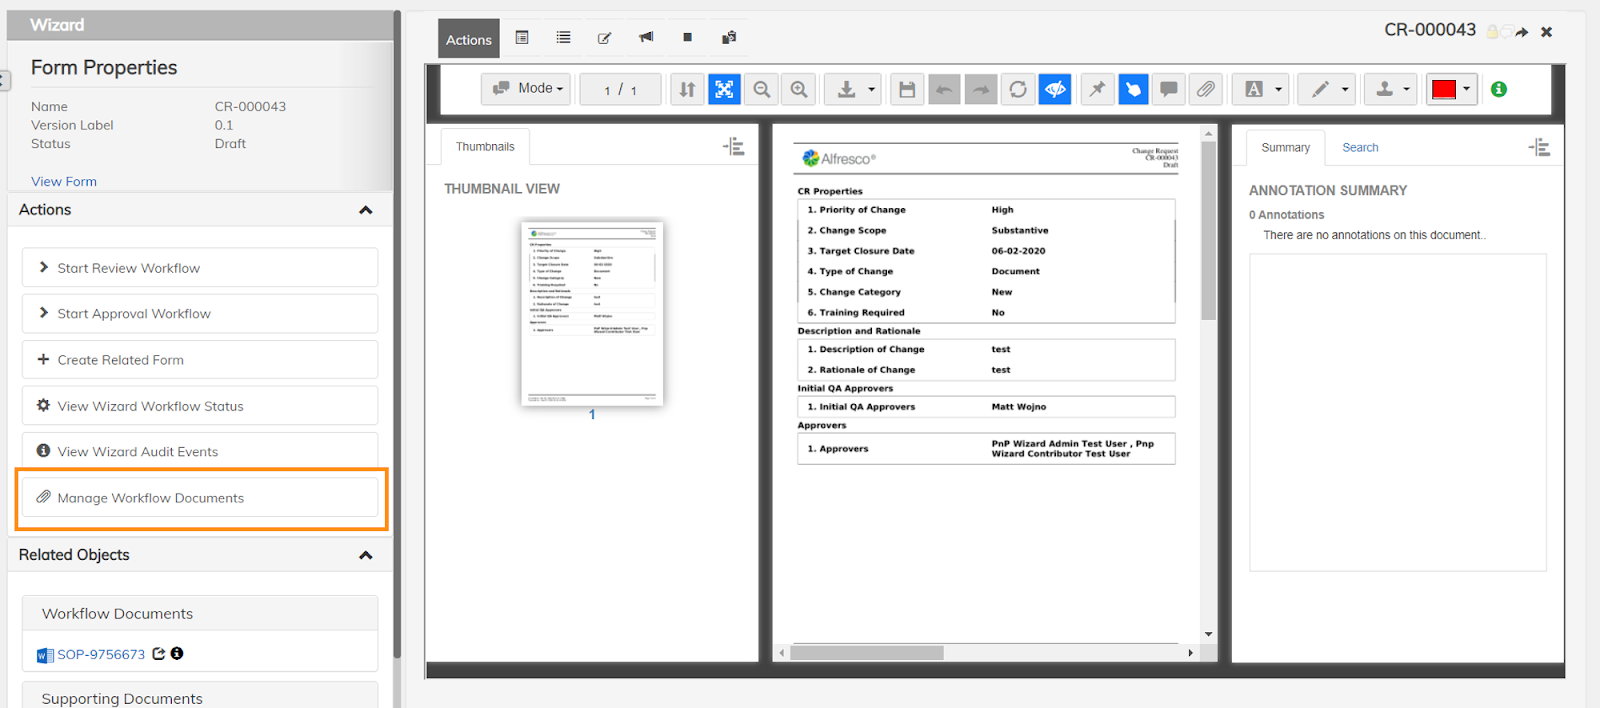
When the screen looks like above, go ahead and click on the Manage Workflow Documents button. See “Manage Workflow Documents” for more details. The action loads in the right-side pane:
Click on the Add Documents tab:
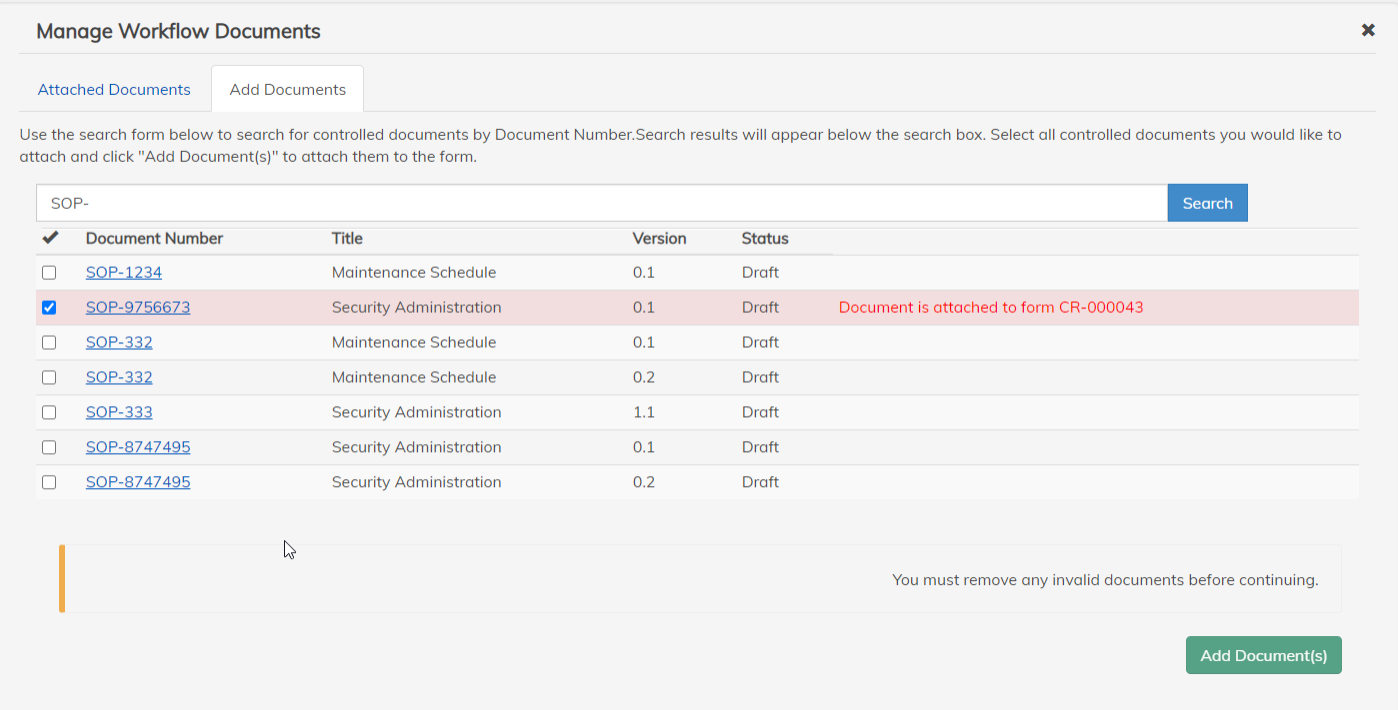
A search bar is provided that requires three characters typed as a minimum to search for documents. There are checks to determine if the document is able to be attached to the form or not. In this case it shows that the SOP-9756673 is already attached to the current form, therefore, cannot be attached again.
The form should now have multiple documents attached and can be seen in the Attached Documents section. In addition, the Related Objects area shows both workflow documents attached.
Route for Review
A form with or without documents attached to it often needs to be confirmed by selected approvers to make sure all the items are valid. See “Start Review Workflow” section for more details.
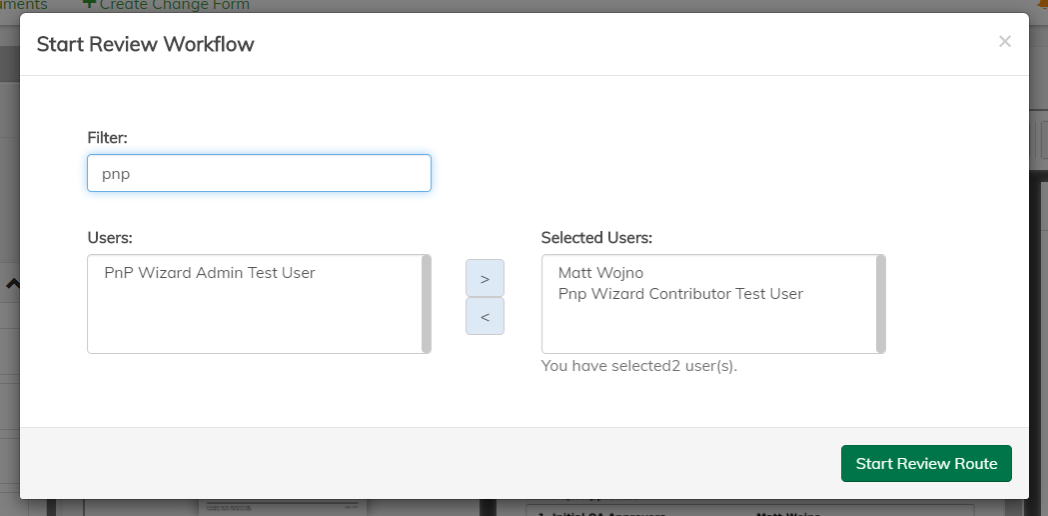
The route for review was designed to select user(s) to be recipients of these review workflow tasks. The ability to filter users can be seen in the below screenshot, as two users are selected to receive the review workflow tasks. Click Start Review Route button to start workflow:
Note: The users shown are within different permission roles within the application. To clarify, the review route isn’t designated for a particular permission role and can have a different assortment of users.
The screenshot shows what the screen of a user with a review workflow task should look like at this moment. More specifically, the Complete Wizard Review should have appeared. Go ahead and click that button.
Find Review Task
There are three ways a user can be notified and navigate to their approval workflow task:
-
An email is sent out to the user’s email address.
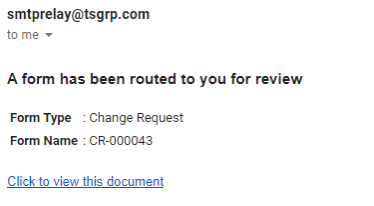
-
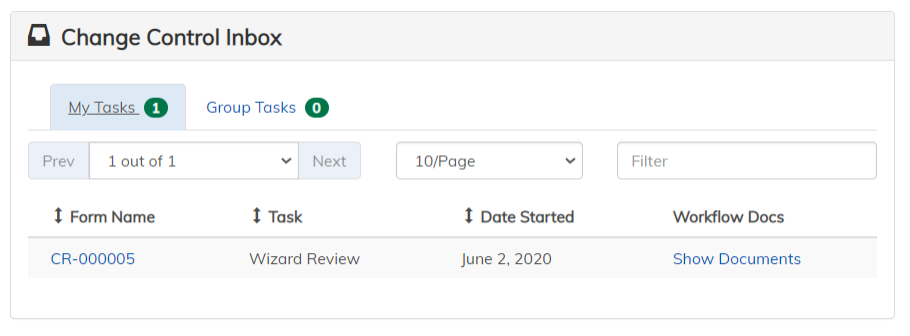
The Change Control Inbox is a collection of all the users tasks as well as group tasks (tasks assigned to the group the user is within). Clicking on the Form Name will bring the user to the form to view the review task.
Note: that the Workflow Docs can be clicked to view this form’s document associations.
-
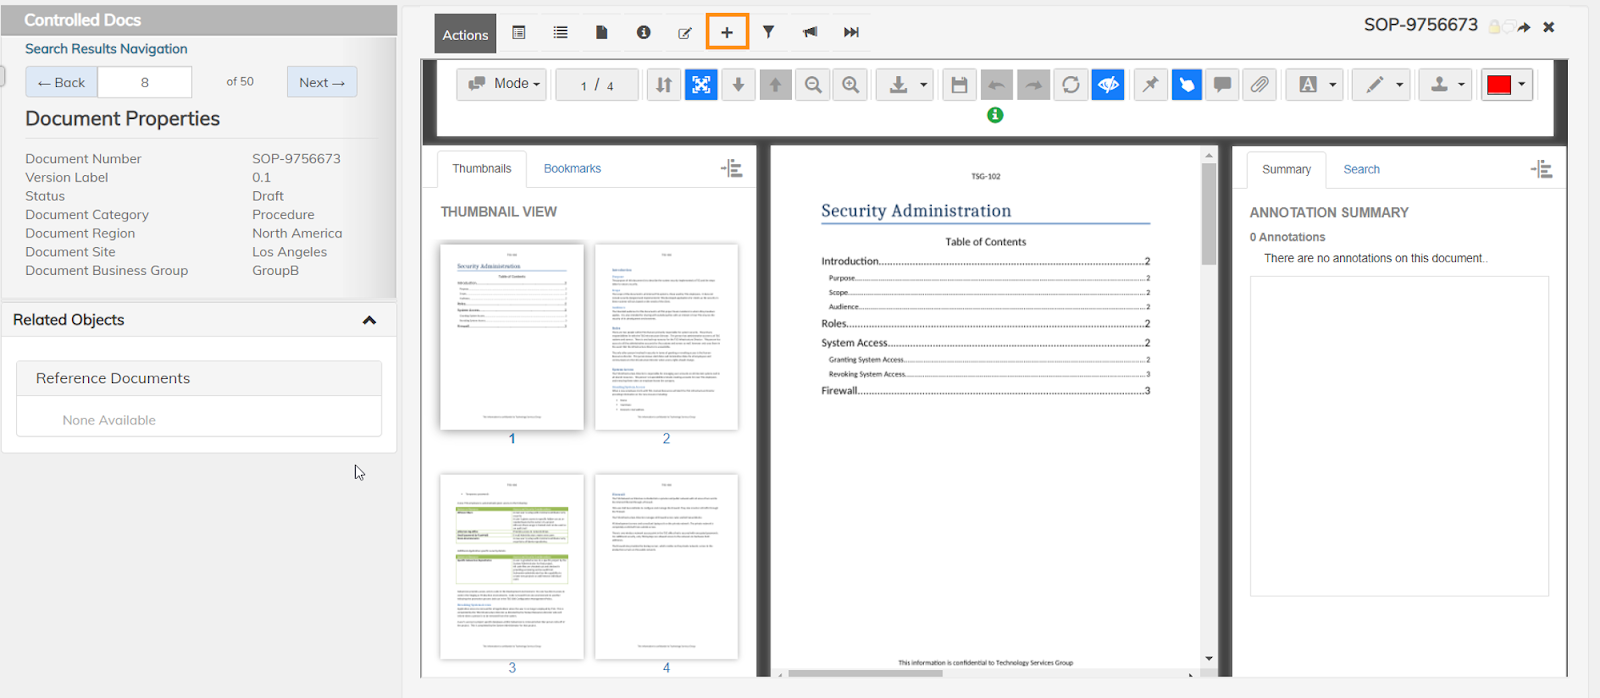
The user can manually search for the document or form within Search to navigate to the task. See “Search” section for more information.
a) Search for the document:
- Choose the Controlled Docs option from the top dropdown and input any information in the fields to narrow the search.
- Select the document from the search results on the right-hand side to load the document.
- Click on the form’s link under the Related CR Form section to be redirected to the form.

b). Search for the form
- Choose the Change Control option from the top dropdown and input any information in the fields to narrow the search.
- Select the form from the search results on the right side to navigate to the form.
Complete Review Task
At this point there are two decisions the user with the review workflow task can make:
-
Mark as Ready for Approval, signifying everything looks good to move toward routing for approval.
If this choice is selected by all recipients, the workflow will be completed and the “Route for Approval” can be initiated.
-
Mark as Additional Review Needed, signifying that there are issues or revisions that still need to be made before routing for approval.
If this choice is selected, the review route will be aborted so the appropriate changes can be made to the document.
Important Notes for Routing for Review
The user can input comments describing their above choice of action in the textbox.
An email will be sent notifying about the completion of the task.
An audit trail entry will be created for the result of the task (See “Audit Trail” section for more information).
Route for Approval
A form and any documents attached (if any) that are ready to be approved by the selected recipients within the form can be started by clicking the Start Approval Workflow.
Upon starting the approval route, the tasks are sent out to the recipients in the first approval role. In the example case below there are 2 roles: Initial QA Approvers and Approvers.
Find Approval Task
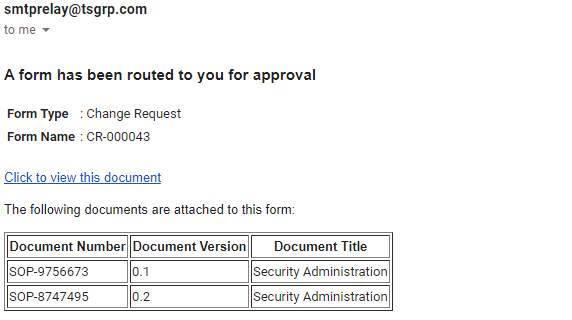
There are three ways a user can be notified and navigate to their approval workflow task:
-
An email is sent out to the user’s email address.
 )
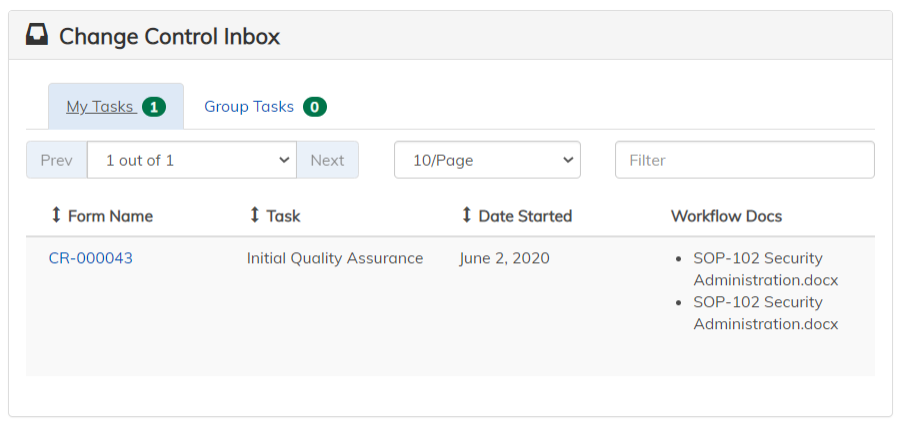
) -
The Change Control Inbox is a collection of all the users tasks as well as group tasks (tasks assigned to the group the user is within). Clicking on the Form Name will bring the user to the form to view the task.
Note that the Workflow Docs can be clicked to view this form’s document associations.
-
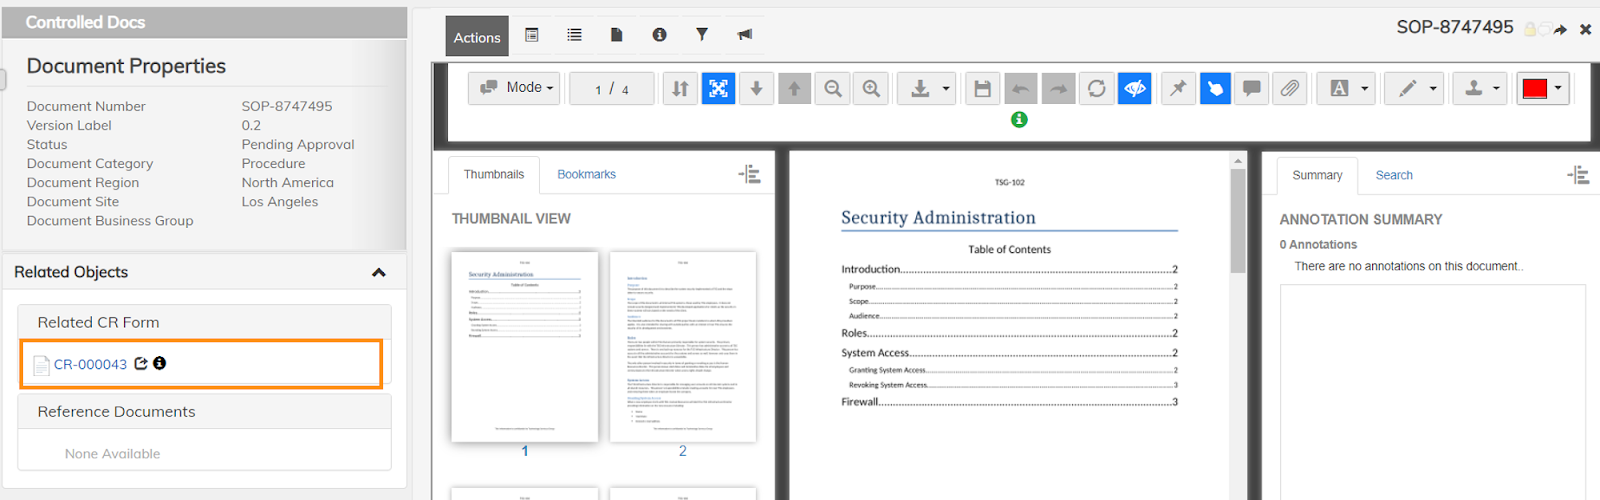
The user can manually search for the document or form within Search to navigate to the task. See Search section for more information. Search for the document:
- Choose the Controlled Docs option from the top dropdown and input any information in the fields to narrow the search.
- Select the document from the search results on the right-hand side to load the document.
- Click on the form’s link under the Related CR Form section to be redirected to the form.
Search for the form
- Choose the Change Control option from the top dropdown and input any information in the fields to narrow the search.
- Select the form from the search results on the right side to navigate to the form.
Complete Approval Task
Now that the approval task can be found. The user should see they have a visible action called Complete Approval (See “Complete Approval” section for more information).

At this point there are two decisions the user with the approval workflow task can make:
-
Approve: if the user selects this option, the workflow will proceed to the next role if there is one. If there isn’t a role, the approval route will complete. Emails and an audit entry will take place upon approval.
-
Reject: if the user selects this option, the workflow will be aborted and all tasks will be canceled. Emails and an audit entry will take place upon rejection.
Once all approval tasks are approved the form and any attached documents transition to the Approved lifecycle status/state. The version label is also updated to the next major version (e.g. 0.1 Draft -> 1.0 Approved).

Important Notes for Routing for Approval
Throughout this test example, users in different permission groups were used. The permission group has an affect on how much the specific user can accomplish.
- One example would be the Reassign Task action is only available to be executed by users who are administrators.
- If there is a specific question about the permissions pertaining to a certain action please refer to the following documentation:
- Admin Guide : if your user is an admin, the admin section displays the particular conditions associated with each action.
- PnP Specific Actions or Commonly Used Actions: this section will detail the action more in depth and will touch on permissions when it is relevant to do so.
- Notable actions that are beneficial throughout the approval workflow:
- Reassign Task
- Delegate Task
- View Wizard Wizard Workflow Status
- View Wizard Audit Events
- Remember the approval workflow can be cancelled at any moment. The user has to be either the form owner or an administrator to cancel, though. See “Cancel Workflow” for more details.
- Emails are sent out throughout the workflow to the various users who are recipients of tasks.
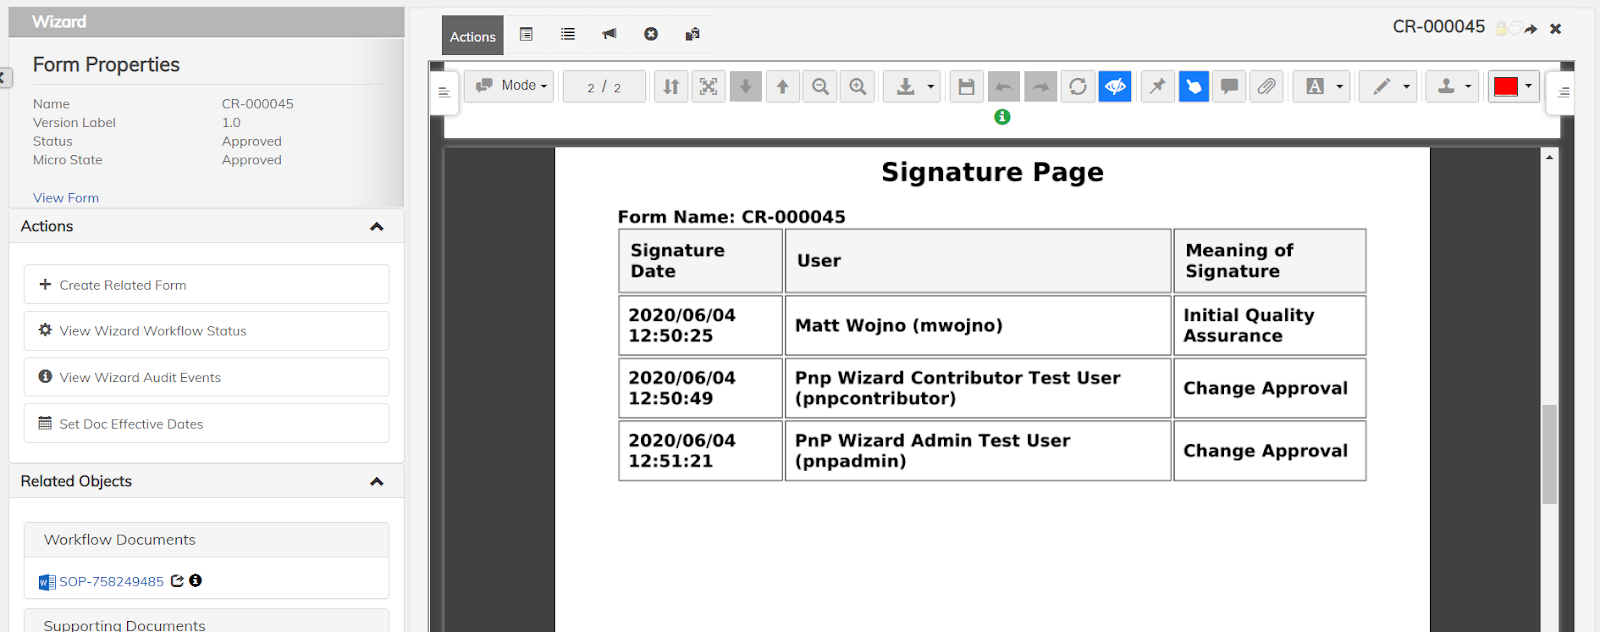
Signature Pages
The signature page is a great additional resource to the “audit trail” that provides information about the major wizard events that happen.
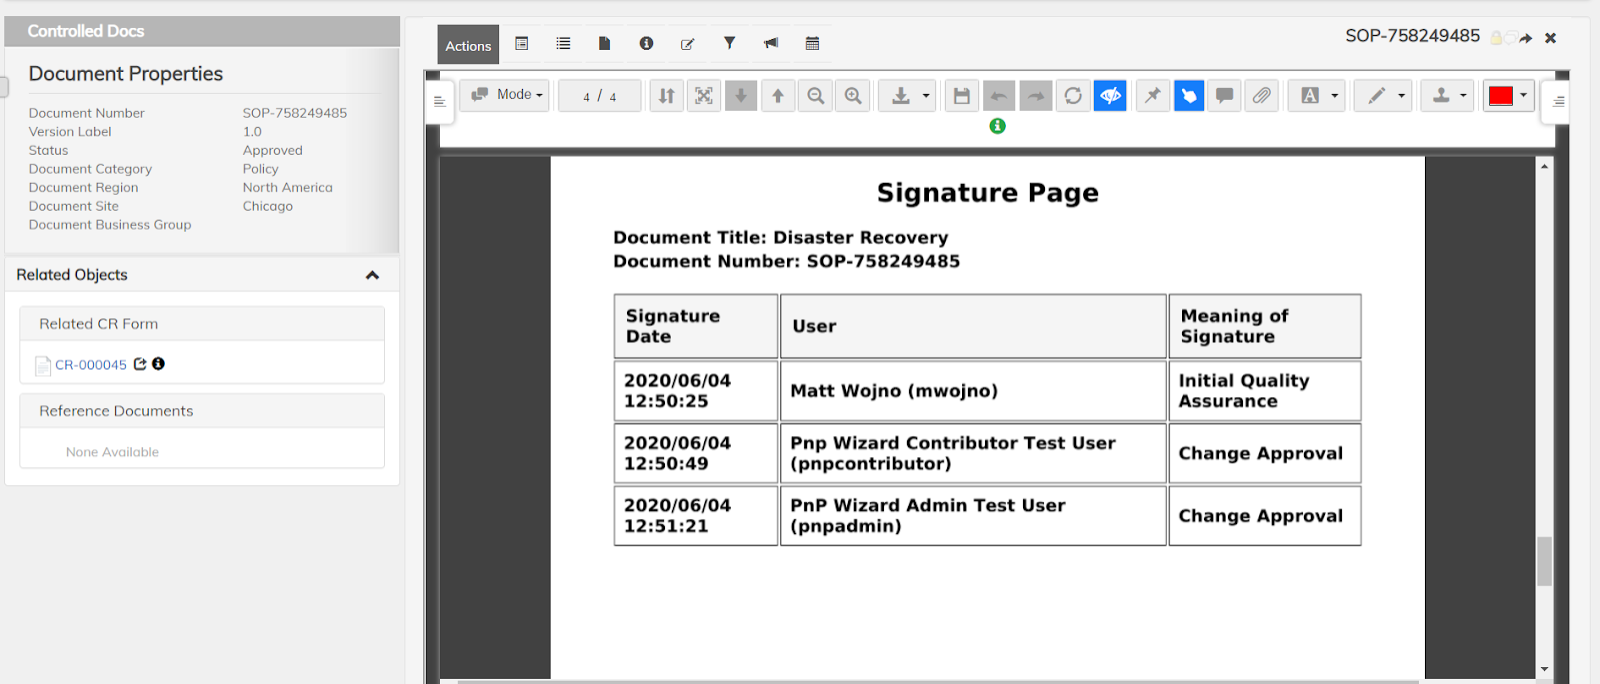
After each approval task is completed for each assigned user, a signature entry will be made in the signature page for the document as well as the form.
The form’s signature page should look similar to the following screenshot:
The document’s signature page should look similar to the following screenshot:
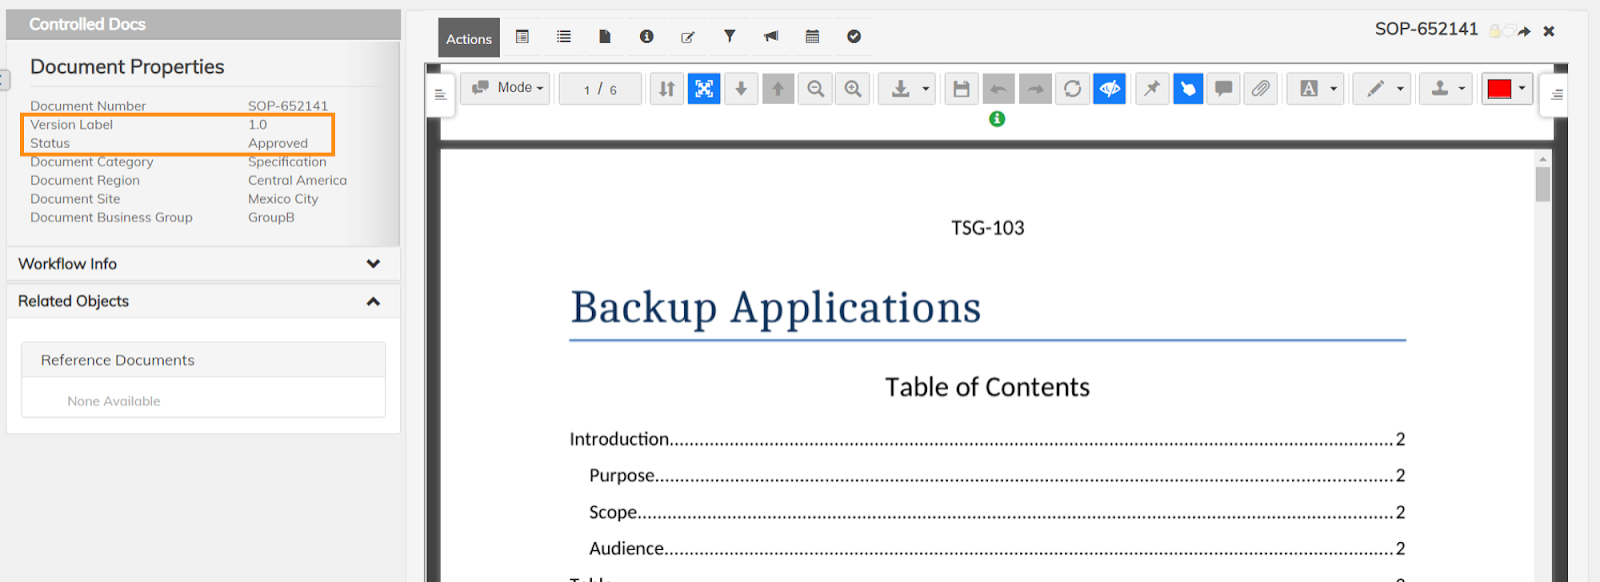
Power Promote
There are some instances where the traditional workflow for a document does not fit the particular business need. One of those instances is the approval of a document. A document can be power promoted to the approval lifecycle state/status independent from a workflow. See “Power Promote” for more information.
- Navigate to a document that is within the Draft lifecycle state and make sure the document is not attached to any workflows already.
- Click on the fast-forward icon
 labeled Power Promote.

Note: Any contributor/editor user will, by default, be able to execute the Power Promote action. However, this action’s visibility can be configured to only allow a certain group and users.
- Execute the power promote action by inputting the credentials of the user that has selected this action.
- Notice after the action has completed the version label should be the next major version (e.g. 0.1 -> 1.0) and the status is now Approved.
To Be Read (TBR) Attestation Workflow
The TBR Attestation Workflow is a way for additional users to attest to the changes made to the now Approved document.
If you have not been following along through the use case scenarios in order, then please review the “Upload New Document” section. During that section, the TBR Groups property on the uploaded document was highlighted. This property needs to be set before the document reaches the Approved state.
Once a document gets promoted to the Approved state, no matter if it went through “Route for Approval” or “Power Promote”, the TBR attestation workflow tasks are sent to the users within the group(s) in that property on the document.
Find TBR Task
There are three ways to find the TBR workflow tasks:
- An email is sent out to the user who is in the TBR Group assigned on the property of the document:

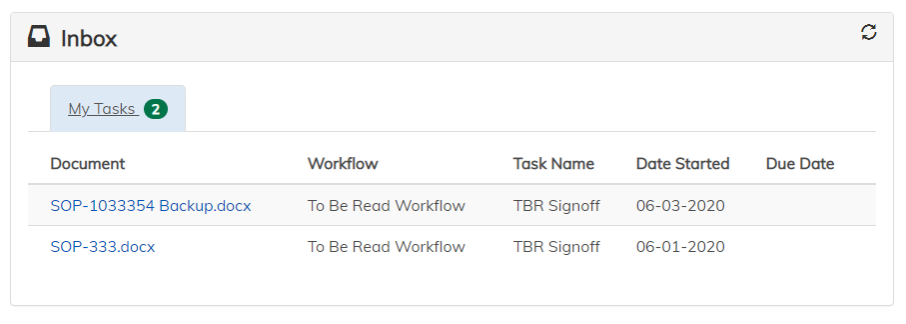
- The Inbox on the Dashboard. The Inbox is a collection of the TBR workflow tasks that the currently logged in user has to complete. Following the link will direct the user to the document to complete the TBR workflow task:
-
The user can manually search for the document within Search to navigate to the task. See “Search” for more information:
Search for the document:
- Choose the Controlled Docs option from the top dropdown and input any information in the fields to narrow the search.
- Select the document from the search results on the right-hand side to load the document.
Complete TBR Task
The user should see the document and the Complete Attestation icon ![]() . Click on it.
. Click on it.
A table full of details about the workflow are provided to the user. If everything looks good and the user is ready to attest to the changes, click Complete Task.
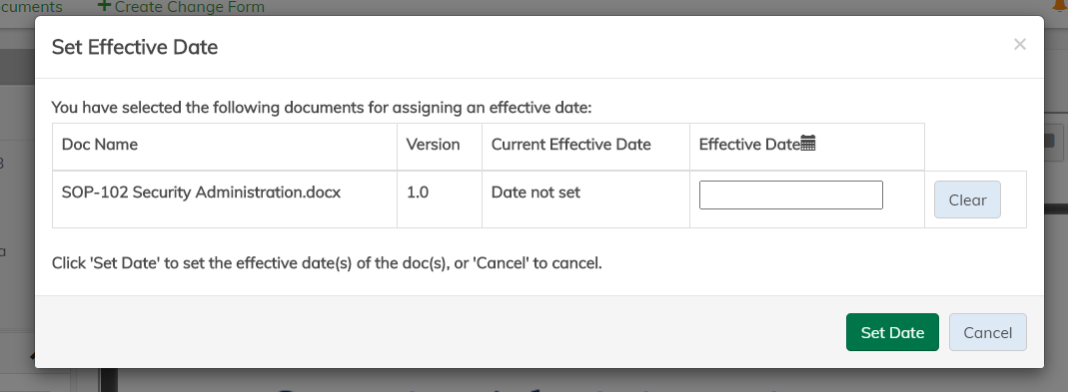
Set Effective Date
The next step in finalizing a document and its contents is to make sure the document transitions from the Approved to the Effective lifecycle state.
Setting the Effective Date signifies the date in which the document should reach Effective status. This will give enough time to decide if there are any more changes that need to be made before the document goes into the final (production) state of Effective.
Once a document has been Approved, there are two ways to Set Effective Date:
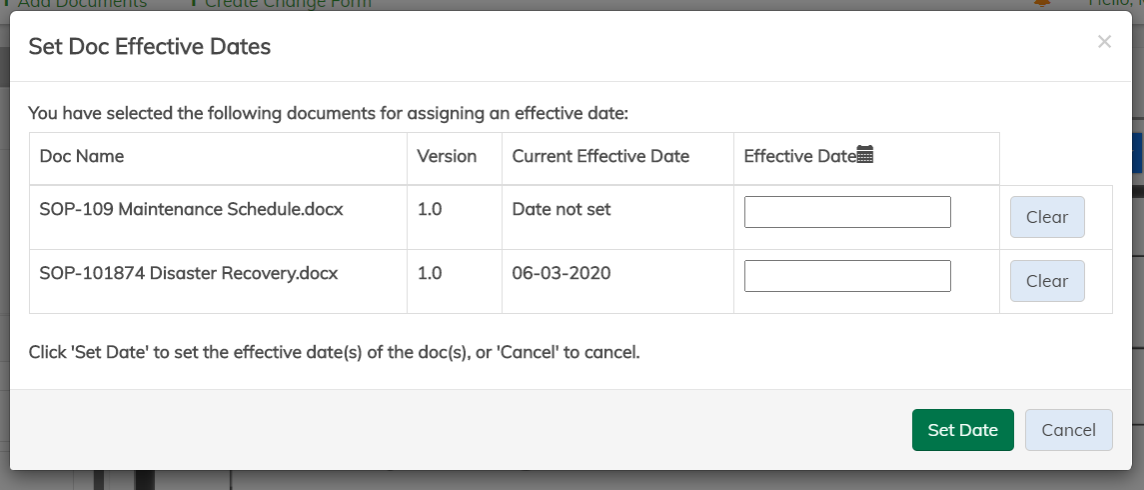
- Setting the effective document of multiple documents on the form they are attached:
- Navigate to the form where the document(s) are attached. Click on the Set Doc Effective Dates.
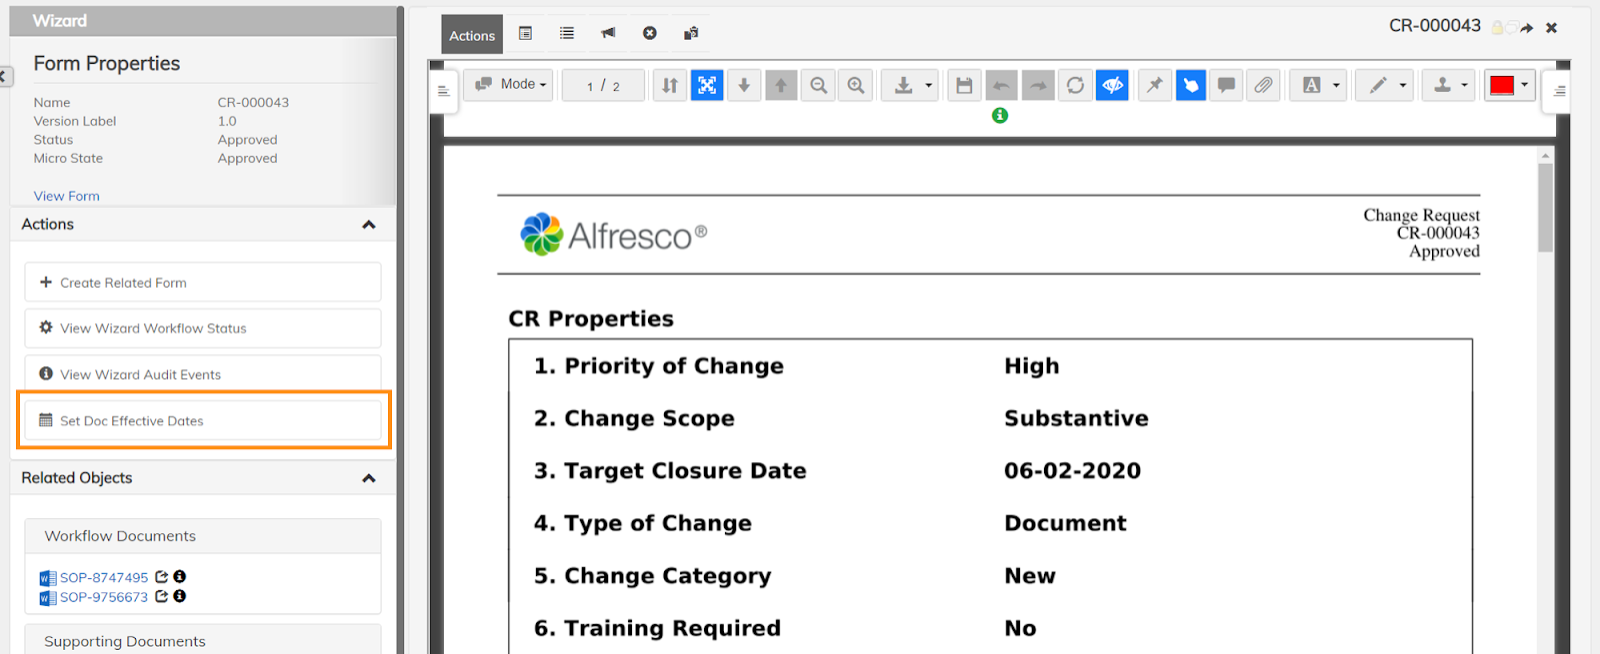
- The two documents attached to the form show up in the table shown below. Go ahead and set the Effective Date to the appropriate value.
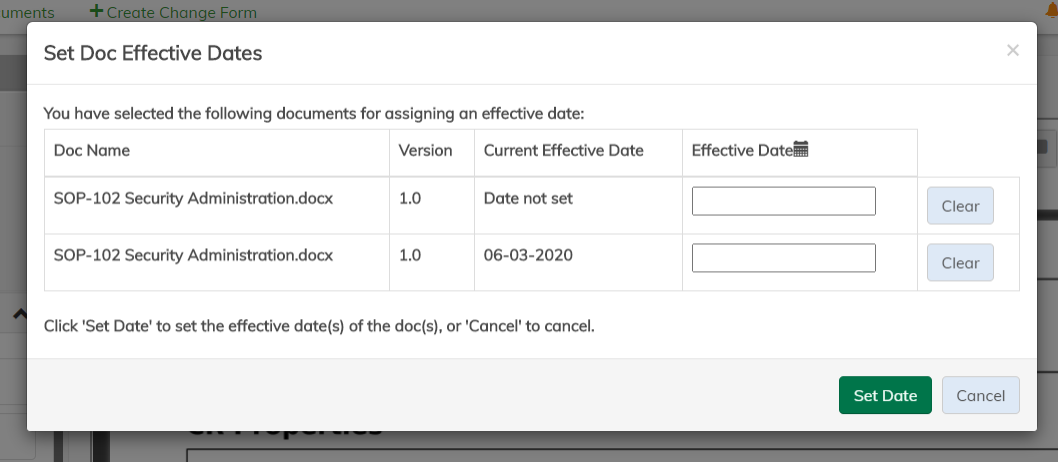
Note: the action was run before this screenshot to show what it looks when a document’s effective date is set.
- Navigate to the form where the document(s) are attached. Click on the Set Doc Effective Dates.
- Setting the effective date of a single document while viewing the document:
- Navigate to the document whose effective date needs to be set and click on the Set Effective Date icon
 .
. - The action will show only the document that the user is viewing in the table, unlike above where it should multiple documents because it was run from a form. Go ahead and set the Effective Date to the appropriate value.
- Navigate to the document whose effective date needs to be set and click on the Set Effective Date icon
Make Docs Effective Scheduled Job
At this moment the effective dates are set and no more action needs to be taken by the user. What happens next is a scheduled job that runs in the background will pick up any Effective documents that fit its criteria and promote them to Effective.
The criteria is the following:
- Approved status aspect
- Effective Date is set to the day the job runs
- Does not have checkedOut aspect
- Does not have workingCopy aspect
The job is configured to run at the top of every hour.
Periodic Review
A document in its final state (i.e. Effective) can be in circulation and used for many years. To make sure the document is still relevant, a periodic review date is set on the document upon becoming Effective.
The periodic review date, by default, is set two years from the time it becomes Effective.
Initiating Periodic Review Workflow
A scheduled job that runs in the background will determine based on the following criteria if the periodic review workflow should be executed:
- Document has Effective status
- Within 90 days of the periodic review date
- Document has inPeriodicReview aspect
- Document doesn’t have checkedOut aspect
- Document doesn’t have workingCopy aspect
The scheduled job is configured to run every night at 12:30 AM.
Find Periodic Review Workflow Task
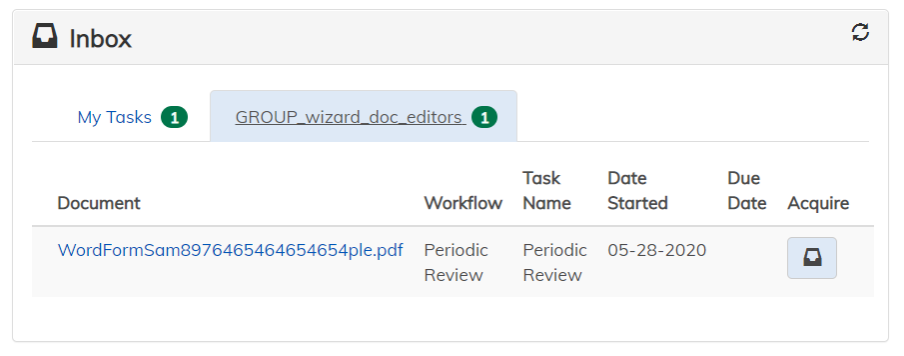
Let’s assume the scheduled job has run and the periodic review workflow tasks have been sent out to the GROUP_wizard_doc_editors (this group is configured as the default).
There are three ways to find the periodic review workflow task:
- An email will be sent out to the configured email address for this particular scheduled job under the property
wizard.periodic.review.default.email. Consult with the Administrator to configure this property. - The Inbox will have a collection of tasks assigned to the user that refers to documents. A group task tab will appear with the group name and all tasks associated with it that can be acquired.
- Click on the Acquire to acquire the task for the periodic review workflow task. This will direct the task into the My Tasks section. The group task tab will disappear, if there are no more group tasks for that particular group.
- The user will click on the document link to be brought to the document to “Complete the Periodic Review Workflow Task”
-
The user can manually search for the document within Search to navigate to the task. See “Search” for more information.
Search for the document
- Choose the Controlled Docs option from the top dropdown and input any information in the fields to narrow the search.
- Select the document from the search results on the right-hand side to load the document.
Complete Periodic Review Workflow Task
If the task was acquired in option 2 from above then this step can be skipped. If not, then the Acquire Task action icon should be visible ![]() . Click on it to acquire the task. See “Acquire Task” for more information.
. Click on it to acquire the task. See “Acquire Task” for more information.
Once the periodic review workflow task is acquired the Perform Periodic Review action icon ![]() should be visible. Click on that to perform periodic review.
should be visible. Click on that to perform periodic review.
The user has two options:
- Accept the document as is. The document’s periodic review date will be moved to two years from the time the user completes this periodic review workflow task.
- Do not accept the document as is.
- A rejection comment section will appear where the user can leave their comments about their rejection.
- The document at this point should be made “Obsolete” or revisions should be made to it.
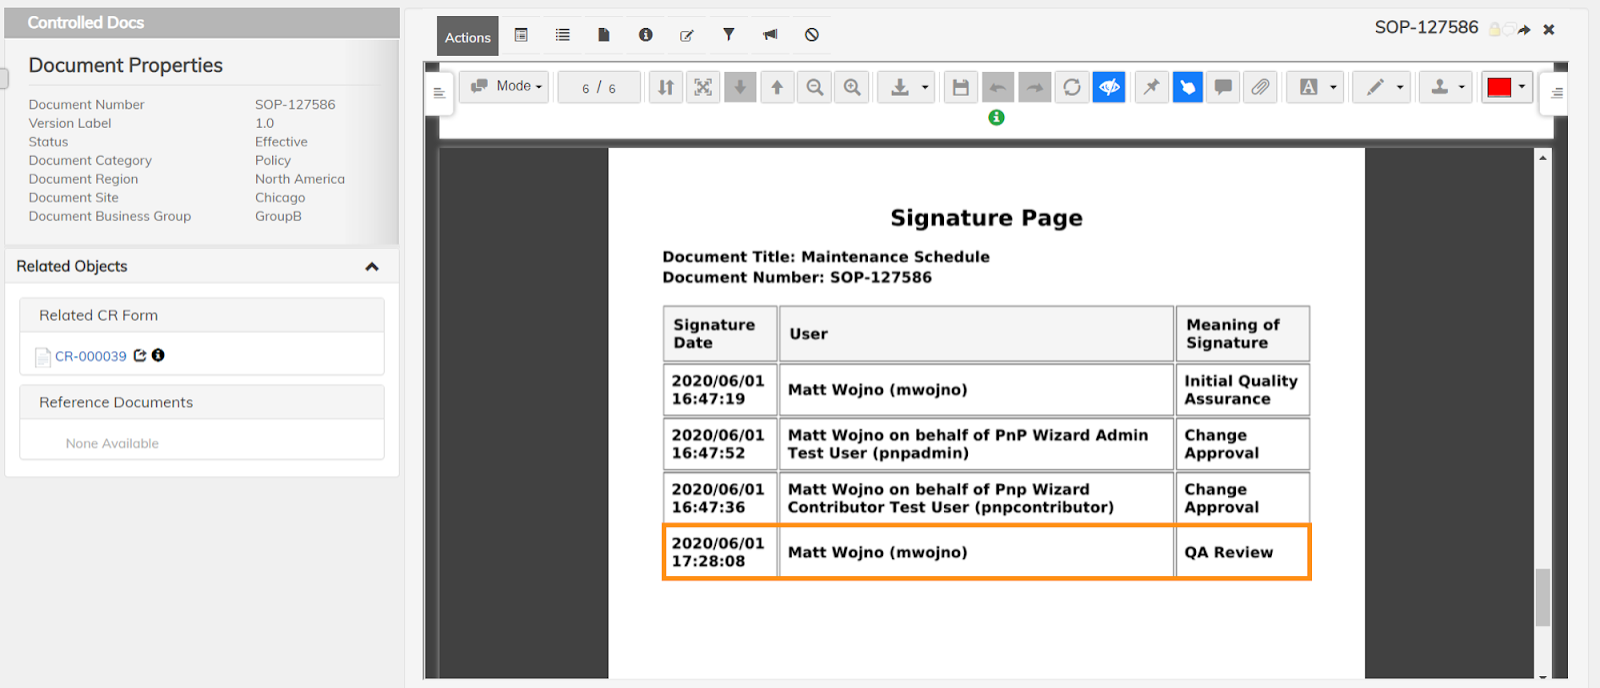
Document Signature Page
The signature page is a great additional resource to the “audit trail” that provides information about the major wizard events that happen.
When the periodic review workflow task is complete, an entry in the document’s signature page will be created. The signature page should be similar to the one in the screenshot below:
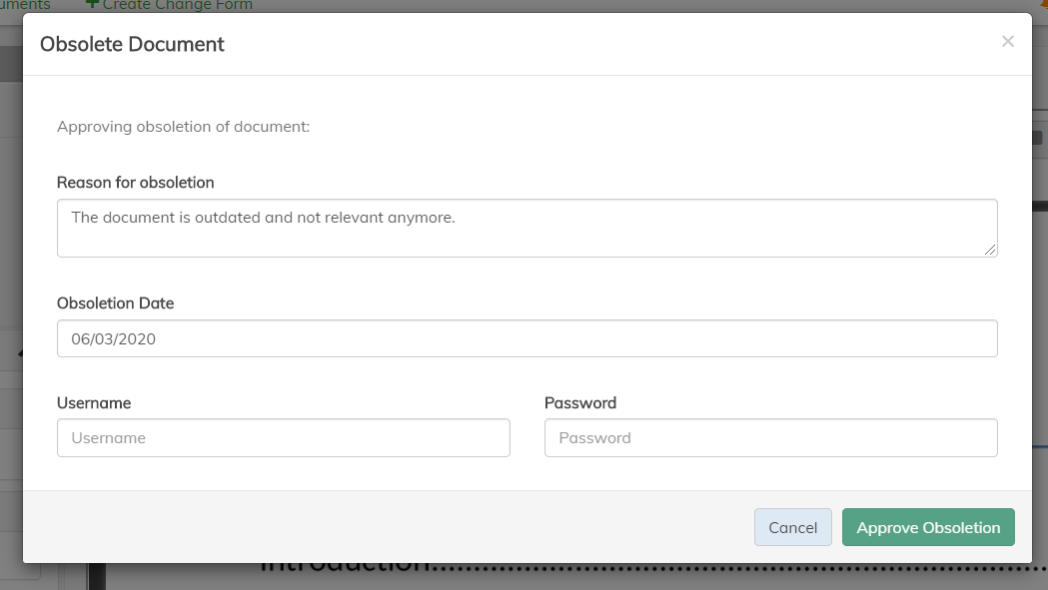
Obsolete Document
For whatever reason, during either the “Periodic Review” or realizing after “Setting the Effective Date”, the document is no longer valid in its current state. The document is then going to be transitioned into the Obsolete lifecycle state. See “Obsolete Document” for more information.
The Obsolete lifecycle state signifies that the document is decommissioned and no longer relevant. The Obsolete date can only be designated when the document is in the Effective (final) state.
Setting the Obsolete Date
Navigate to the Effective document that should become Obsolete and click on the Obsolete Document action icon ![]() .
.
The user will fill out the required inputs on the form to then successfully set the obsoletion date. There is no user action needed once this is completed.
The admin can configure the Obselete Document action to require authentication.
Authentication Required:
Authentication Not Required:
Make Docs Obsolete Scheduled Job
At this moment the obsolete date is set and no more action needs to be taken by the user. What happens next is a scheduled job that runs in the background will pick up any Effective documents that fit its criteria and transition them to the Obsolete lifecycle state.
The criteria is the following:
- Effective status aspect
- Obsolete Date is set to the day the job runs
- Does not have checkedOut aspect
- Does not have workingCopy aspect
The job is configured to run every night at 12 AM.
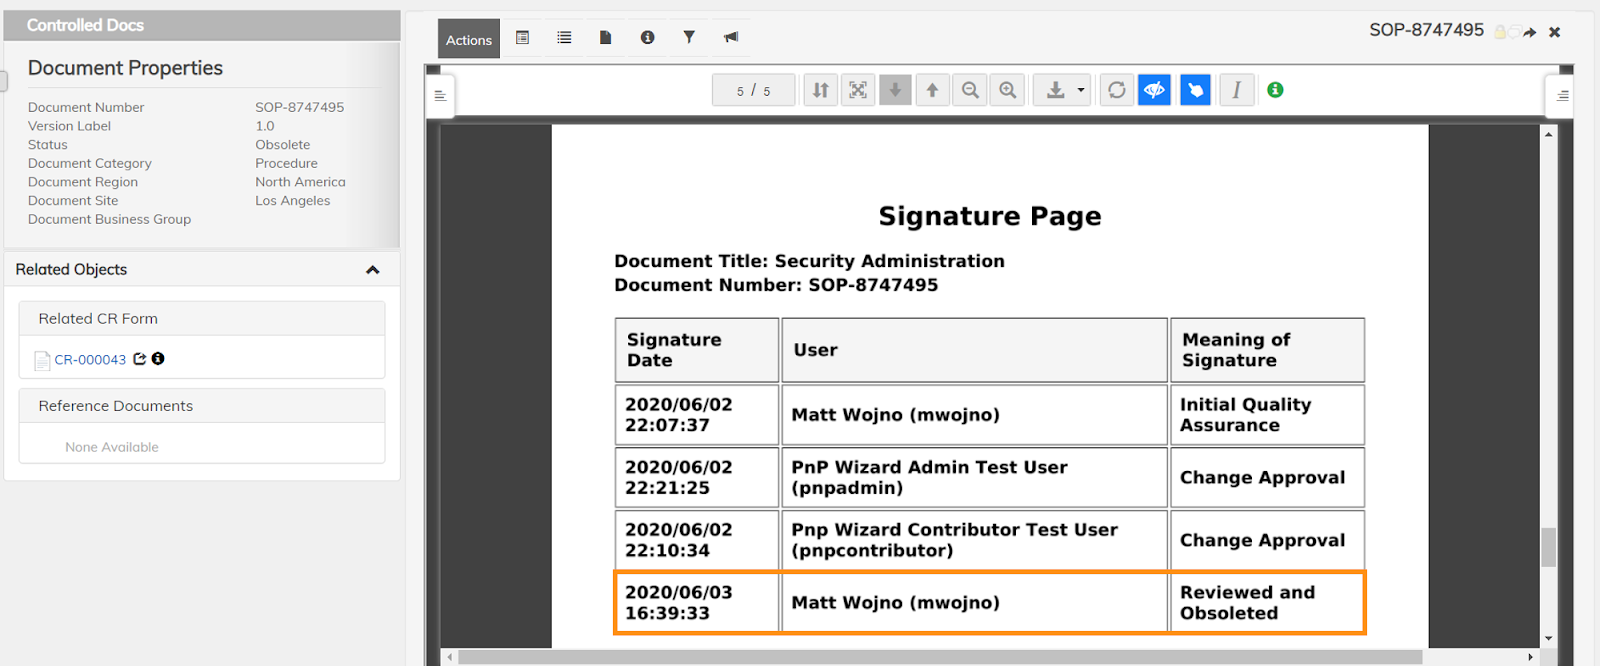
Document Signature Page
The signature page is a great additional resource to the “audit trail” that provides information about the major wizard events that happen. After the document transitions to the Obsolete lifecycle status, the signature page is updated and could look like something below:
Claims Management Solution Features
The Content Accelerator for Claims Management provides:
- A robust and efficient claims content management interface and integration platform to vastly improve access and integration to a variety of content including documents, video and audio files
- Simplified connectivity to any claims data system (ex: Guidewire, Salesforce, Fineos, or custom built) to provide unlimited access from any client data driven system for the synchronization of claims data, a critical indexing component of claims documents.
- A modern platform for additional business intelligence analytics for claims documents.
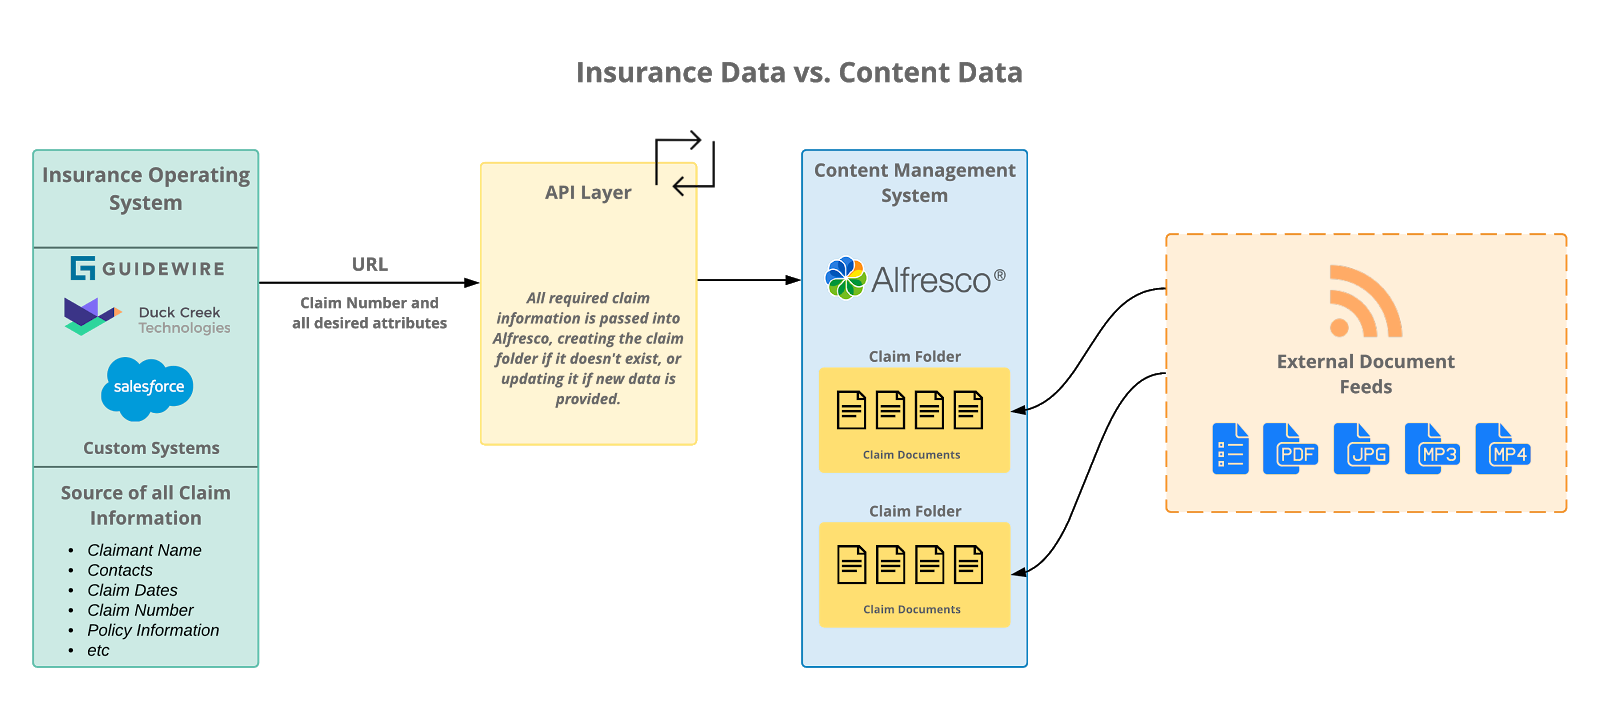
As an integrated solution, the Content Accelerator does not require the replacement of existing data systems, only extensions to “electronic file enable” the claim systems saving a huge amount of rework for data processing and document processing if combined in a single effort. Data such as insured name, policy number and claim number can be passed to the solution when the electronic file system is first accessed, saving critical data entry time, effort and reducing errors.
The below integration point can be used from Guidewire, Duck Creek, Salesforce, or any custom system to allow for integration from these systems to create a claim and launch users directly into the claim folder. A typical integration involves generating a URL link on the existing interface that can be put into an iframe or launch a new tab/window that takes the user directly into the claim folder. It will commonly pass in some key metadata from the claims data system to populate and update the claim info each time it is launched.
Stage
Here you can view all information about a claim, the documents linked to a claim, and perform a variety of actions. The guide below walks through a typical example of a Claim Solution’s Stage and what can be achieved.
Left Sidebar
The left side of the image exhibits the left sidebar. Here, this guide will cover the Claim Informational Panel and the Actions Panel. Please note that clicking on the tab on the left near the top of the panel will minimize the panel, allowing more space for the right side panel.
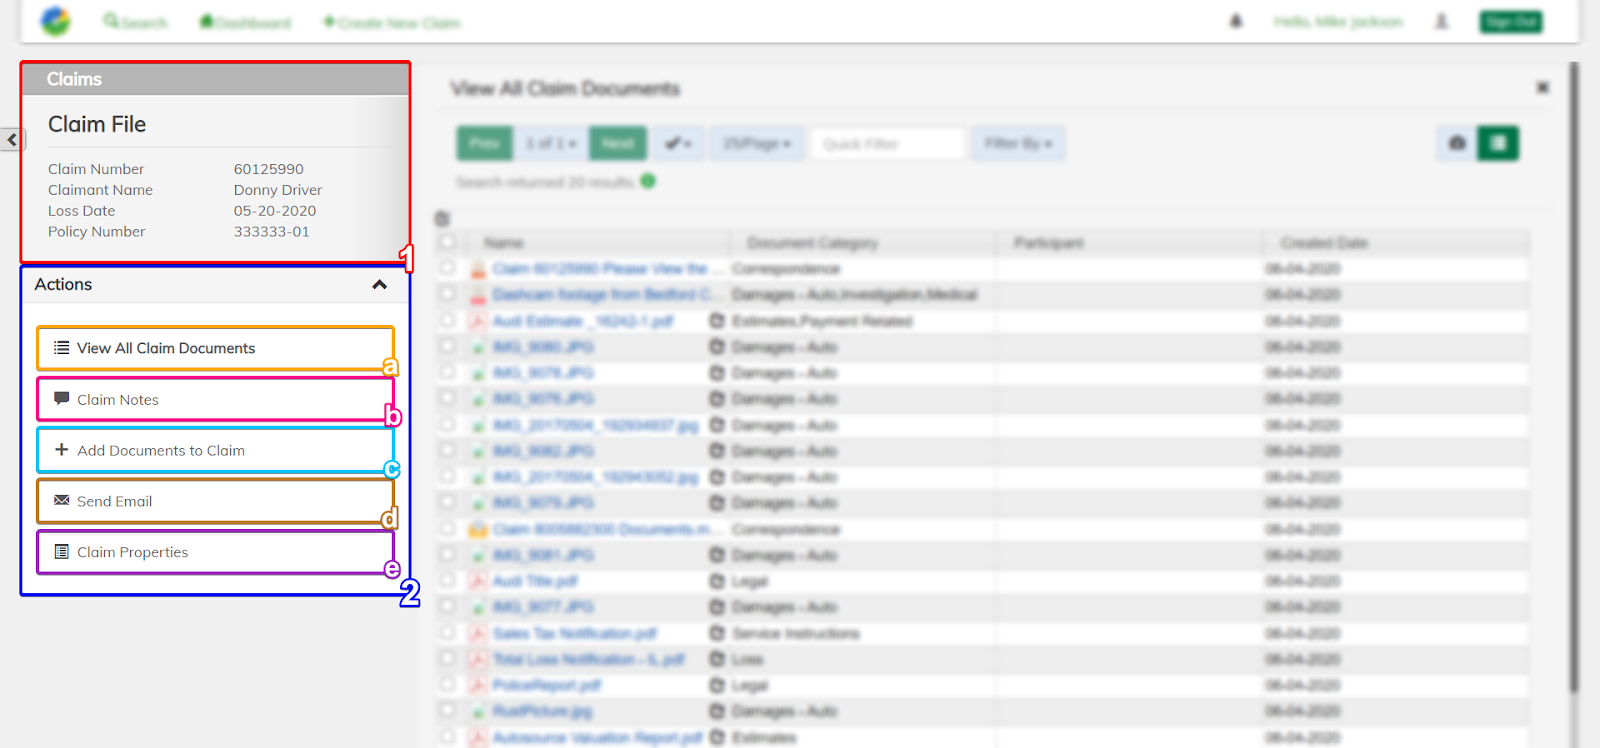
- The red box labeled
1outlines the Claim Informational Panel. The top most panel’s header tells you the type of the current claim folder. Moving down, there is a list of some of the properties from the claim the user is currently viewing. - The dark blue box labeled
2outlines the Actions dropdown panel. Within this dropdown are actions you can perform on this claim folder.- The orange box labeled
aoutlines the View All Claim Documents action. This action allows you to view all the documents within the current claim. Upon launching into a claim, this action is automatically active. - The pink box labeled
boutlines the Claim Notes action. This action is great for tracking user activity within the claim, as well as creating your notes. - The light blue box labeled
coutlines the Add Documents to Claim action. This action allows you to add one or more documents to the claim folder and properties for each of those documents. - The brown box labeled
doutlines the Send Email action. This action allows you to send an email to both internal and external recipients, attach documents found within the claim, and can create a personal note based on custom text after sending. - The purple box labeled
eoutlines the Claim Properties action. This action allows you to view and edit the current properties of the claim folder.
- The orange box labeled
Right Side Panel
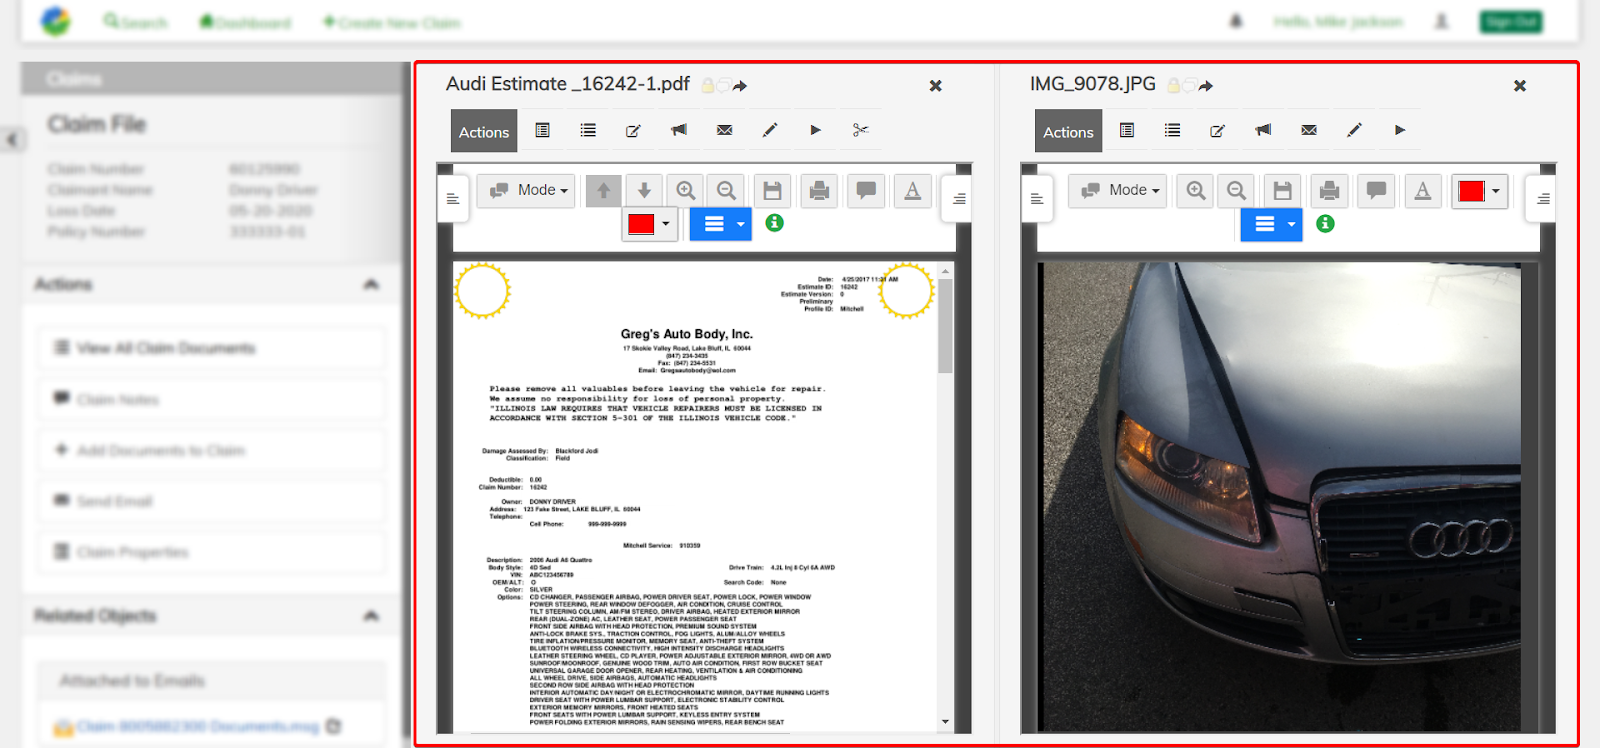
Direct your attention to the right side of the image. The right side panel is the largest area of the Stage. This area can consist of either one or two panes. Either one or both of these panes can be used as a document viewer, which allows you to work on documents side by side. As seen in the initial screenshot of the Stage, this panel can consist of one pane dedicated solely to an action. Additionally, it can be side by side with a document viewer pane. Two action panes cannot be side by side.
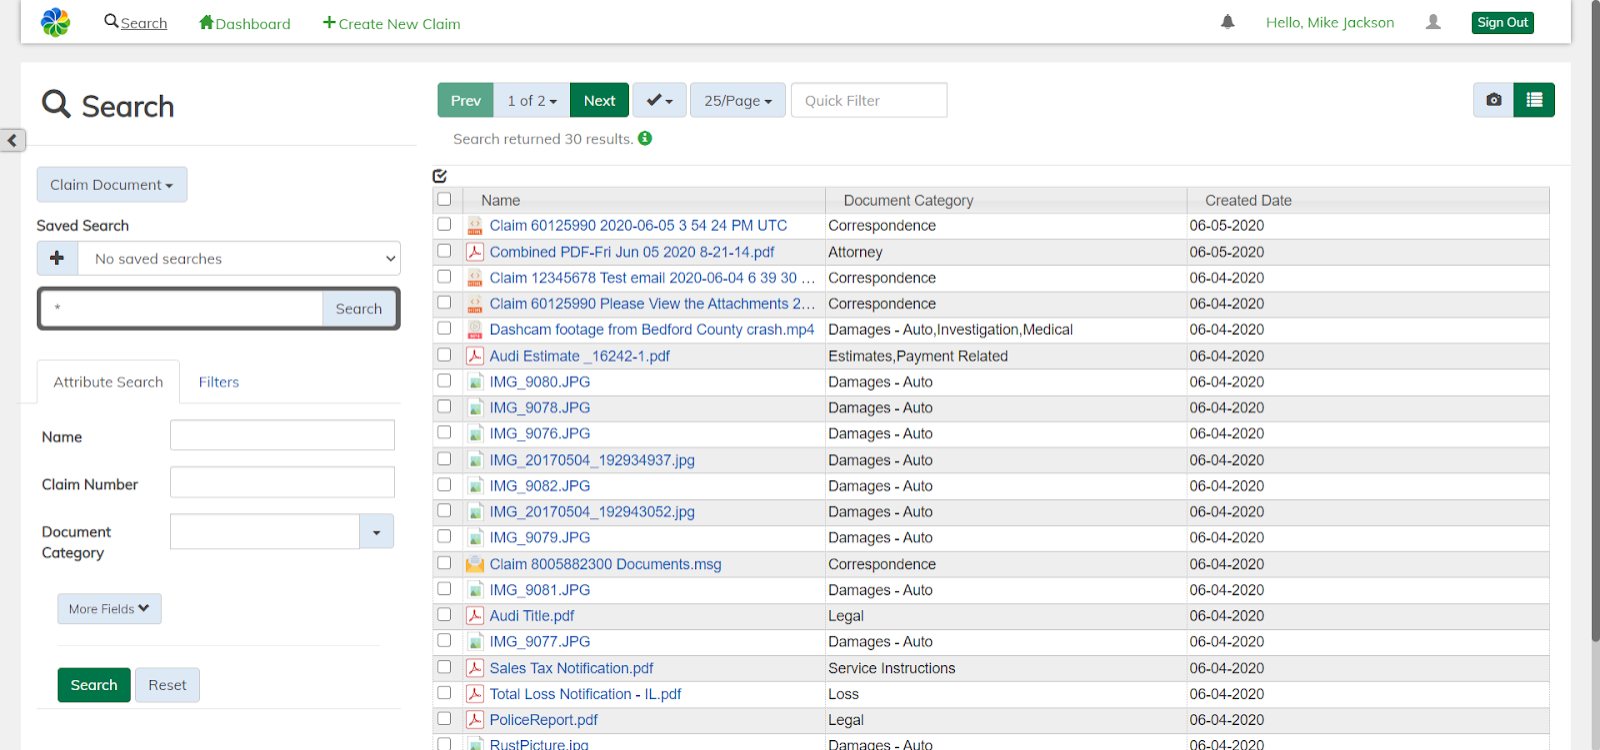
Search
Some implementations may choose to expose the “Search” interface for searching across various claim and/or document metadata. Search is the easiest way to find a claim based on a set of properties already known to you. In the case only one property is known or even a partial value, search makes it easy to find your desired claims. Additionally, you can search for specific documents that could be located in one or many claims.
After searching, you can navigate to the displayed results and perform multiple actions on those documents. Below is an example of a Claim Solution’s Search and the features can be accomplished:
Search Form
The search form is where you enter the criteria you wish to search on. Upon navigating to search, this form appears on the left side of the search underneath the search header. Clicking the tab near the top left corner of the pane will open and close the search view.
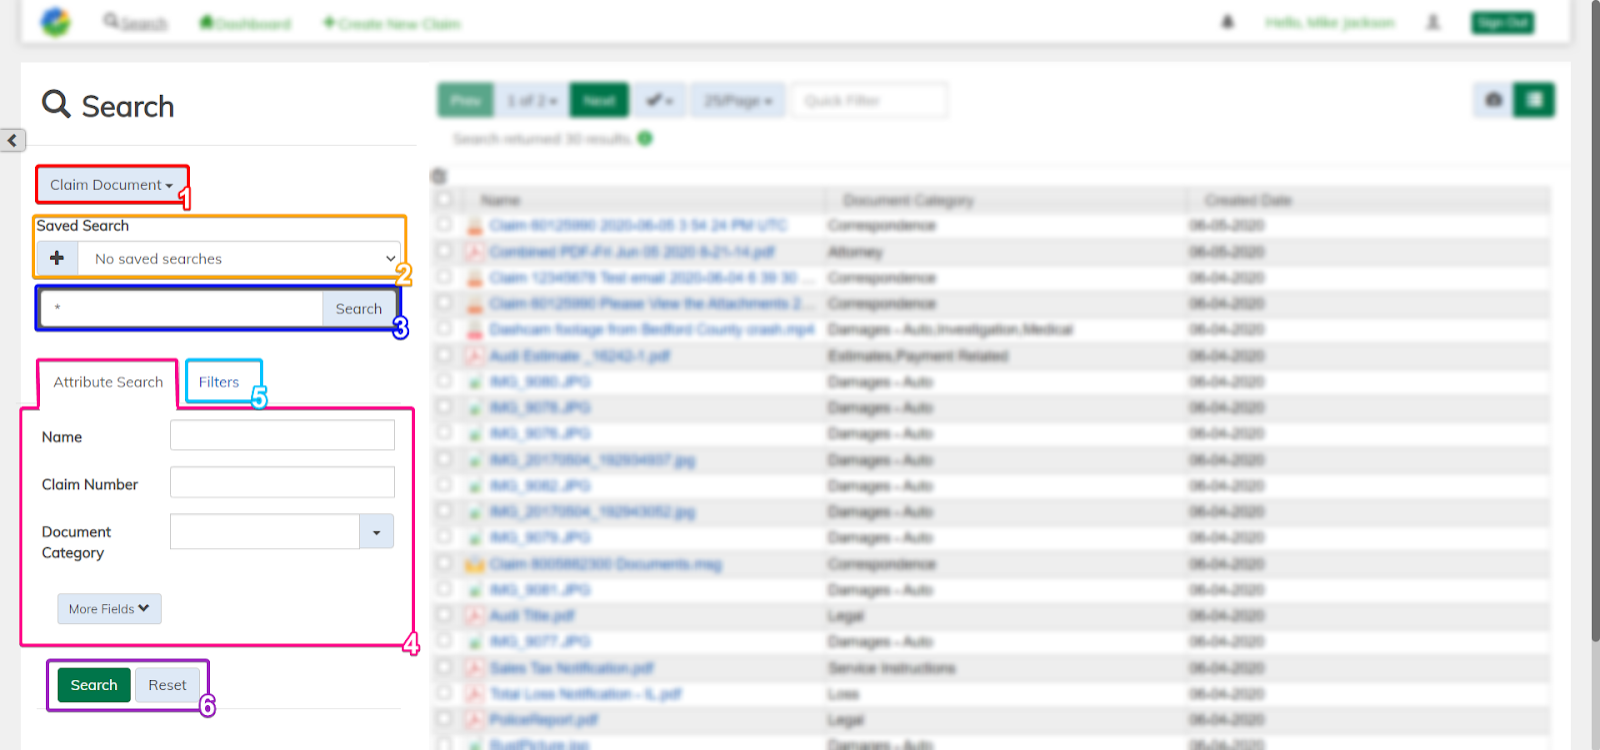
When searching, some criteria allow for wildcard characters. Here, the asterisk (*) is a wildcard character that allows you to search for all possible documents in the repository.
- The red box labeled
1outlines the object type selector box. Here, you can choose between searching for Claim Folders or Claim Documents. Currently, we are searching for claim documents, as ‘Claim Documents’ is selected in the dropdown. - The orange box labeled
2outlines the saved search input box. Before searching, you can select a pre-saved search from the dropdown list. A saved search stores the values of the previous form into an easy-to-remember text the user can define. This can save you from reentering all the criteria for searches you use everyday. To save a new search, type in the criteria for the search, execute the search, click the plus icon within the saved search input box, and input what you would like your search to be called. You can manage your saved searches from the User Preferences page. - The dark blue box labeled
3outlines the full text search box. This field consists of two parts, the input box and the search button. The input box is where you enter any text that could match any property. The returned claims will have at least one property that matches the input text exactly. The button on the right of the box will execute the search. Additionally, the search button at the bottom of the form and the enter key will also execute the search. - The pink box labeled
4outlines the attribute search tab. Within this tab, you can add criteria for properties you wish to search. Some properties’ criteria can be selected from a dropdown or date picker. Others, such as Claim Number, need to be entered in manually. The results will return all items that match any part of the criteria for the respective property. If the property you wish to search on does not appear, check the more fields section at the bottom of the attribute search tab. Note that not all claim properties will appear in the form. -
The light blue box labeled
5outlines the filters tab. After a search has already been run, this tab will populate with filters based on the result.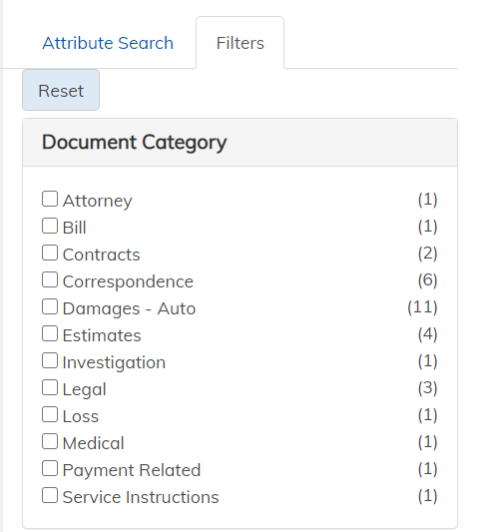
Here, the results returned had 12 different values within the document category property. The number to the right represents the number of results that match the criteria stated on the left. Selecting the checkbox will remove all results from search results pane that do not match the criteria selected. The reset button at the top left removes all selected filters.
- The purple box labeled
6is where you can submit your search form, executing the search. This can also be done by clicking the search button in the full text search input box or by hitting the enter key while within the form. Clicking the reset button empties all previous entered criteria in the form without running another search.
Search Results Pane
Here you can navigate the results, change how the results are displayed, further filter the results down, and perform actions on some or all of the results.
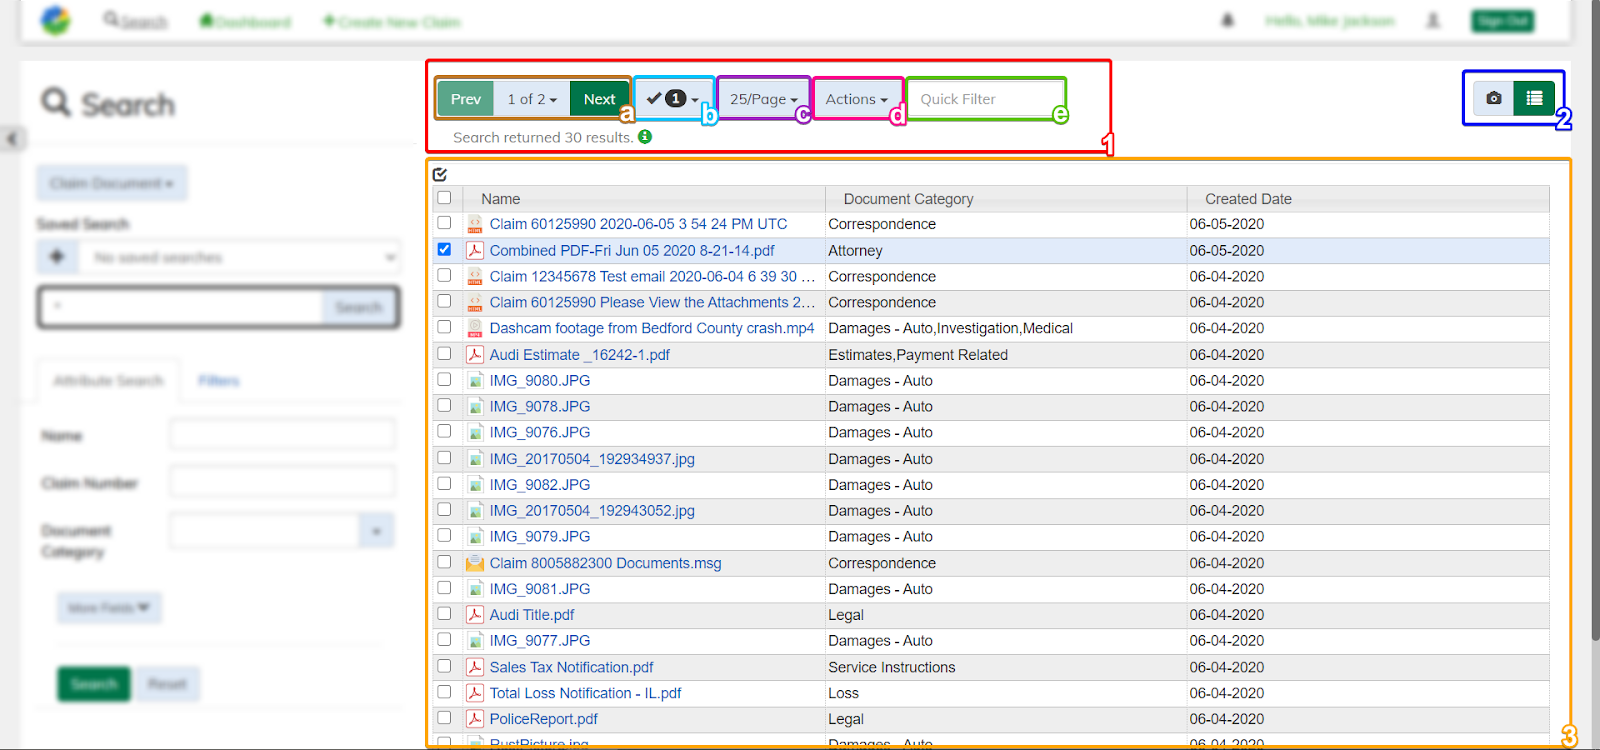
- The red box labeled
1: outlines the search results control bar. This control bar allows the user to interact, modify, and update the table below it. It consists of 5 main controls but can change depending on the state of the table. Below the controls displays the number of search results returned with the previous search as well as an icon. Hovering over the icon will display detailed timing information about search execution.- The brown box labeled
a: outlines the pagination control. You can navigate the various pages of the results using the Prev and Next buttons. Clicking on the page number dropdown in the center allows you to jump to a specific page number. - The light blue box labeled
b: outlines the selection control. When items in the table are selected, the number of selected items will be displayed. Clicking on the control allows you to select all items in the table across all pages or deselect all selected items. - The purple box labeled
c’: outlines the results per page control. Here you can select how many items you wish to display in the table below. - The pink box labeled
d: outlines the actions control. The actions control will appear when one or more items are selected. This dropdown can also be accessed by right-clicking on a selected item and applies to all selected items. - The green box labeled
e: outlines the quick filter control. This filter allows you to narrow down the results that displayed. This filter removes all results except those that have a partial match of the text you entered to a table property. Note this filter will filter across all pages.
- The brown box labeled
-
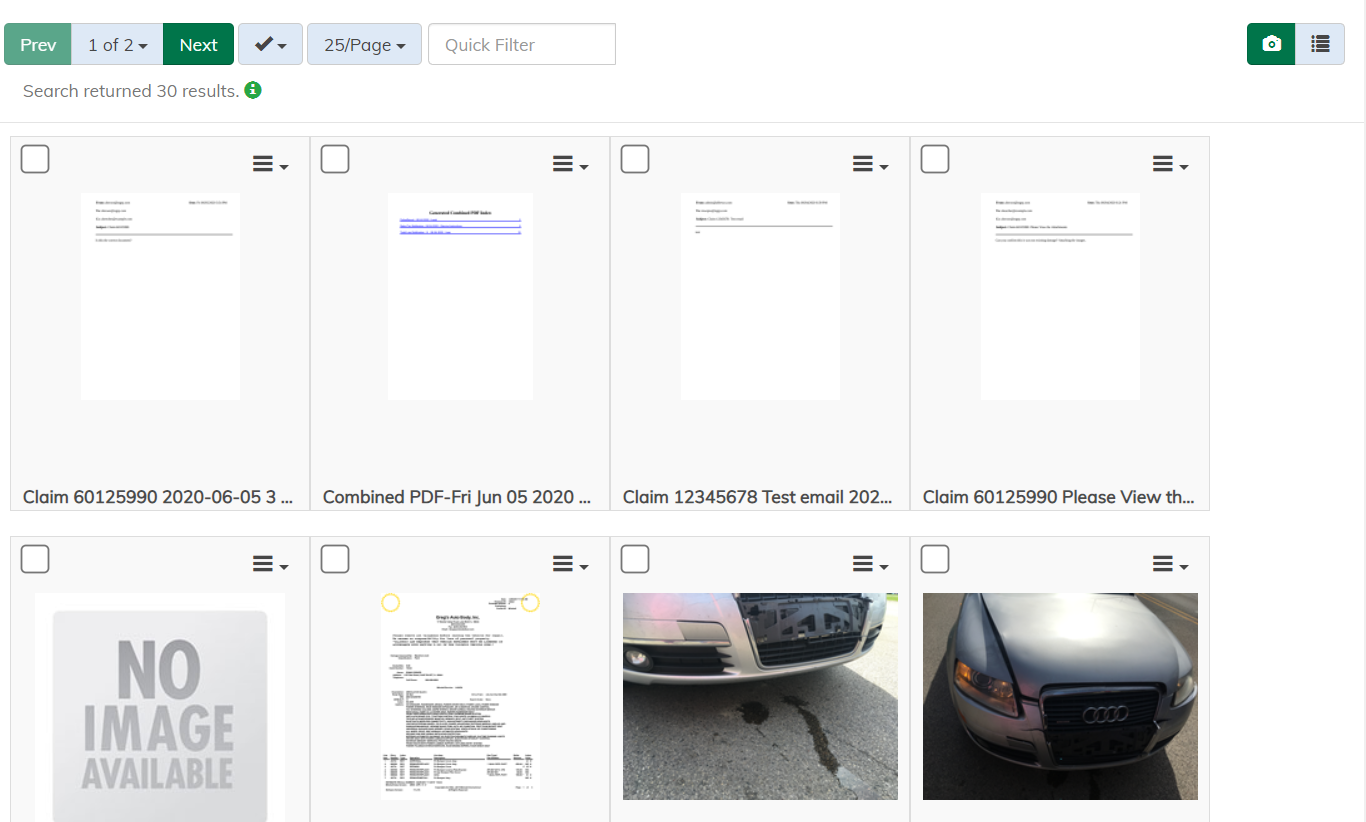
The dark blue box labeled 2: outlines is the table display options. Currently listview is selected and displayed green. You can toggle table display view, also known as thumbnail view, by clicking on the camera icon. This will show a preview of each item in the results table. Below is an image of the table in thumbnail view. Note right-click functionality is disabled for thumbnails.
- The orange box labeled 3: outlines the search result’s table. This table lists all the search results, displaying important properties along its x-axis within the header. Right clicking on the table header allows you to add or remove various claim properties. Clicking the checkbox in the top right corner selects all items on the current page. The checkboxes down the right side allow you to select or deselect individual items. Right clicking on the table when in listview will show potential actions you can perform on the selected items. Clicking on the blue linked item name will route you to Stage if in search. If clicking on a document, Content Accelerator will also open the document viewer for that document.
Navigation Bar
At the top of the following image is the navigation bar allowing you to navigate to different views or perform actions. Here, this guide will cover Search, Dashboard, and Create New Claim.
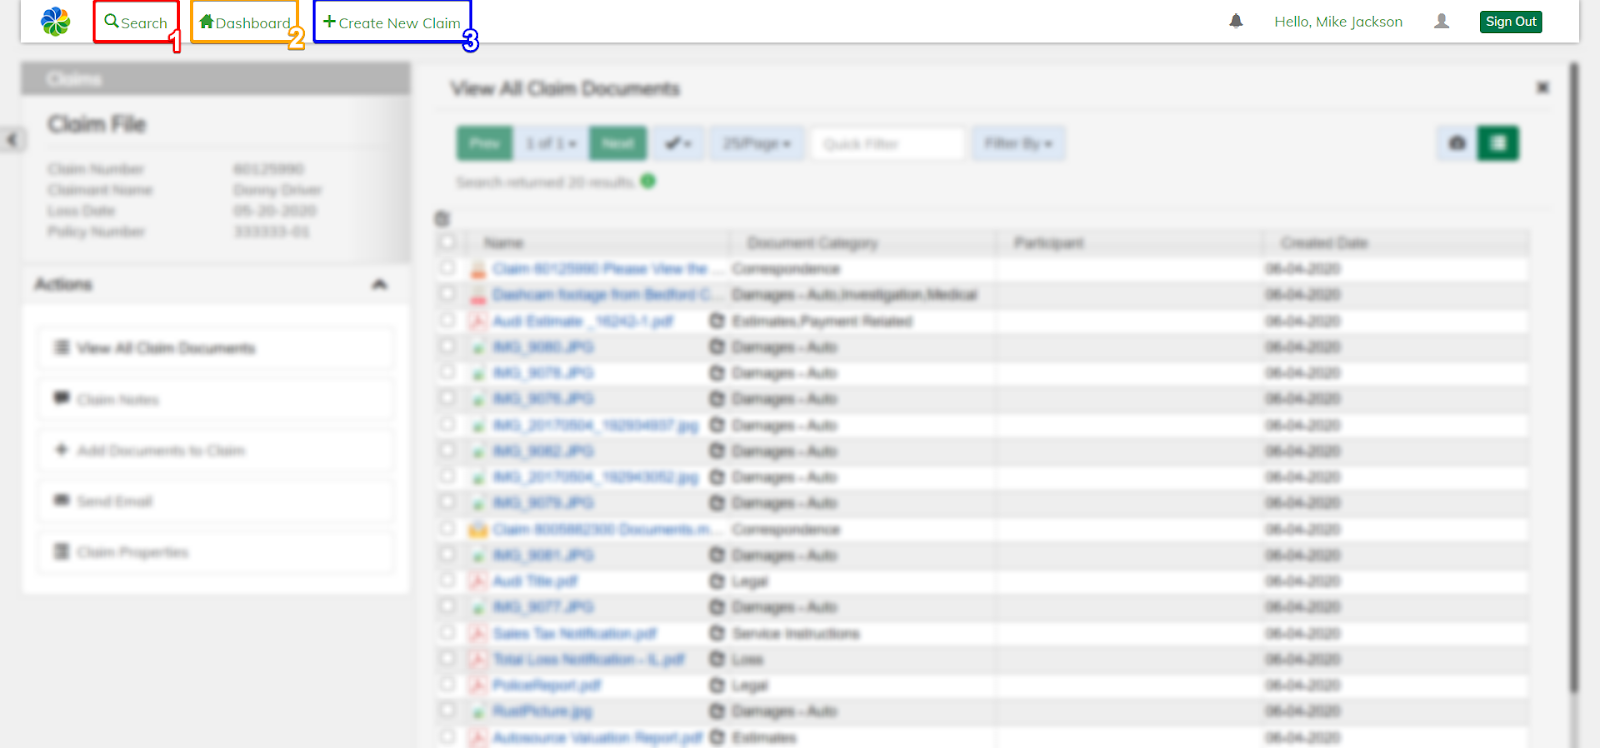
- The red box labeled
1outlines the Search. Clicking there will navigate you to the search view, where you can search for all the claims based on a variety of conditions. - The orange box labeled
2outlines the Dashboard. Clicking there will navigate you to the dashboard view. - The blue box labeled
3outlines the “Create New Claim” Action. This allows you to quickly create a new claim regardless of the current view.
Claim Specific Actions
Below is a list of all possible actions you can perform within the Content Accelerator for Claims Management. Folder actions are actions that are applied to claims within the Accelerator. Document actions are actions that are applied to documents, and group actions are applied to multiple documents. Header actions are actions that are accessed within the navigation bar.
Folder Actions
Folder actions are actions that apply to the folder as a whole. These actions are accessed in the left sidebar of the stage. Below is a list of actions you can perform on a Claim Folder.
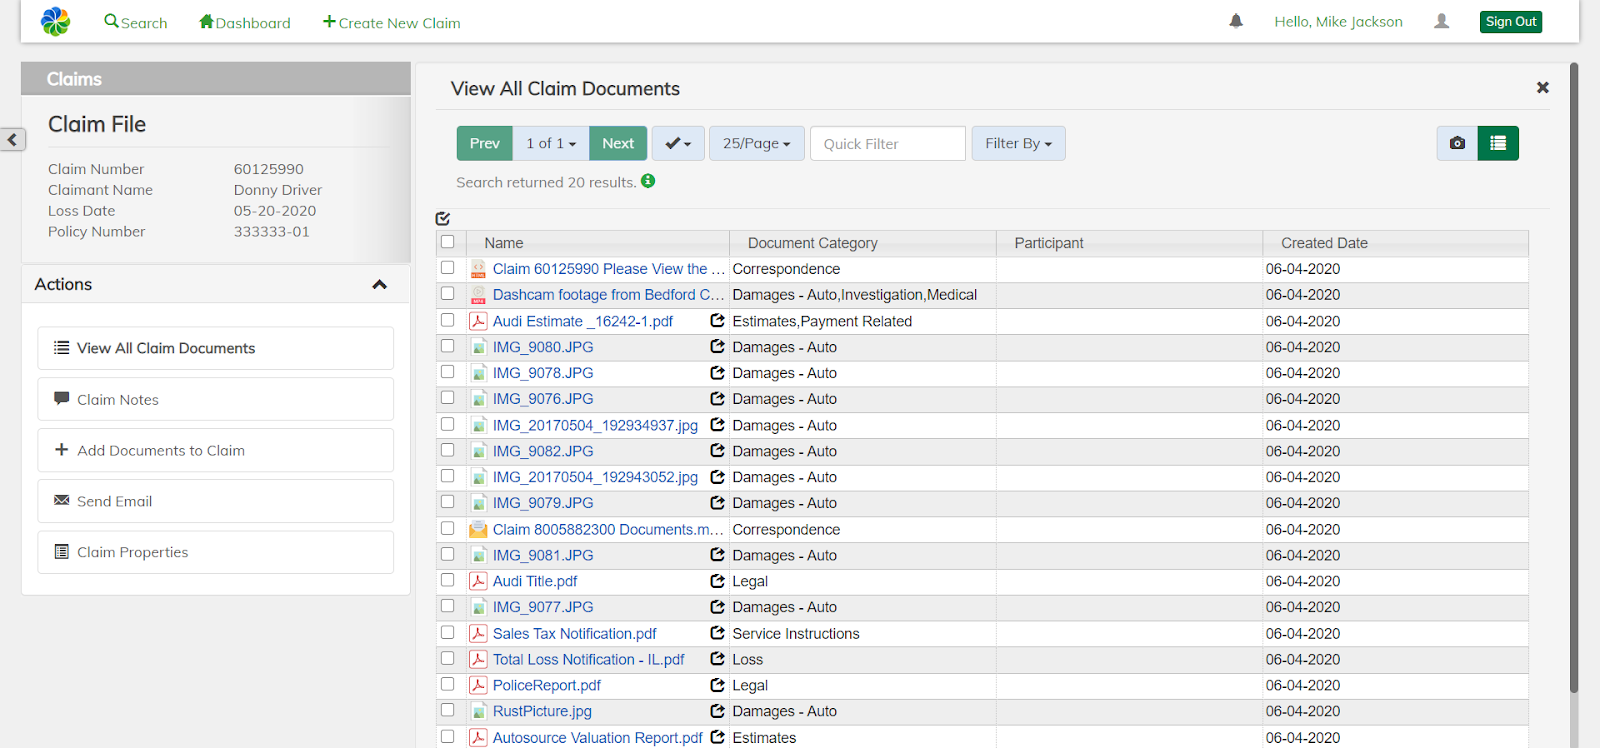
View All Claim Documents
View All Claim Documents is an extension of the “Search Results Pane”. All the documents associated with the claim are listed as search results in. Within Stage you will be able to perform a larger variety of actions on the documents than in Search.
Claim Notes
See “View/Create Folder/Document Notes”.
Add Document to Claim
See “Common Add Documents”
Send Email
Allows for one or more documents to be sent to the email addresses specified, along with a message body.
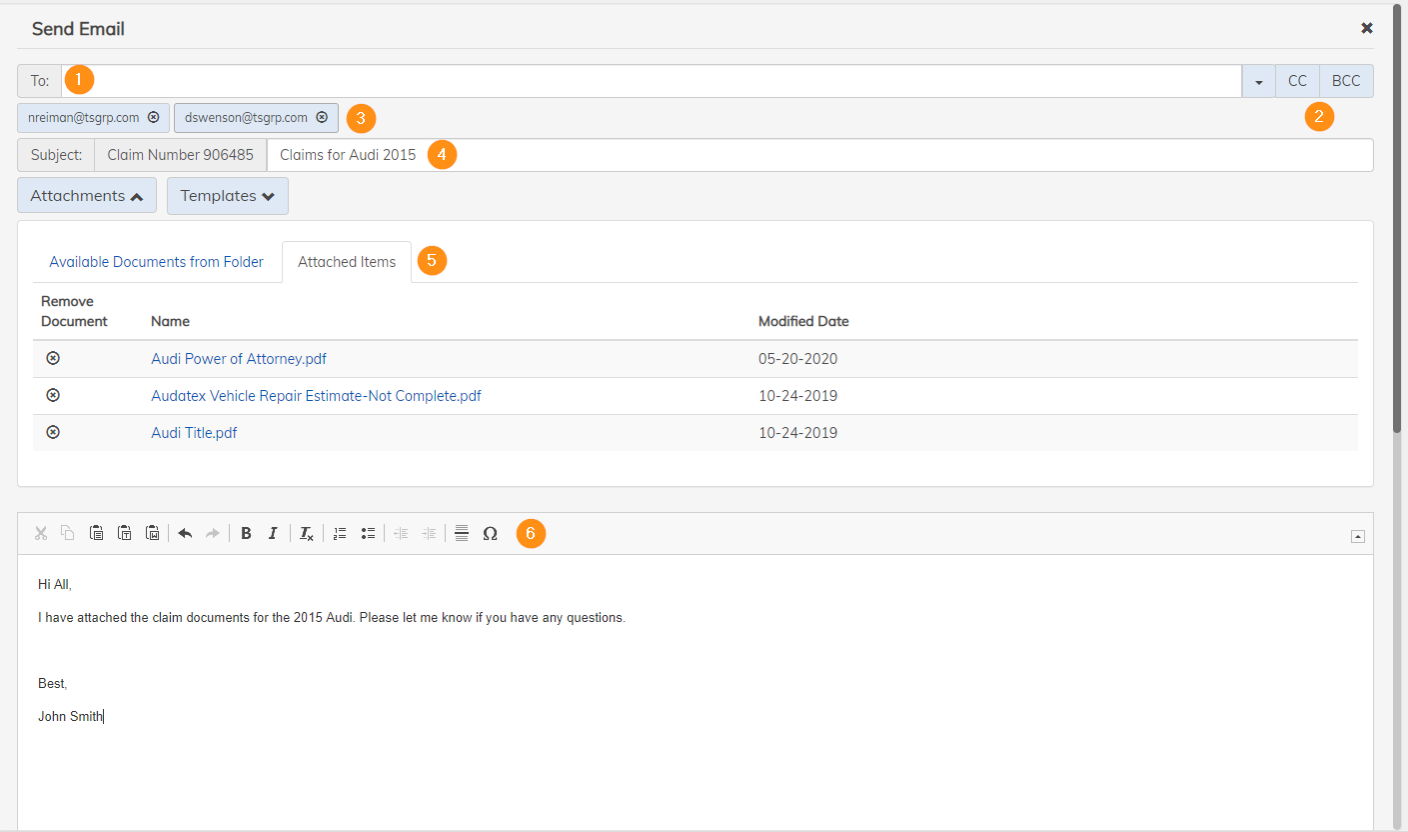
Content Accelerator Send Email:
- The To field.
- Options to send the email as a CC or BCC to individuals.
- This list indicates the users that have been entered into the To field.
- The subject of the email. Notice that this email has a custom prefix to the subject that can not be changed. This custom prefix and the ability to edit it are all configurable.
- The list of attached documents that will be sent with the email.
- The body of the email.
Claim Properties
See “Common View/Edit Properties”
Document Actions
Document actions are actions that are applied to a single document. There are a couple ways to select a document action. One method is to open the document in the document viewer and select one of the actions below the header. Another way is to select the row for the document and either right-clicking on the row or clicking on the Action dropdown above the table. For these two scenarios, you may see different lists of actions.
The lists depend on the context by which the action was accessed. Below is a list of all possible document actions you can perform.
Start Workflow
Allows for the creation of a workflow process with the specified document included.
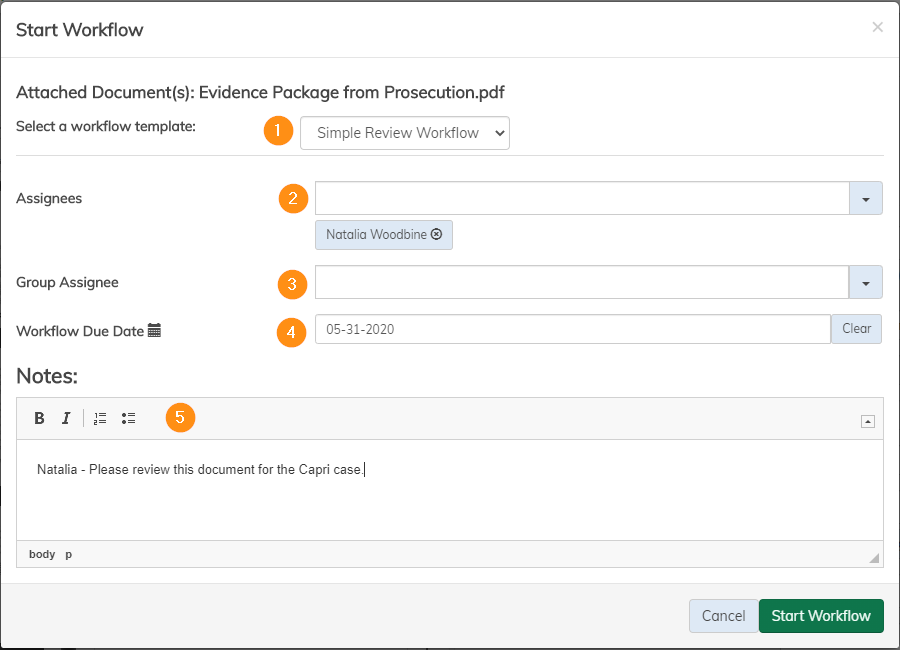
Content Accelerator Start Workflow
- The current workflow template being used.
- The users that will be assigned the workflow once it has started.
- The groups that will be assigned to the workflow once it has been started. Note you can not assign users and a group to a workflow, it must be one or the other.
- The date the workflow needs to be completed by.
- Any notes about the workflow.
Download Document
See “Common Download Document”.
View/Edit Properties
See “Common View/Edit Properties”.
View Versions
See “Common View Versions”.
Checkout / Checkin
See “Common Checkout/Checkin”.
Send Notification
See “Common Send Notification”.
Send Email
As a document action, send email will attach the document that the action was launched from. For example, if the action is launched from document Audi_Title.pdf, the send email action will launch with Audi_Title.pdf as the pre-attached document.
Document Notes
See “View/Create Folder/Document Notes”.
Split PDF
Allows for the content of a single document to be extracted and turned into a new PDF document.
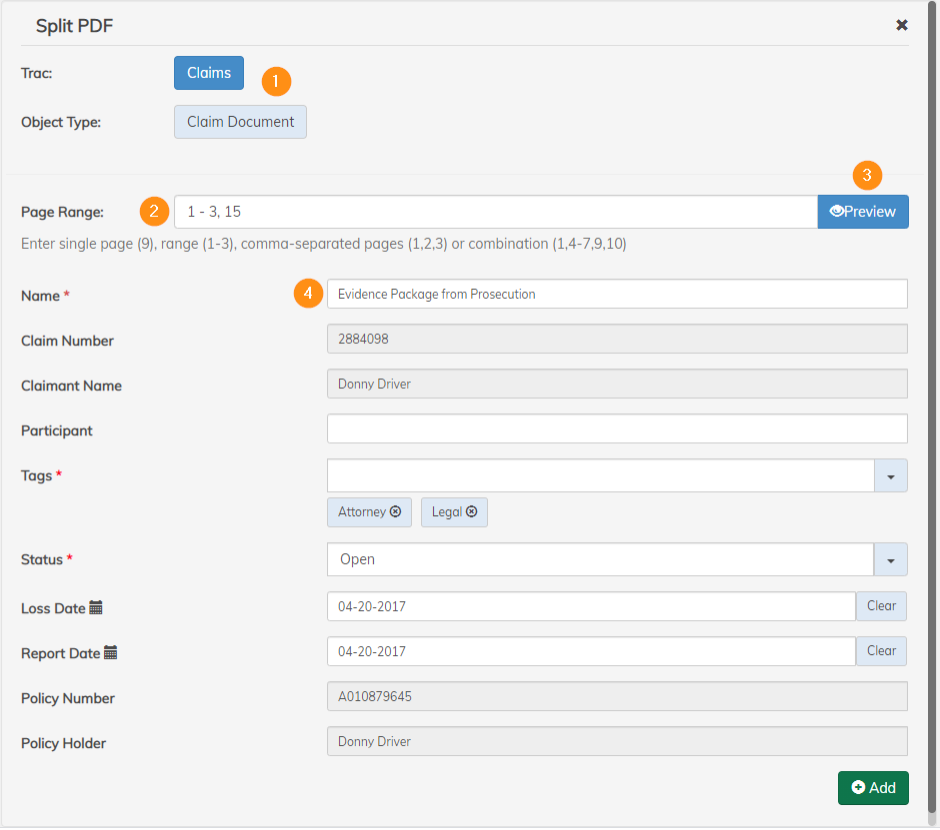
Content Accelerator Split PDF
- The ObjectType that the new PDF document will be created as.
- The pages that will be included from the original document in the new document.
- Clicking this will open a preview of what the new document will look like given the page range.
- The new document’s properties.
Open In New Tab
See “Common Open In New Tab”.
Group Actions
Group actions are actions that apply when multiple documents have been selected. For example, when looking at the table either in Search or Stage, selecting multiple rows and right-clicking on those rows will open the group action menu. Alternatively, you can access these actions by clicking on the Action dropdown menu above the table.
Below is a list of the possible actions you can perform on a group of documents. Note that all of the actions may not always appear, as they depend on the scenario.
Open Each in New Tab
See “Common Open Each in New Tab”.
Bulk Property Edit
Allows you to edit the properties of multiple documents simultaneously.
In the case you wish to edit one or more properties for multiple documents, you can enter in new values on the Bulk Properties page of the form. Each subsequent page represents the properties of one of the documents you selected.
After entering new values into the Bulk Properties page, you can either click the Save button or the Next button. The Save button will update the properties for all of the documents selected. The Next button will go to the next document you selected to edit, and the properties you entered in the Bulk Properties page should be filled out. You can continue to edit the properties for the document selected here.

Download As Zip
Download as Zip is a group action fired from the Search Results Table. Selecting multiple documents and selecting the action will bring up a prompt to name the zip file. The file will be named the entered name with the current time appended.
Export Results to Excel
See “Common Export Results to Excel”.
Generate Combined PDF
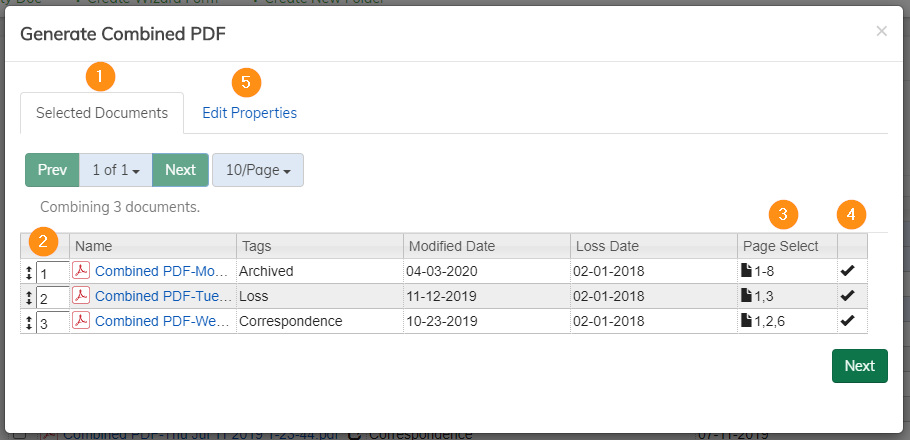
Allows for the creation of a single PDF document containing content from one or more documents in the repository. The resulting document can be downloaded to your machine, saved to the repository, or sent via email.
Select the files that should be in the combined PDF:
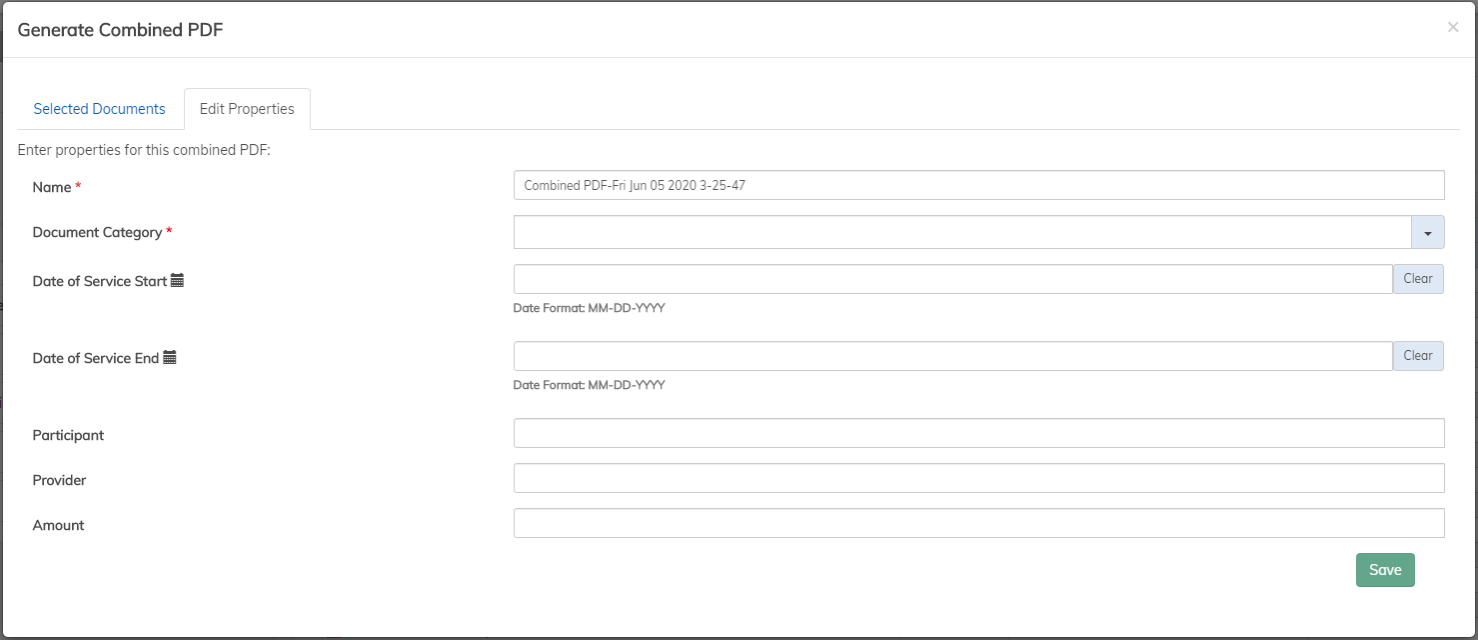
Set properties for PDF:
- Selected Documents - This tab shows the list of documents that will be used to create the combined PDF content.
- Order of Documents for Combined PDF - This represents the order the documents will be added to the new PDF. You can either edit the numbers manually or drag the documents to reorder them.
- Page Range Selections for Each Document - Select the
 icon next to one of the PDFs if you’d only like to include specific pages. This will open a modal window that allows you to enter the page range you’d like to be included. If this section is not edited, the entire document will be included.
 - Removal of Document(s) - If you decide you want no longer want to include one of your selected documents in the combined PDF, click the
 icon. Note it will not be removed from the modal screen, so you can re-add a document if you remove it by mistake.
 - Edit Properties - This tab allows you to edit the properties for the combined PDF that will be created.
Send Email
As a group action, send email will attach the documents that the action was launched from. For example, if the action is launched from both documents Audi_Title.pdf and Audi_ProofOfSale.pdf, the send email action will launch with Audi_Title.pdf and Audi_ProofOfSale.pdf attachments.
Create New Claim
Located in Content Accelerator’s navigation bar, the Create New Claim action allows you to either create one new Claim or several. When creating one claim, you will fill out a form similar to the “Claim Properties” form. The greyed out boxes are unable to be edited. Upon populating the form, the Create Folder button will create the new claim and route you to the new claim.
Alternatively, claims can be created all together by uploading a csv file that matches specific formatting dependent on the claim object.
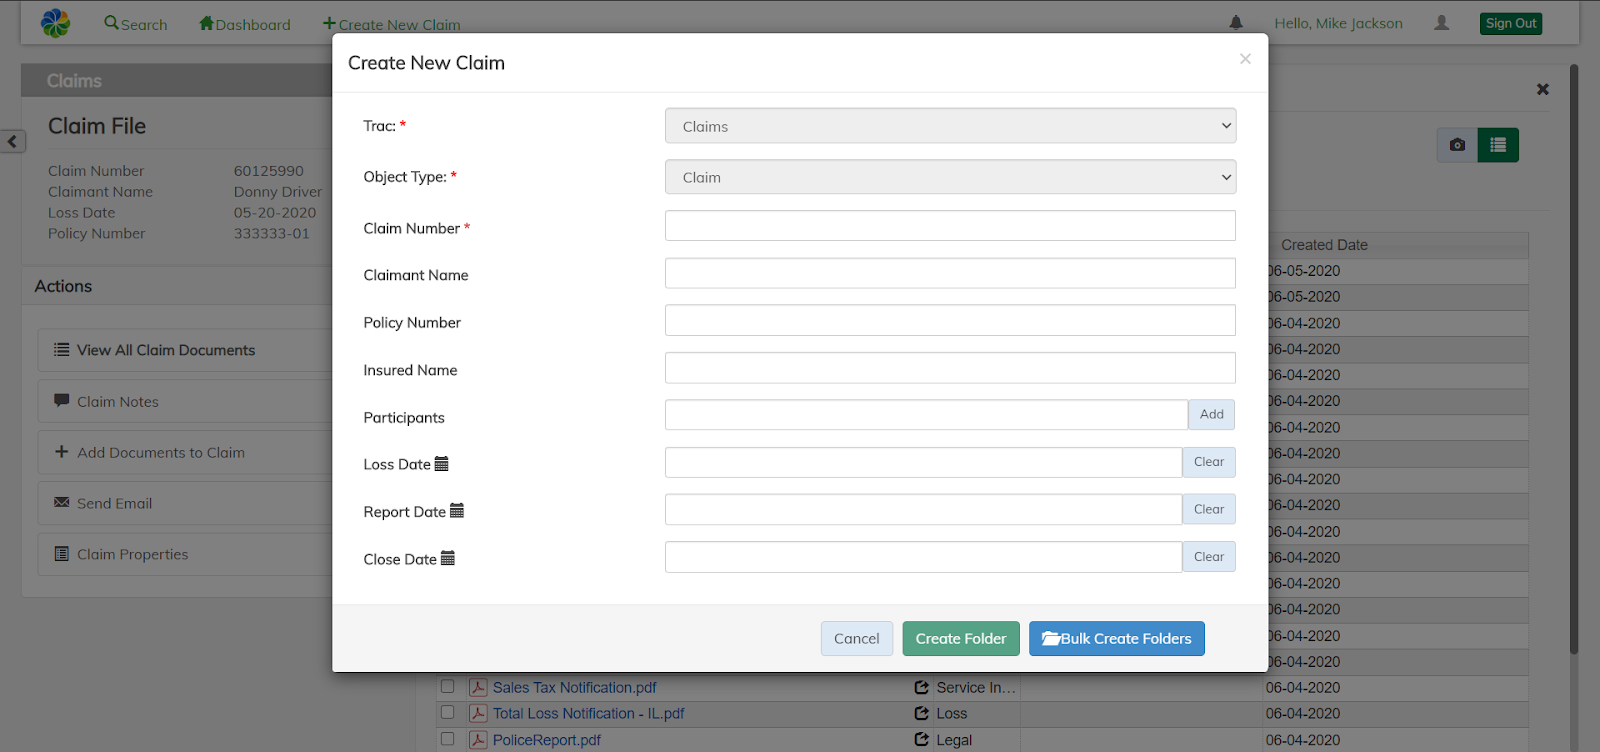
Typical Ways to Access a Claim
This section contains info on the different ways you can access a claim.
Launch from Claim Service to Content Accelerator
One of the main ways to open a claim in Content Accelerator is from a Claim Service. Upon launching into the Content Accelerator from a Claim Service, you will arrive at the Stage. From here you can perform a variety of actions on the claim, within the claim, and with the claim documents.
Within Content Accelerator Search and Access Claim
Content Accelerator provides the ability for users to search for a specific claim based on various criteria. After logging into Content Accelerator, navigate to search using the navigation bar at the top of the page.
Create a Claim within Content Accelerator
Content Accelerator allows you to create a new claim if it does not exist yet. After logging into Content Accelerator, click on the Create New Claim action in the navigation bar.