Use this information to migrate from Alfresco One 5.1 with the Solr 4 search index server to Alfresco Content Services 6.2 with the Solr 6 search index server.
To determine the current search server, navigate to the Search Manager page at Alfresco Share Admin Console > Repository Services > Search Service. Select the search subsystem from the Search Service In Use list.
Note: The Admin Console is only available for users who are using Alfresco Content Services Enterprise.
Follow the steps to migrate from Alfresco One 5.x with Solr 4 search service to Alfresco Content Services 6.2 with Solr 6 search service.
-
Upgrades from Alfresco One 5.0 or 5.1 need to first stop at 5.2 to upgrade search to Alfresco Search Services, and then upgrade to 6.0.
-
Upgrades from Alfresco Content Services 5.2 must first upgrade to Search Services from Solr 4, and then upgrade to 6.0
-
Make sure you upgrade to Alfresco Search Services 2.0 before upgrading the repository to 6.2.
-
Install and configure Solr 6 to track the repository. For more information, see Installation options
-
While Solr 6 builds its indexes, you can monitor progress using the
SUMMARYreport.
http://localhost:8080/solr/admin/cores?action=SUMMARY&wt=xml
For details, see the Monitor and troubleshoot topic.
-
Optionally, you can use the Solr Admin Web interface to view Solr configuration details, run queries, and analyze document fields.
-
Open the FireFox Certificate Manager by selecting Firefox > Preferences > Advanced > Certificates > View Certificates > Your Certificates.
-
Import the browser keystore
browser.p12that is located in your<ALFRESCO_HOME>/alf_data/keystore directory. -
Enter the password
alfresco.A window displays showing that the keystore has been imported successfully. The Certificate Manager now contains the imported keystore with the Alfresco repository certificate under the Your Certificates tab.
-
Close the Certificate Manager by clicking OK.
-
In the browser, navigate to a Solr URL.
For example, use
http://localhost:8080/solr.The browser displays an error message window to indicate that the connection is untrusted. This is due to the Alfresco certificate not being tied to the server IP address. In this case, view the certificate and confirm that it is signed by the Alfresco Certificate Authority.
-
Expand I understand the risks.
-
Select Add Exception.
-
Click View.
This displays the certificate.
-
Confirm that the certificate was issued by Alfresco Certificate Authority, and then confirm the Security Exception.
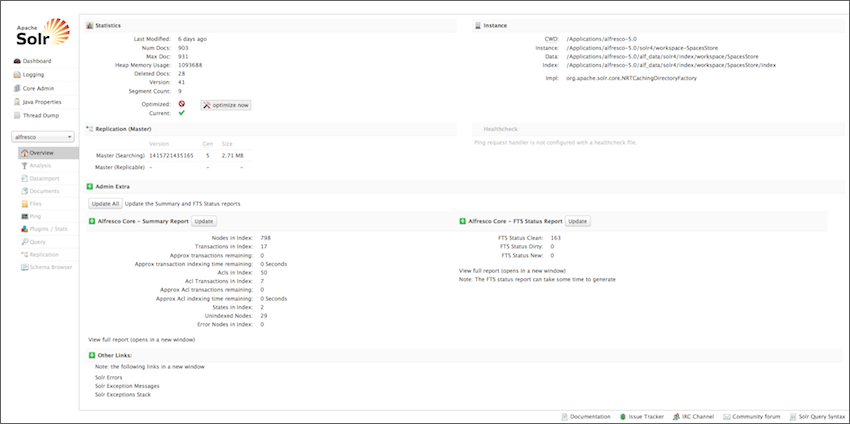
Access to Solr 6 is granted. The Solr Admin page is displayed. It is divided into two parts.
The left-side of the screen is a menu under the Solr logo that provides navigation through various screens. The first set of links are for system-level information and configuration and provide access to Logging, Core Admin and Java Properties. At the end of this information is a list of Solr cores configured for this instance of Alfresco.
The center of the screen shows the detail of the Solr core selected, such as statistics, summary report, and so on.
-
-
When the index is updated as reported by the
SUMMARYreport, you can use theREPORToption and check the following:
- In the
REPORToption, node count should match the number of live nodes in the repository (assuming nothing is changing and the index is updated). The index contains a document for failed nodes, so failures need to be considered separately. - Any missing transactions; if there are issues, use the
FIXoption.
http://localhost:8080/solr/admin/cores?action=FIX
For more information, see the Monitor and troubleshoot topic.
Find errors with specific nodes using DOC_TYPE:ErrorNode option.
https://localhost:8446/solr/alfresco/afts?q=DOC_TYPE:ErrorNode
If there are any issues, use the REINDEX option with the relevant node id.
http://localhost:8080/solr/admin/cores?action=REINDEX&txid=1&acltxid=2&nodeid=3&aclid=4
For more information, see the Monitor and troubleshoot topic.