By default, communication between the repository and Solr is protected by SSL with mutual authentication. Both the repository and Solr have their own standard public/private key pair. To secure the two-way communication between the repository and Solr, you must generate your own keys.
Note: For security reasons, you must generate a new set of keys to secure the Solr communication and access to the Solr Admin Console. Note: The Admin Console is only available when you are using Alfresco Content Services Enterprise.
For more information, see Configuring using the Admin Console and Secure Keys.
Repository SSL keystores
Use this information to understand the keystores used by the repository for mutual TLS.
The keys and certificates required for mutual TLS on the repository side are set up in Tomcat.
-
Modify
<TOMCAT_HOME>/conf/server.xmland add the following connector:- If using Alfresco Content Services 6.x on Tomcat 8:
<Connector port="8999" protocol="HTTP/1.1" connectionTimeout="20000" SSLEnabled="true" scheme="https" secure="true" sslProtocol="TLS" clientAuth="true" keystoreFile="xxxxxxx" keystorePass="yyyyy" truststoreFile="xxxxxxx" truststorePass="yyyyy" />- If using Alfresco Content Services 7.x on Tomcat 9 or 23.x on Tomcat 10:
<Connector port="8999" protocol="org.apache.coyote.http11.Http11NioProtocol" connectionTimeout="20000" maxThreads="150" SSLEnabled="true" scheme="https" secure="true" defaultSSLHostConfigName="localhost"> <SSLHostConfig hostName="localhost" protocols="TLSv1.2" certificateVerification="required" truststoreFile="xxxxxxx" truststorePassword="yyyyy" truststoreType="JCEKS"> <Certificate certificateKeystoreFile="xxxxxxx" certificateKeyAlias="ssl.repo" type="RSA" certificateKeystorePassword="yyyyy" certificateKeystoreType="JCEKS"/> </SSLHostConfig> </Connector> -
Copy the keystore and truststore files you created in Generating secure keys for ssl communication to the machine that’s running the repository.
-
Set the parameters in the connector, replacing the
xxxxxxxandyyyyyvalues. -
Make sure that the following property is added to the
TOMCAT_HOME>/shared/classes/alfresco-global.propertiesfile:solr.secureComms=https
Solr SSL keystores
Solr core has two keystores that it uses for SSL. These are:
ssl.repo.client.keystorecontains a Solr public/private RSA key pairssl.repo.client.truststorecontains the trusted Alfresco Certificate Authority certificate (which has been used to sign both the repository and Solr certificates)
Connecting to the SSL-protected Solr web application
The Solr Admin Web interface allows you to view Solr configuration details, run queries, and analyze document fields.
All Solr URLs, which are bundled within Alfresco Content Services, are protected by SSL. To use these URLs from a browser, you need to import a browser-compatible keystore to allow mutual authentication and decryption to work. The following steps describe how to import the keystore into your browser (these relate to Firefox, other browsers will have a similar mechanism):
-
Open the FireFox Certificate Manager by selecting Firefox > Preferences > Advanced > Certificates > View Certificates > Your Certificates.
-
Import the browser keystore
browser.p12that is located in your<ALFRESCO_HOME>/alf_data/keystoredirectory. -
Enter the password
alfresco.A window displays showing that the keystore has been imported successfully. The Certificate Manager now contains the imported keystore with the repository certificate under the Your Certificates tab.
-
Close the Certificate Manager by clicking OK.
-
In the browser, navigate to a Solr URL, https://localhost:8983/solr.
The browser displays an error message window to indicate that the connection is untrusted. This is due to the certificate not being tied to the server IP address. In this case, view the certificate and confirm that it is signed by the Alfresco Certificate Authority.
-
Expand I understand the risks.
-
Select Add Exception.
-
Click View to display the certificate.
-
Confirm that the certificate was issued by Alfresco Certificate Authority, and then confirm the Security Exception.
Access to Solr is granted and the Solr Admin screen is displayed.
The Solr web interface makes it easy for administrators to view the Solr configuration details, run queries, and analyse document fields in order to calibrate a Solr configuration.
The main Solr Admin dashboard is divided into two parts: the left and center panels.

Solr Admin UI left panel
The left-side of the Solr Admin screen is a menu under the Solr logo that provides the navigation through the screens of the UI. The first set of links are for system-level information and configuration, and provide access to Logging, Core Admin and Java Properties, among other things.
After this information is a list of Solr cores configured for your Alfresco Content Services instance. Clicking on a core name shows a secondary menu of information and configuration options for that core specifically. Items in this list include the Schema, Config, Plugins, and an ability to perform queries on indexed data.
The different screens of the Solr Admin UI are described below.
Logging
The Logging page shows messages from Solr’s log files.
Under Logging, when you select Level, you see the hierarchy of classpaths and classnames for your Level instance. A row highlighted in yellow indicates that the class has logging capabilities. Click on a highlighted row, and a menu will appear to allow you to change the log level for that class. Characters in bold indicate that the class will not be affected by level changes to root.

Core Admin
The Core Admin screen lets you manage your cores.
The buttons at the top of the screen enable you to add a new core, unload the core displayed, rename the currently displayed core, swap the existing core with one that you specify in a drop-down box, and reload the current core.
The main display and available actions provide another way of working with your cores.

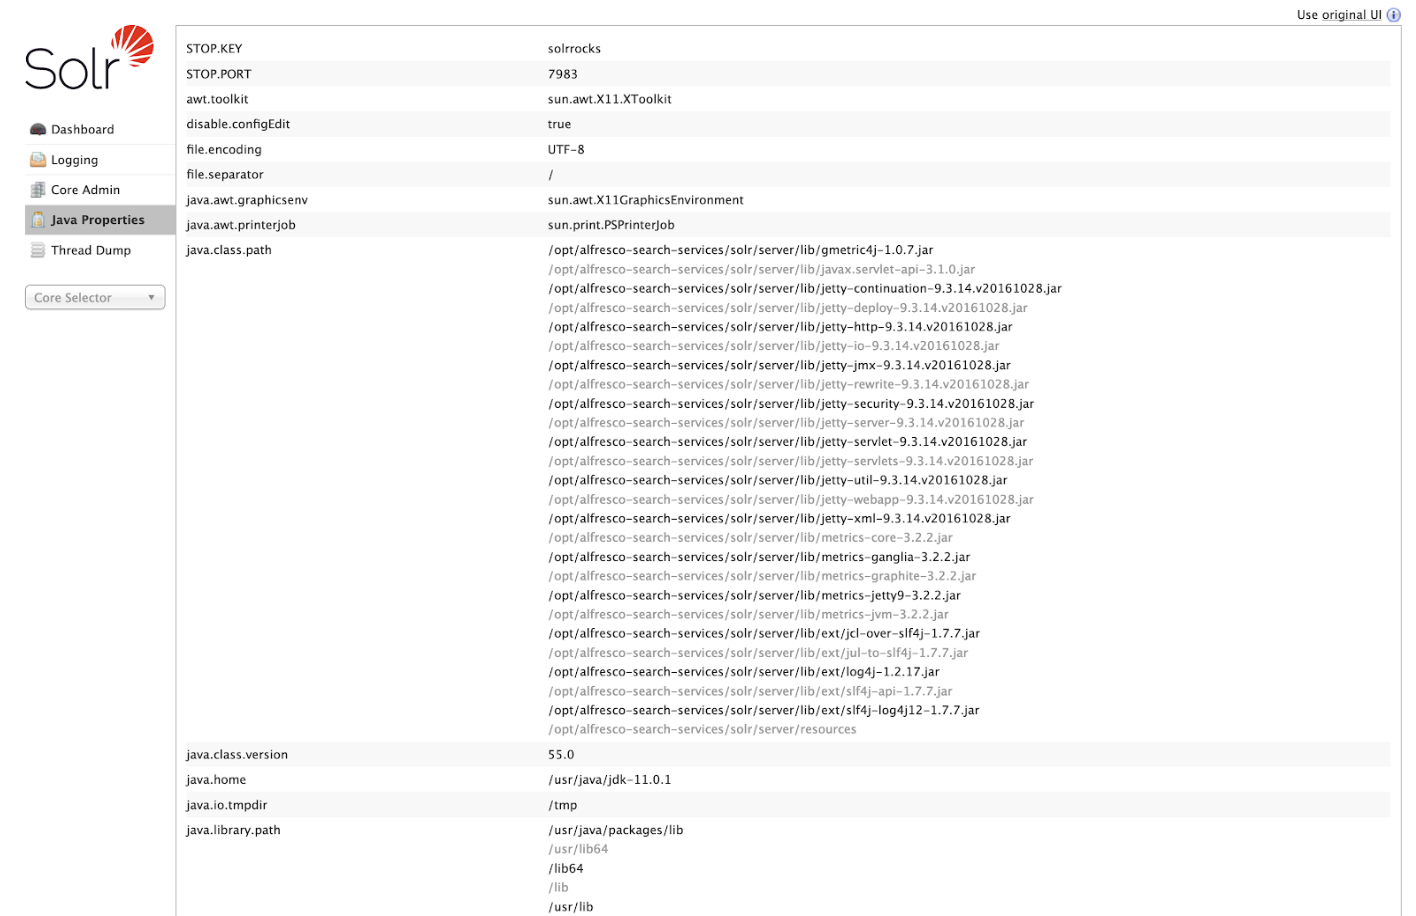
Java Properties
The Java Properties screen displays all the properties of the JVM running Solr, including the classpaths, file encodings, JVM memory settings, operating system, and more.
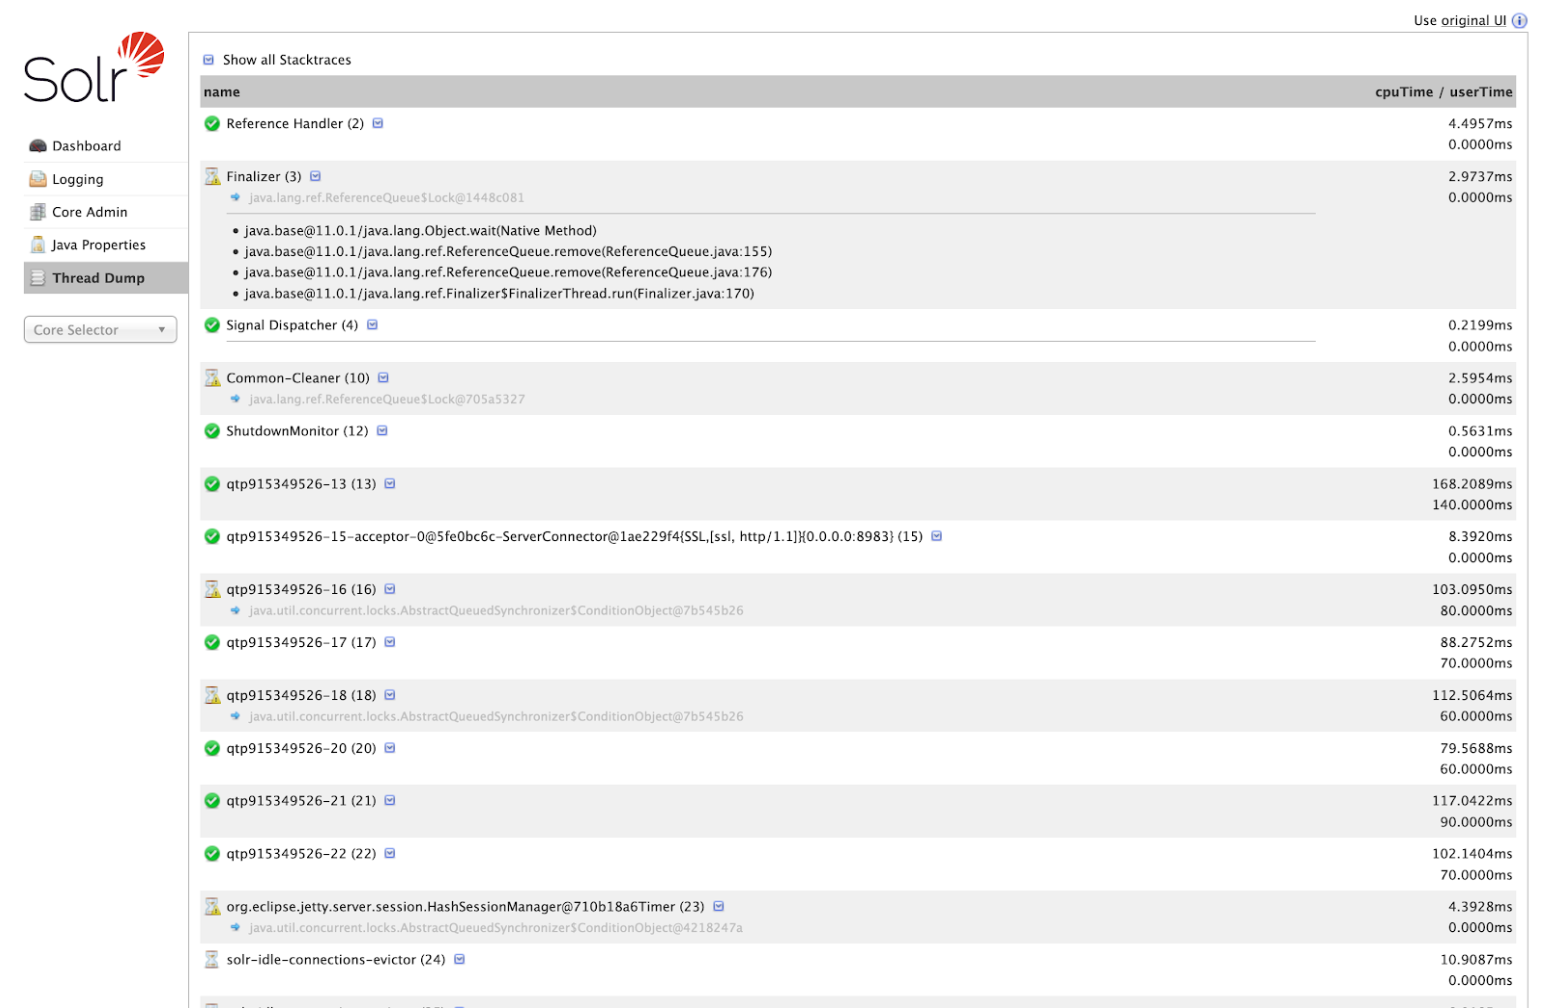
Thread Dump
The Thread Dump screen lets you inspect the currently active threads on your server.
Each thread is listed and access to the stacktraces is available where applicable. Icons to the left indicate the state of the thread. For example, threads with a green check-mark in a green circle are in a RUNNABLE state.
On the right of the thread name, click the down-arrow to see the stacktrace for that thread.
Core-specific tools
Click the Core Selector to display a list of Solr cores, with a search box that can be used to find a specific core.
When you select a core:
- the central part of the screen shows Statistics and other information about the selected core.
-
a secondary menu opens under the core name with the administration options available for that particular core. The core-specific options are:
Options Description Overview This dashboard displays full statistics of the indexes. It shows the index count for each of the cores. It also provides a summary report and an FTS status report. The summary report displays information about the number of nodes in index, transactions in index, approximate transactions remaining, and so on. The FTS status report displays information about the FTS status clean, FTS status dirty, and FTS status new. Analysis Allows data analysis according to the field, field type and dynamic rule configurations found in schema.xml.Dataimport Displays information about the current status of the Data Import Handler. It enables you to import commands as defined by the options selected on the screen and defined in the configuration file. Documents Provides a simple form allowing execution of various Solr indexing commands directly from the browser. The screen allows you to: Copy documents in JSON, CSV or XML and submit them to the index, upload documents (in JSON, CSV or XML), and Construct documents by selecting fields and field values Files Displays the current core configuration files such as solrconfig.xmlandschema.xml. Configuration files cannot be edited with this screen, so a text editor must be used.Ping Enables you to ping a named core and determine whether the core is active. The Ping option does not open a page, but the status of the request can be seen on the core overview page shown when clicking on a collection name. The length of time the request has taken is displayed next to the Ping option, in milliseconds. Plugins/Stats Displays statistics for plugins and other installed components. Query Enables you to submit a structured query about various elements of a core. Replication Displays current replication status for the core and lets you enable/disable replication. Schema Browser Displays schema data in a browser window. Segments info Visualization of the various segments in the underlying Lucene index for this core
Solr Admin UI center panel
The center of the screen shows the detail of the Solr core selected, such as statistics, summary report, and so on.
Core-specific details
On the left-side of the Solr Admin screen, you will see Core Selector. Clicking on the menu displays a list of Solr cores hosted on this Solr node, with a search box that can be used to find a specific core by name.
This includes a sub-navigation for the option or text or graphical representation of the requested data.
See Solr Admin UI left panel and Solr Admin UI center panel to know more about each screen.
Solr backup directory
To address the security issue https://nvd.nist.gov/vuln/detail/CVE-2020-13941, it is necessary to configure the location parameter of the replication handler to be invariant.
This configuration is already provided in solrconfig.xml.
<requestHandler name="/replication" class="org.alfresco.solr.handler.AlfrescoReplicationHandler" >
<!--
This invariant is needed to prevent the usage of location parameter in the replication handler APIs.
There is no validation for location parameter. This results in a vulnerability described in https://nvd.nist.gov/vuln/detail/CVE-2020-13941
-->
<lst name="invariants">
<str name="location">${solr.backup.dir:.}</str>
</lst>
</requestHandler>
To specify the backup location you must configure a parameter called solr.backup.dir in the solrcore.properties file. The parameter determines the root backup directory and one must be created for each core, in advance of when you start Solr.
For example, if you have one core then the parameter might be set to /var/data/solr/backup and you must create that directory before starting Solr. If you have two cores, called alfresco and archive, then the parameter might be set to /var/data/solr/backup/alfresco, /var/data/solr/backup/archive and you must create those directories before starting Solr.