The Collaboration Connector for Teams can be installed using a distribution zip.
Prerequisites
There are a number of software requirements for installing the Collaboration Connector for Teams:
Alfresco requirements
See the Supported Platforms for more information.
Microsoft Teams requirements
Proper registration of an Azure Bot along with OAuth configuration is needed, this can be done before the Collaboration Connector for Teams installation.
In order to use the Alfresco Collaboration Connector for Teams, you will need a Microsoft Teams client.
The Teams Client is available as a webapp, desktop client and also as an app for both iOS and Android.
Note: Minor differences between clients exists.
Installation
The installation of the Collaboration Connector for Teams involves a number of steps and components.
Overview
The following picture illustrates the components involved in this solution:

The picture shows a number of components that need to be installed to get the Collaboration Connector for Teams up and running in your environment. The first thing you need to install is Alfresco Content Services with the Identity Service (which is the OAuth identity provider), and the Alfresco Digital Workspace user interface.
The Alfresco Content Services repository contains the content, and the Collaboration Connector for Teams service will execute search requests on this component. To connect this service to the Microsoft Teams environment an Azure bot is used. To load the Collaboration Connector for Teams app into the Microsoft Teams client an app manifest is created.
Install Content Services including UI
Install Alfresco Content Services, Alfresco Digital Workspace, and the Identity Service.
All software should be exposed as “https” via proxy/gateway.
The following secure endpoints should be available when this step is complete:
https://{my.domain}/alfrescohttps://{my.domain}/workspacehttps://{my.domain}/auth
Microsoft Azure Bot Registration (including OAuth)
Microsoft Teams and Azure services can interact with Teams Extensions and Bots hosted outside of Azure only when they are registered in Azure. See more details in the official Microsoft docs.
Note: The payment plan is subject to your choice (below it says to change the plan to ‘Free’, but that is not necessary.
To register the Microsoft Azure Bot and configure the OAuth connection to the Alfresco Digital Workspace (ADW) follow these steps:
-
Sign in to the Microsoft Azure Portal:
- If you see a Quick Start page, then remove it by clicking the X to the right.
- Now you should see a page looking something like this:

Note: The logged in user must have permission to register bots in Azure Active Directory (AAD).
-
Register the Microsoft Azure Bot:
- Click the Create a resource item under Azure services to start Azure bot registration.
- Type
Azure Botin the search input field and choose the Azure Bot item. - Click Create.
- In the Bot handle field type a unique name for your Bot (cannot be changed later on). Such as
alfresco-teams-integration. - Select desired subscription and resource group. Both are required.
- Click Change plan.
- Select Free.
- Let Azure create a Microsoft App ID for you.
-
Your screen should look like this now:

-
Click Review + create (optionally you can add tags to your Bot):
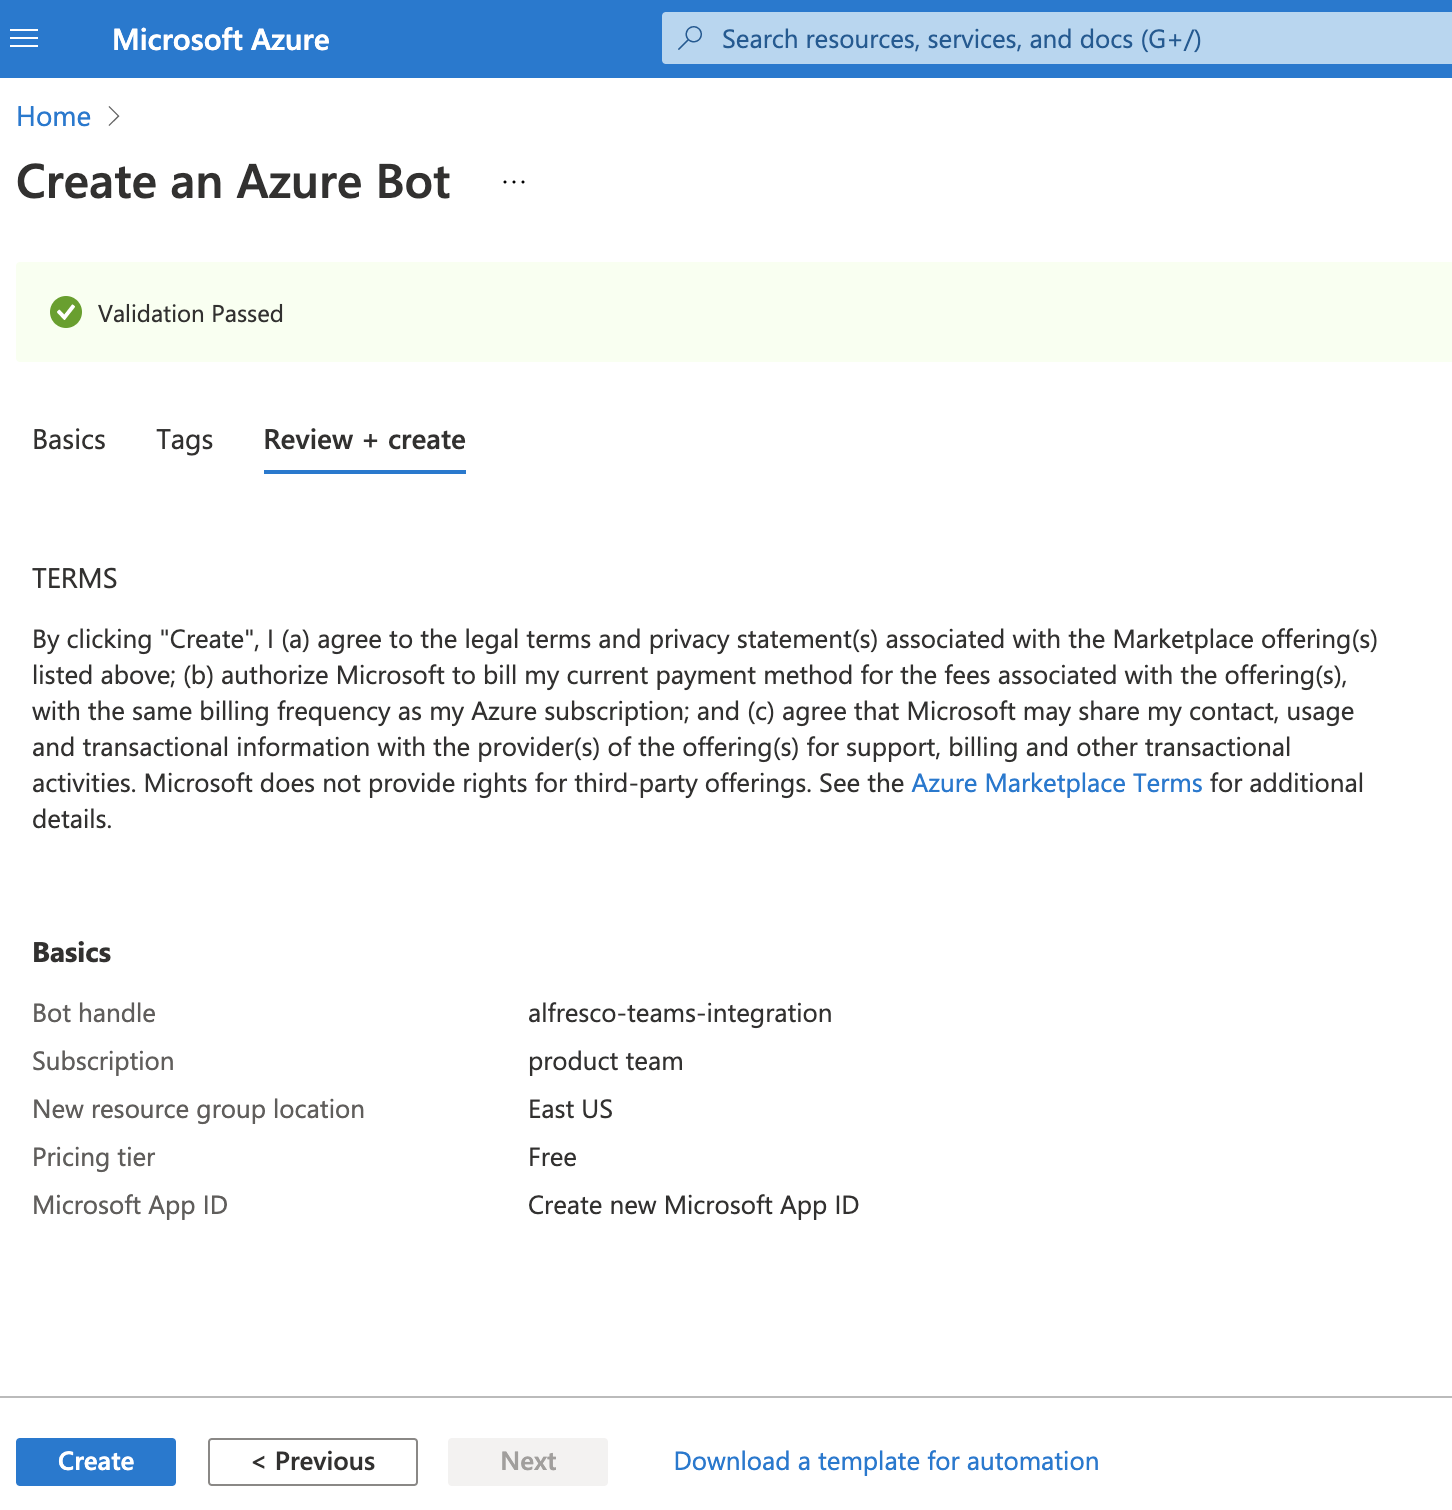
- If all pre-checks passed click Create.
-
Azure will deploy your registration.
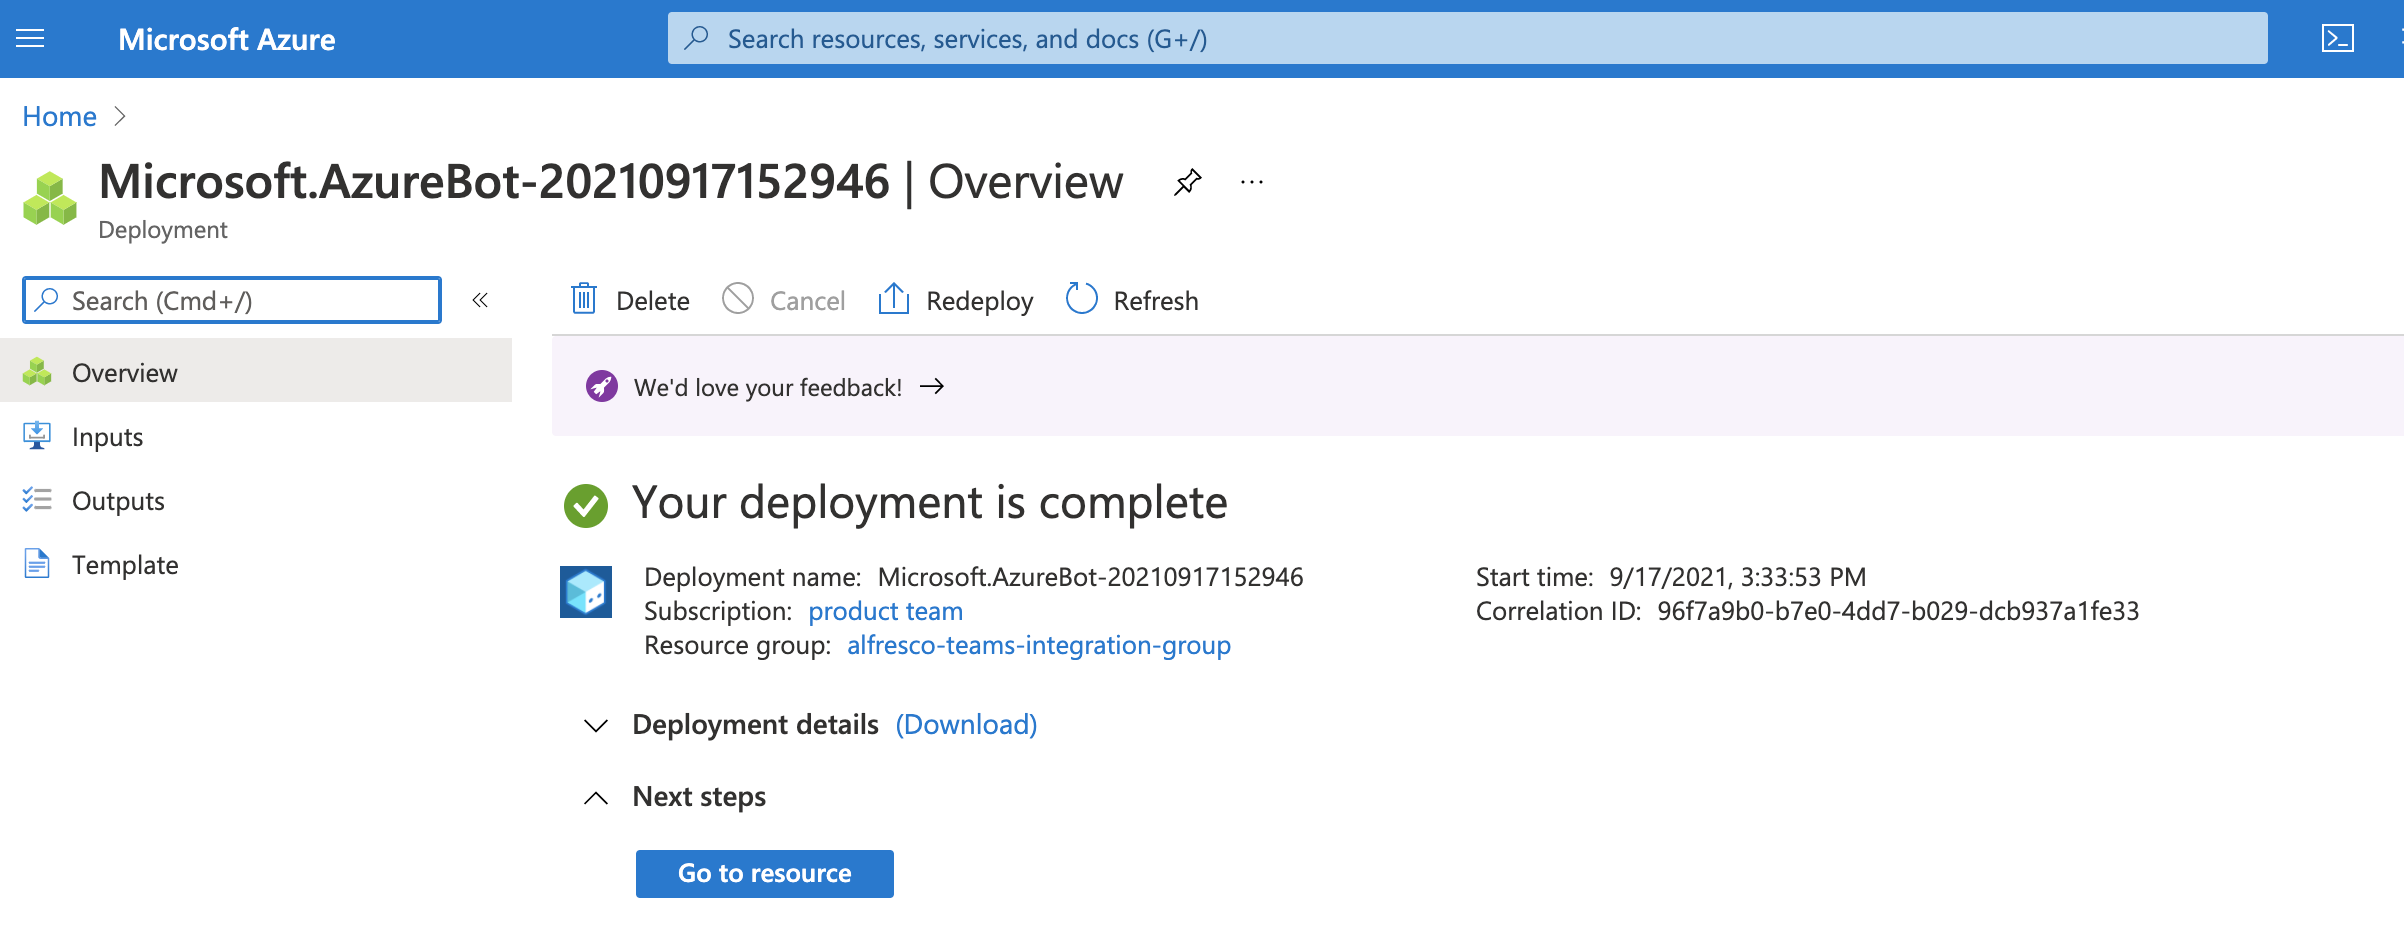
- When complete, click on Go to resource.
- Click on the Configuration menu item to the left under Settings.
- Set Messaging endpoint to
https://{my.domain}/{teams-service-path}/api/messages. This is the URL that the Collaboration Connector for Teams is exposed on. See below.For example:
https://develop.mycompany.com/ms-teams-service/api/messages - Copy your Microsoft App ID. For example:
9af7ae3a-1798-4de7-a992-c3ac489e5324. We later refer to this app identifier asMS_BOT_APP_ID. - Click Apply to save configuration.
-
Configure the OAuth connection to the ADW.
For more information about user authentication see this article.
In the configuration screen:

Click on Add OAuth Connection Settings, a window will appear on the right side of the screen.
A full example on how to set up all the values can be found in the following table:
Property Description Value Name The name of your connection Typically this is set to alfresco- when changed it must be reflected inmicrosoft.app.oauth.connection-nameapp property when running Alfresco Collaboration Connector for Teams.Service Provider Identity provider type From the drop-down list, select Oauth 2 Generic ProviderClient ID Refers to the name of the OAuth client in Keycloak (OAuth) configuration in the Identity Service. Typically alfrescoClient secret OAuth client secret (if client access is not public), otherwise this field must be filled but the value is irrelevant random string Scope List Delimiter The character to use between scope values (often a space or comma) , <enter comma>Authorization URL Template Authorization endpoint URL https://{my.domain}/auth/realms/alfresco/protocol/openid-connect/authAuthorization URL Query String The query string to append to the authorization URL, templated with any wanted parameters: {ClientId} {ClientSecret} {RedirectUrl} {Scopes} {State}?client_id={ClientId}&redirect_uri={RedirectUrl}&scope={Scopes}&response_type=code&state={State}Token URL Template Token endpoint URL https://{my.domain}/auth/realms/alfresco/protocol/openid-connect/tokenToken URL Query String Template Body to send for the token exchange ? <enter question mark>Token Body Template Body to send for the token exchange code={Code}&grant_type=authorization_code&redirect_uri={RedirectUrl}&client_id={ClientId}&client_secret={ClientSecret}Refresh URL Template Token refresh endpoint URL https://{my.domain}/auth/realms/alfresco/protocol/openid-connect/tokenRefresh URL Query String Template The query string to append to the refresh URL, templated with any wanted parameters: {ClientId} {ClientSecret} {RedirectUrl} {Scopes} {State}? <enter question mark>Refresh Body Template Body to send with the token refresh refresh_token={RefreshToken}&redirect_uri={RedirectUrl}&grant_type=refresh_token&client_id={ClientId}&client_secret={ClientSecret}Token Exchange URL Used for SSO in Azure AD v2 Leave blank Scopes Comma separated list of the API permissions you granted earlier to the Azure AD authentication app openid After filling in the values you should see a name/value property list looking something like this:
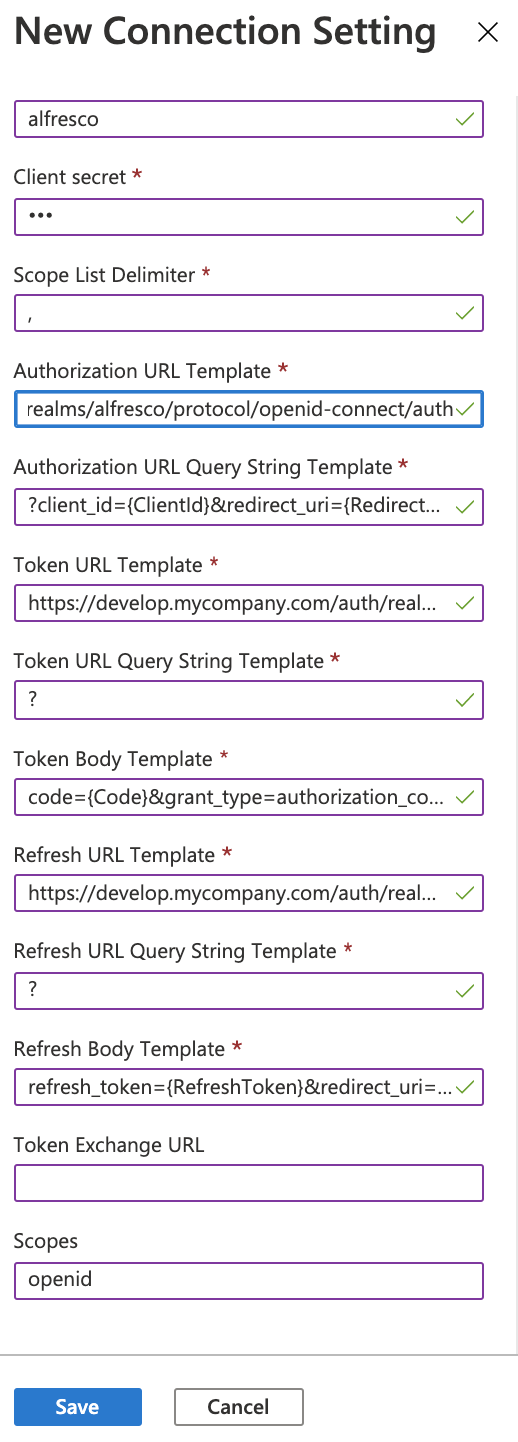
Click Save to validate and store the OAuth configuration.
-
Test the ADW Connection:
-
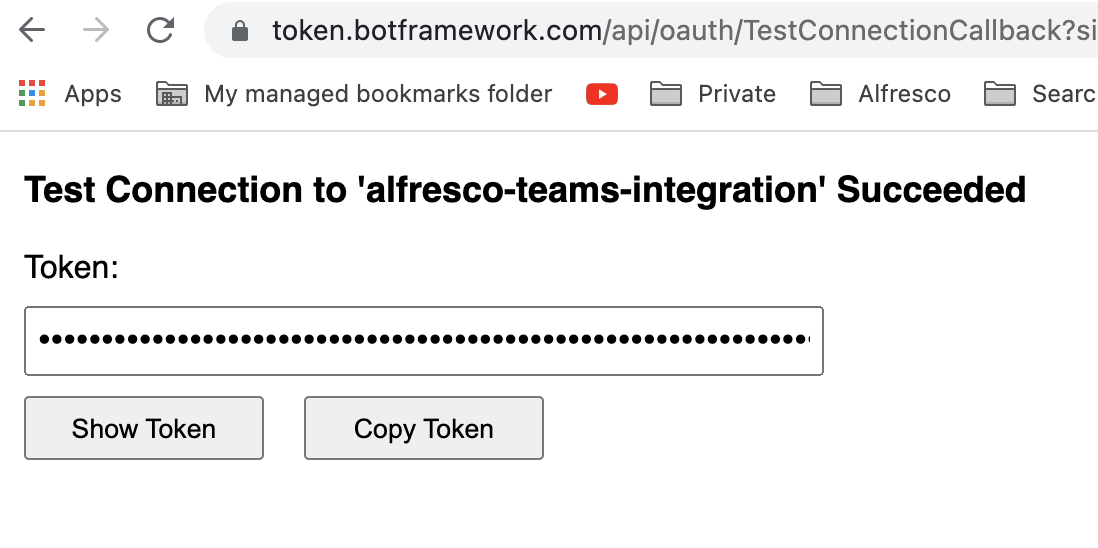
Click on your newly created connection and then click Test Connection:

-
If it was successful, then you will be redirected to the ADW login page:

- Enter username and password and click Sign in.
-
Once successfully logged in, you should see:
-
-
Retrieve bot Secret.
If you already had a bot secret but lost it, then skip this section and proceed directly to 6. Already had a bot secret.
This secret is important and is not to be confused with the Oath client secret used above. It is one of the mandatory properties when starting the Collaboration Connector for Teams bot service.
- In the top-most search bar type in
vaultand click on Key vaults. - Click on the item with a name starting with
bot-secrets-*. - Choose Secrets (vertical) tab.
- The following message is displayed: The operation “List” is not enabled in this key vault’s access policy.
- Go to Access Policies (vertical tab) and click on Add Access Policy.
- The easiest way to add it is to choose from a template (‘Configure from template’) named ‘Key, secret, & certificate Management’ (or choose from other, or configure manually). You also need to add a principal responsible for this policy.
- Don’t forget to Save Access policies settings.
- You should now be able to access data on Secrets (vertical) tab.
- Choose the secret that relates to your bot.
- Click Show Secret Value button on bottom of the screen and copy the secret value for reference. We later refer to this secret as
MS_BOT_APP_CLIENT_SECRET_VALUE.
- In the top-most search bar type in
-
Already had a bot secret? (OPTIONAL):
- Go to the Microsoft Azure Portal.
- Click on your bot name.
- Then click Configuration in the left menu.
- Click Manage in > Microsoft App ID (Manage).
- Click new client secret. Note, if one already exists delete it unless you already have the value, because you can not get it again.
- Give it a description, such as “My secret”.
- Click add.
- Now your secret value should be visible. Copy and keep it safe as you only get one chance to see its value.
Install Collaboration Connector for Teams bot service
The Collaboration Connector for Teams zip file includes all the files required to install the connector.
-
Browse to Hyland Community, download
alfresco-ms-teams-integration-distribution-1.x.x.zipand extract the contents:alfresco-ms-teams-integration-distribution-1.x.x.jarteamsManifest/manifest.json- needed in the next stepteamsManifest/color.pngteamsManifest/outline.pngREADME.md
-
Start the Spring Boot app:
java -Dmicrosoft.app.id=<MS_BOT_APP_ID> -Dmicrosoft.app.password=<MS_BOT_APP_CLIENT_SECRET_VALUE> -Dalfresco.base-url=https://<ACS_BASE_URL> -Dalfresco.digital-workspace.context-path=<ADW_CONTEXT_PATH> -jar alfresco-ms-teams-integration-distribution-1.x.x.jarWhere:
MS_BOT_APP_IDis the Azure Bot application identifier created when registering the Azure bot earlier on, and looks something like9af7ae3a-1798-4de7-a992-c3ac48****MS_BOT_APP_CLIENT_SECRET_VALUEis the Azure Bot secret created when registering the Azure bot earlier on, and looks something likeje~IY13A~t8~r5Lt.9W.2cTJjlP*****ACS_BASE_URLis the base URL of the Content Services installation in the format<domain>:<port>. For example,{my.domain}/ADW_CONTEXT_PATHis the Alfresco Digital Workspace context path in the Content Services installation, usually/workspace
Note: If OAuth Connection name is set different from
alfresco, then specify this with parameter-Dmicrosoft.app.oauth.connection-name -
Expose Collaboration Connector for Teams via proxy/gateway, eg.
https://{my.domain}/ms-teams-service. This URL should be the same as the one used when setting the Messaging Endpoint in the Azure Bot registration above.
Create a Teams App Manifest zip
Installation of MS Teams Extensions needs a manifest.json
file contained in a ZIP. A sample one is available in the teamsManifest directory in the distribution ZIP. It looks
something like this:
{
    "$schema": "https://developer.microsoft.com/en-us/json-schemas/teams/v1.9/MicrosoftTeams.schema.json",
    "version": "1.0.0",
    "manifestVersion": "1.9",
    "id": "<MS_APP_ID>",
    "packageName": "org.alfresco.integrations.msteams",
    "name": {
        "short": "Alfresco for Teams",
        "full": "Alfresco Content Connector for Teams"
    },
    "developer": {
        "name": "Alfresco",
        "mpnId": "",
        "websiteUrl": "https://www.alfresco.com/",
        "privacyUrl": "https://www.alfresco.com/privacy-statement",
        "termsOfUseUrl": "https://www.alfresco.com/terms-use"
    },
    "description": {
        "short": "Alfresco for Teams",
        "full": "Easily search for content stored in Alfresco and share in your Teams chat or channel."
    },
    "icons": {
        "outline": "outline.png",
        "color": "color.png"
    },
    "accentColor": "#FFFFFF",
    "composeExtensions": [
        {
            "botId": "<MS_APP_ID>",
            "commands": [
                {
                    "id": "searchQuery",
                    "type": "query",
                    "title": "Search Alfresco",
                    "description": "Perform a search in Alfresco",
                    "initialRun": true,
                    "fetchTask": false,
                    "context": [
                        "commandBox",
                        "compose"
                    ],
                    "parameters": [
                        {
                            "name": "searchQuery",
                            "title": "Search",
                            "description": "Your search query",
                            "inputType": "text",
                            "choices": []
                        }
                    ]
                }
            ],
            "canUpdateConfiguration": false,
            "messageHandlers": [
                {
                    "type": "link",
                    "value": {
                        "domains": [
                           "*.botframework.com",
                           "<YOUR_DOMAIN_URL>"
                        ]
                    }
                }
            ]
        }
    ],
    "validDomains": [
        "*.botframework.com",
        "<YOUR_DOMAIN_URL>"
    ]
}
There are a couple of changes you need to do to configure the app for your MS Teams environment. In particular, following entries need to be replaced with customer specific values:
<MS_APP_ID>- is the Azure Bot application identifier created when registering the Azure bot earlier on, and looks something like9af7ae3a-1798-4de7-a992-c3ac48****<YOUR_DOMAIN_URL>- is the base URL of the Content Services installation. For example,https://{my.domain}
You might want to change several other entries (short/full names or descriptions), but this is not recommended.
Now, create a Zip file (without folders) with manifest.json and the two icon files.
Publish the Collaboration Connector for Teams app
This explains how a Microsoft Teams Admin user can install the Collaboration Connector for Teams app and make it available to the organization’s users.
Note: It is possible to install the custom app as an end-user. However, doing this might result in problems for other users to read messages from the user installing the app. It is recommended to install the custom app as a Teams Admin.
In Microsoft Teams admin center do the following:
-
Navigate to Teams apps > Manage apps:
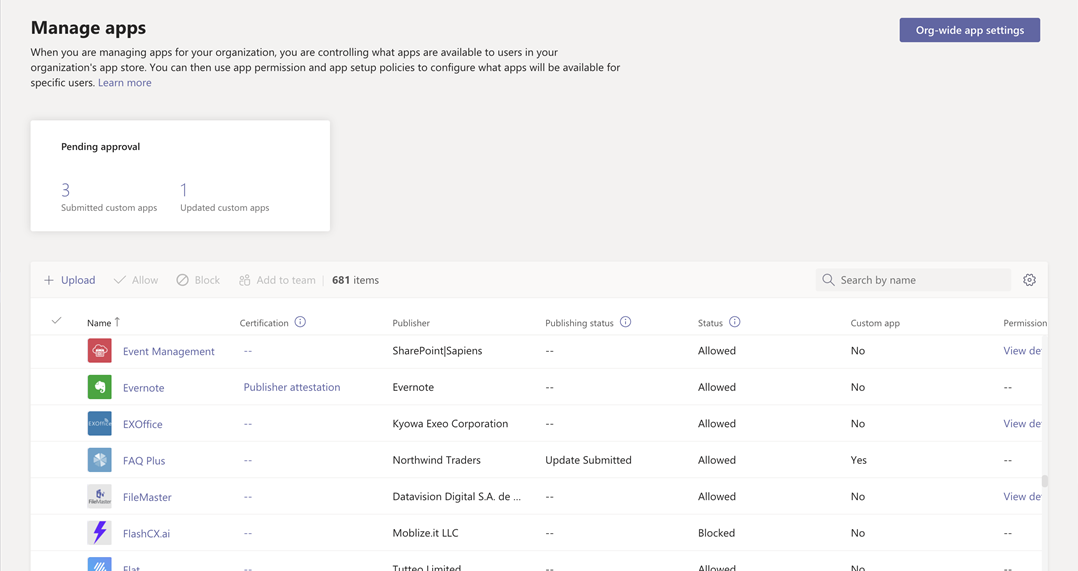
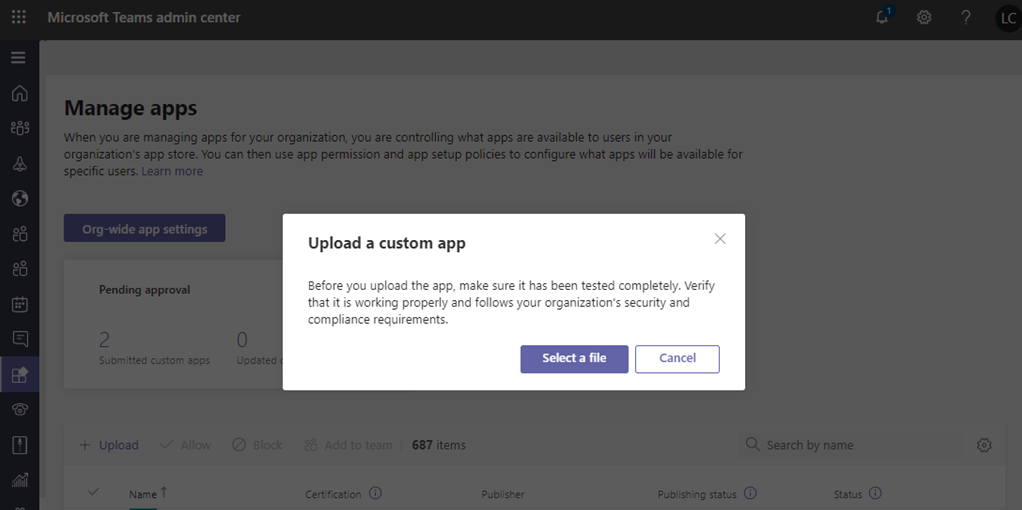
-
Then select Upload, click Upload, select the app package (i.e. the manifest zip archive prepared in the previous step), and select Open:
-
Control access to the app:
By default, all users in your organization can access the app in your organization’s app store. To restrict and control who has permission to use the app, you can create and assign an app permission policy. To learn more, see Manage app permission policies in Teams.
-
Pin and install the app for users to discover:
By default, for users to find the app they have to go to your organization’s app store and browse or search for it. To make it easy for users to get to the app, you can pin the app to the app bar in Teams. To do this, create an app setup policy and assign it to users. To learn more, see Manage app setup policies in Teams.
-
If you search for something in the Alfresco app it will ask you to log in. Use your Alfresco credentials.
Note: A common error is when uploading a manifest zip with the wrong layout:
“Error while extracting package: Please ensure there are no folders in your app package and that your app package contains only themanifest.jsonand the two required icon files at its root level. For an easier experience creating your app package, install App Studio from the Teams Store.” - Use a zip tool to make sure the files are not contained in a folder.