Use Authentication when your system requires access to external REST services. An authentication called Application Service Credentials is already created for use within Process Automation. The authentication can be used when you create radio buttons or dropdown lists on your forms. The authentication is selected from the Authentication dropdown list, accessed from: Field Editor > Advanced > REST Service > Authentication. The authentication it uses is the same as the authentication assigned to the script runtime user.
Note: The name Application Service Credentials cannot be used for one of your own authentications because it is reserved.
Properties
The basic properties of creating authentication are:
| Property | Description |
|---|---|
| Authentication name | Required. The name used to identify the authentication. The name must be in lowercase and be between one and 26 characters in length, for example token1auth. |
| Authentication description | Optional. A description of the authentication, for example Basic authentication used. |
| Authentication type | Required. Select the type of authentication, for example Basic. There are three types of authentication you can use, Basic, Client credentials, and Bearer token. |
| Secured | Optional. When selected, credentials are defined during deployment time, or de-select the checkbox to provide them during modeling time. These credentials are used when contacting the external API. |
| Clientid | Required. When using Client credentials authentication, enter the client id, for example Client-1. |
| Client secret | Required. When using Client credentials authentication, enter the client secret for the API, for example client.secret. |
| Endpoint | Required. When using Client credentials authentication, enter the end point of the server, for example client.endpoint. The endpoint entered is validated before you can save the authentication. |
| Scope | Required. When using Client credentials authentication, enter one or more scope values that make up part of the API account you want to access, for example api.account.one. The scope entered is validated before you can save the authentication. |
| Token | Required. When using Bearer token authentication, enter the bearer token for the API, for example bearer-token. |
Note
All the configuration parameters can be overridden at deployment time.
Create authentication
To create authentication:
-
Sign into the Modeling Application and open a project.
-
Click the + next to Authentications.
-
Enter a name for the authentication.
Optionally, enter a description for the authentication.
-
Select an authentication type from the dropdown list.
Optionally, deselect Secured so you can enter a username and password that is used when contacting the API.
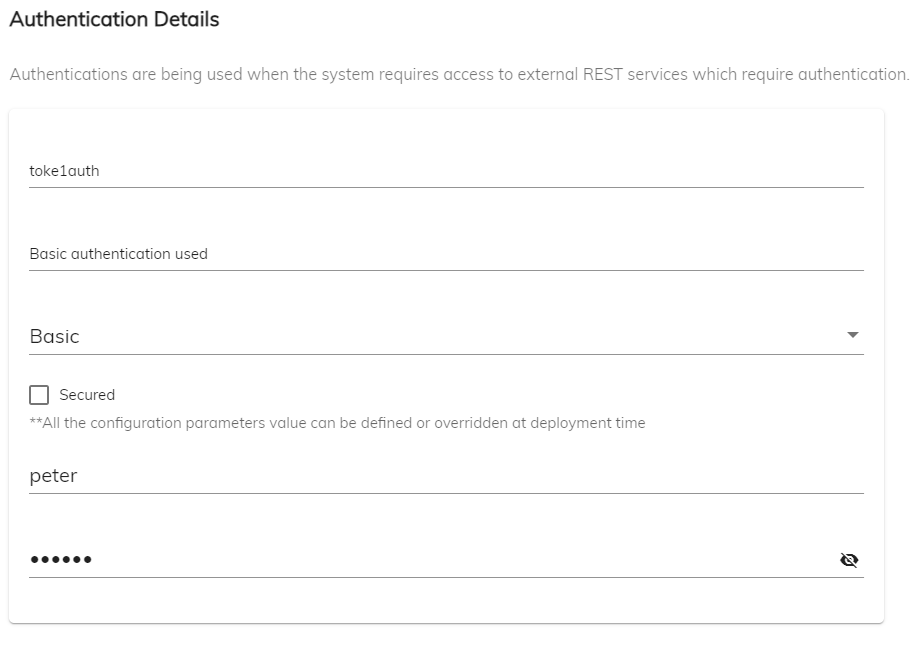
Authentication
The following is an authentication created using Basic authentication and a username and password.
Upgrade authentication for deployed application
You can upgrade the authentication of your deployed application.
To upgrade your authentication:
-
Expand the Devops section on the left of the Admin App and then select Application Instances.
-
For the application you want to upgrade, click the three dots on the right of the last column and then select Upgrade.
-
Select the version you want to upgrade to from the Upgrade dropdown list.
If you select a version of the application that is identical to the currently deployed one, you will optionally be able to change the configuration values further in this process. If you select a different version of the application that does not have the same configuration values as the currently deployed one, you will be forced to re-enter the authentication values for that application further in this process.
-
If you want users to receive an email each time a process assigns them a task, select Enable user task mail notifications and then select the Authentications tab.
-
Select Change the authentication values to change the current authentication values and then click Upgrade.
If you are upgrading to a different version of the application to the currently deployed one, the Change the authentication values check box will not be visible. Instead, you will be required to re-enter the authentication values of the authentication assigned to the version of the application you are upgrading to.
-
Click Upgrade.
Important: For your authentications that are not secure, in other words you did not select the Secured check box when the authentication was created, the configuration values already set in the Modeling Application will be automatically applied during the upgrade process. For your authentications that are secure, in other words you did select the Secured check box when the authentication was created, you must must re-enter the authentication values on the Authentications tab when performing the upgrade.
Delete authentication
To delete an authentication:
-
Sign into the Modeling App and open the project that contains the authentication you want to delete.
-
Expand the Authentications section on the left.
-
Select the authentication you want to delete.
-
Click the three dots and then select Delete.
-
You will see Deleting the authentication may affect your project if this authentication is already in use. Click Confirm if you still want to delete the authentication.